Loading...
Loading...
Loading...
Loading...
Loading...
Loading...
Loading...
Loading...
Loading...
Loading...
Loading...
Loading...
Loading...
Loading...
Loading...
Loading...
Loading...
Loading...
Loading...
Loading...
Loading...
Loading...
Loading...
Loading...
Loading...
Loading...
Loading...
Loading...
Loading...
Loading...
Loading...
Loading...
Loading...
Loading...
Loading...
Loading...
Loading...
Loading...
Loading...
Loading...
Loading...
Loading...
Loading...
Loading...
Loading...
Loading...
Loading...
Loading...
Loading...
Loading...
Loading...
Loading...
Loading...
Loading...
Loading...
Loading...
Loading...
Loading...
Loading...
Loading...
Loading...
Loading...
Loading...
Loading...
Loading...
Loading...
Loading...
Loading...
Loading...
Loading...
Loading...
Loading...
Loading...
Loading...
Loading...
Loading...
Loading...
Loading...
Loading...
Loading...
Loading...
Loading...
Loading...
Loading...
Loading...
Loading...
Loading...
Loading...
Loading...
Loading...
Loading...
Loading...
Loading...
Loading...
Loading...
Loading...
Loading...
Loading...
Loading...
Loading...

Maitre'D - Mobile Point of Sale (MPO)
This topic also includes

Introduction
World rights reserved. No part of this publication may be stored in a retrieval system, transmitted, or reproduced in any way, including but not limited to photocopy, photograph, magnetic, or other record, without the prior agreement and written permission of PayFacto Inc.
Maitre'D, the Maitre'D logo, e-Global, Databoard® and MealZone® are trademarks or registered trademarks of PayFacto Inc. in Canada and other countries and may not be used without written permission from PayFacto Inc. Windows is a trademark or a registered trademark of Microsoft Corporation. All other trademarks are the property of their respective owners. PayFacto is not associated with any product or vendor mentioned in this document.
PayFacto Inc has made every effort to prepare this document, and the content is based upon the release of Maitre'D 7.08. Portions of the manuscript may be based upon pre-release versions supplied by software manufacturer(s). PayFacto Inc. makes no representation or warranties of any kind with regard to the completeness or accuracy of the contents herein and accepts no liability of any kind caused or alleged to be caused directly or indirectly from this document.
For general information on Maitre'D and other products and services from PayFacto Inc, please visit our website at https://payfacto.com.
The Maitre'D Online User Manual is intended primarily for restaurant owners and managers, but it is equally suited for corporate IT departments, Maitre'D resellers and restaurant employees. This manual provides general information on the use of the Maitre'D Software Suite and introduces the reader to the many features of Maitre'D. It can be used by first time users to familiarize themselves with the Maitre'D Software Suite, or by seasoned users who want to learn more on how to apply the powerful features of Maitre'D to streamline their restaurant business.
The following symbols are used throughout this manual to highlight a special section and to introduce the reader to new features in Maitre'D.
TIP: This symbol indicates a tip on how to use Maitre'D more efficiently.
IMPORTANT! This symbol emphasizes an important section.
The Maitre'D Installation DVD and downloaded files contains a sample database that can be installed with Maitre'D during installation. This database contains the necessary pre-configured information to have a Maitre'D system up and running such as employees, items and preferential screens. The sample database contains fictitious sales data that is installed for demo purposes only, and should not be installed in a live environment.
Examples used to illustrate topics in this manual are based on the data and configuration found in this sample database. It is important to note that most restaurant businesses will be configured differently, depending on their needs and the options they have selected. The examples presented in this manual are nevertheless easy to understand and can be transposed to most situations.
Maitre'D has a built-in context sensitive help feature that users can refer to when they need to find out more about a specific function or feature. Many Maitre'D Back-Office windows have a small question mark box on the top right hand corner of the screen. This question mark can be dragged and dropped on any element in a screen. If a help topic associated with this component exists, then a window will appear and the help information will be displayed to the user.
To display the entire help file, the Help Topics option is selected in the Help menu of any of the Back-Office applications.
For further information, consult the Maitre'D website at https://PayFacto.com or contact an authorized Maitre'D reseller for support.
With modern computer hardware, the speed of the CPU (in Mhz or Ghz) and the core count alone are no longer enough to determine if a given system will perform adequately. There are many more factors to consider, such as the architecture of the CPU, its generation, the technology it is based on, its power consumption, the amount of RAM available, etc.
The only way to reliably compare CPU’s is by looking at their respective benchmark results. Synthetic benchmark tests compound all CPU attributes into a single numeric score value. Quite simply put, the higher the score, the better the CPU is.
PassMark Software’s CPU benchmark is a highly regarded database that contains all the information required to compare millions of different CPU models. The database can be consulted here:
By searching this database and using the provided “Compare” tool, it is easy to determine if the hardware that you plan to buy (or already have) will meet or surpass the performance of the recommended hardware configuration.
The Point of Sale Control module, available from the Maitre'D Back-Office Desktop, allows users to configure all point of sale workstations, sales items, employees, media types, revenue center, screens and reports. To access this module, click on the Point of Sale Control icon from the Main Back-Office window or from any other module.
After clicking the Point of Sale Control icon, the Point of Sale Control application will launch and the module's window will appear.
When setting up taxes in Maitre'D, following a logical sequence will make the work easier. It will also avoid having to go back-and-forth between various configurations to achieve the desired result.
The general steps are:
Research and understand local tax laws.
Determine how taxes need to be grouped for reporting, and create the required tax categories in Maitre'D.
The Point of Sale (POS) Control module allows restaurants to manage their day-to-day operations from one central location. It is installed with the Maitre'D Back-Office Suite and is accessed through the Maitre'D Back-Office main window. All modules such as the Inventory Management module and the Time and Attendance module are linked to the POS Control module and require the POS Control module to function. The POS Control module allows restaurants to configure and manage the following tasks:
Preferential Screens are created to display a logical grouping of sales items. For example, a preferential screen can be created to display the selection of soft drinks available or a list of desserts. Preferential screens can also be modified on the fly.
Typically, a restaurant will have several preferential screens, which will be displayed depending on the time of day or the employee role. Bartenders will have access to different preferential screens than dining room servers. This gives restaurants a great amount of flexibility when customizing their POS workstation screens.
The License option allows to view the options that are currently available on the active Maitre'D license. Additional modules, interfaces and components can be purchased through your Maitre'D Reseller or Sales Representative. Once purchased, they can be activated here.
Serial Number
Each Maitre'D installation has a unique serial number. You will need to provide this number when purchasing additional Maitre'D components or when calling the Help Desk.
Maitre'D screens are the interface that allows POS users to interact with the Maitre'D POS system. They allow ordering of sales items and perform all the operations required to run a successful restaurant business. Different screens can be assigned to each employee based on their functions and responsibilities in the restaurant, and screens can change automatically based on modes and revenue centers.
The key to managing POS workstation screens is to understand the different components that make up the screen. The POS workstation is divided into separate components that are configured independently, allowing a great degree of customization to the restaurant.
All Maitre'D modules share the same general layout allowing users to quickly navigate through the modules. A menu bar in the top part of the window displays all the tasks and functions that can be performed using the POS Control module. The center pane is divided into two parts. The right hand side contains the same icons as the Maitre'D Back-Office main screen and allows users to open another module directly from the Point of Sale Control module. The left hand side contains a series of links to the most common tasks performed using the Point of Sale Control.
Assign taxes to Divisions in Maitre'D.
This is the first and most important step. Understanding the local tax regulation will ensure that taxes will be configured properly in Maitre'D. The Maitre'D tax calculation engine is powerful and flexible. To be able to select the appropriate options for your region, you first need to understand the regulation thoroughly. Here are some general guidelines:
Some jurisdictions have federal taxes, provincial taxes, liquor taxes and even special taxes on sodas or sweetened beverages. Some areas apply taxes on food items, while others don't. Some areas have variable tax rates based on whether the food is consumed on-premises (dine-in) or off-premises (take-out).
Taxes can be added to the price of an item (add-on tax) or can be included in the list price of the item (inclusive tax). Also, some areas may require that the tax be calculated on an individual item before being multiplied by the quantity of items purchased (tax before quantity). It is also important to understand how rounding works. Most areas calculate rounding to the nearest cent ($0.01) while some simply truncate everything after the second decimal.
Once you understand how taxes work in your area, you need to determine how taxes will be grouped for reporting purposes. Taxes are grouped together using Tax Categories in Maitre'D. Every tax needs to belong to a tax category. Here are some common tax category examples:
Federal Tax
Provincial Tax
State Tax
Liquor Tax
Food Tax
Create each tax in Maitre'D. Each tax will be assigned to a tax category and configured according to local tax laws.
Each Division in Maitre'D can have up to 2 taxes. When divisions are created in Maitre'D, care should be taken to group similar items together. Generally speaking, similar items should have the same taxes applied to them.
Sales item management tasks such as creating and modifying sales items, divisions, categories, revenue centers and modifier lists are done through the POS Control.
Several employee management tasks such as creating and modifying employees are done through the POS Control module. Roles can be assigned to employees as well as screen access and other options. For more advanced features, the Time and Attendance module can be used to manage employees.
Frequent Diners and Frequent Diner Promotions are configured through the POS Control module. This allows loyal customers to be rewarded for their patronage by offering them discounts on featured items and special offers.
Tracking Frequent Diners also allows restaurants to create a valuable guest database that can be used to advertise special events or the launch of new products, and print mailing labels.
Frequent Diner Promotions allow restaurants to reward their guests with points that can be used for future purchases. A frequent diner promotion is set up so that when guests spend a certain amount of money, they receive a number amount of points based on the purchase amount. For example, a customer may receive 5 points for every $100.00 they spend. Points can later be converted into dollar discounts, which are available to the returning guest.
Maitre'D can also print Rewards Coupons when guests settle their checks. Rewards Coupons are discounts that guests can apply towards future purchases. Restaurants can create multiple different Rewards and the system can select which Rewards Coupon to print based on the amount spent, the revenue center, or the mode.
The POS Control module is used to create backups of checks and also to retrieve checks from previous backups. This allows an exact copy of a check from any past transaction to be viewed and reprinted.
The POS Control is used to configure the workstation screens such as preferential screens and screen layouts, and other general workstation options.
The POS Control module is used to configure printers such as POS workstation printers, bar printers and kitchen printers. Redirection tables can also be configured through the POS Control module. Redirection tables determine where requisition coupons such as kitchen and bar printouts will be printed, and can be configured based on the time of the day, the POS workstation that is accessed, the role of the employee, or the revenue center. Configuring printers and redirection tables are explained in more detail in Chapter 5: Configuring and Managing POS Workstations.
All information about taxes, media types such as credit cards, and void reasons are configured through the POS Control module.
The POS Control module is used to generate Sales reports allowing the restaurant to analyze past and current sales data.
Check back soon for updated contents.
Check back soon for updated contents.
Check back soon for updated contents.
Check back soon for updated contents.
Before Installing Maitre'D
Configure your Windows Network Profile
Download Maitre'D Setup Files
Creat your own Custom Maitre'D Installer
Start the Installation from a DVD (for downloaded DVD Files)
Start the Installation from Downloaded Files
Installation Process for the Maitre'D Back-Office
Installation Process for the Maitre'D Point of Sale
Installation Process for the Maitre'D Auxiliary Back-Office
Installation Process for the Maitre'D Backup Server
Maitre'D Back-Office License Activation
Maitre'D Auxiliary Back- Office License Activation
Check Current License Options
Add-on Option to Existing Lisense
Overview
Quick Service Restaurants (QSR) and Table Service Restaurants (TSR)
Navigating the Point of Sale Controle module
Main Back-Office - License Activation
Auxiliary Back - Office License Activation
Preferential Screen Editor
Screen Layout
Here are a few performance indicators we can use to measure the performance:
This is the score of the CPU posted on https://www.cpubenchmark.net/. Note that the posted scores are averages and may vary daily. Higher is better.
This is the minimum time, in milliseconds, that the user needs to wait between keystrokes to avoid visible lag and missed keystrokes. Lower is better.
This value is measured in a lab environment using a tool built into the POS software.
The input keystrokes and the POS' output are compared, and the delay is shortened until one of two things happen:
The POS starts "missing" keystrokes. (i.e. a key is pressed but the POS fails to register it), or;
There is visible lag, meaning there is a significant and clearly visible delay between the keystroke and the information appearing on the screen.
The delay between keystrokes is then increased gradually until the POS can reliably process all keystrokes without missing one and without creating significant lag, for a period of at least one full minute.
This is the maximum theoretical number of keystrokes per second that a user can achieve without causing the POS to lag. Higher is better.
This value is calculated from the minimum keystroke delay. For example, with a minimum keystroke delay of 100 milliseconds, we can have a theoretical maximum of 10 keystrokes per second.
This is the maximum theoretical number of keystrokes per minute that a user can achieve without causing the POS to lag. Higher is better.
This figure is obtained by multiplying Max Keys / Second by 60. This figure is used to put the keystroke delay and keys per second values in perspective. Knowing that an average typist can do between 190 and 200 keystrokes per minute on a keyboard, while a "two-finger" typist does 150 to 160, this figure makes it easy to determine if the POS hardware will be able to keep up with the employees using it.
Maitre'D can be configured to operate in a Quick Service Restaurant (QSR) or a Table Service Restaurant (TSR). In certain cases, a restaurant may offer both Quick Service and Table Service, such as a restaurant that has a dining room, a take out counter, and a Drive-Thru lane. Maitre'D can function in both TSR and QSR operations simultaneously and display the appropriate screens and functionalities depending on the employees' configuration.
Maitre'D for Quick Service Restaurants (QSR) offers complete counter service functions that are ideal for fast food restaurants as well as Drive-Thru functions such as Break-In keys, Drive-Thru Customer Display interface, and direct order relay to the kitchen monitor allowing orders to be processed quickly.
Other features such as automatic combo detection, order queue management and the ability to reprint past checks ensure that customers are served accurately and without delay. The Maitre'D QSR mode also offers a complete set of reports that allow the restaurant manager to track the speed of service and the quality of service.
Modules such as the Maitre'D Delivery module can be added to extend the functionality of the Maitre'D Quick Service Restaurant (QSR).
Maitre'D for Table Service Restaurant (TSR) offers an extensive range of dining room functions that enable restaurants to better serve their guests. Features such as the ability to have open orders so that customers can continue to add items to their checks until they are ready to pay demonstrates the flexibility of the Maitre'D TSR mode. Other features include easy check splitting, a comprehensive floor management system, and the Order Hold and Fire function that ensures that there is an appropriate delay between each course of a meal. Like Maitre'D for QSR, Maitre'D for TSR operations includes a complete set of TSR reports that allow the restaurant to track service levels and to analyze sales figures.
Screen Access Setup is used to determine which POS employees have access to which preferential screens depending on their functions. The Screen Access Setup tool allows access to preferential screens to be configured individually for each Revenue Center and Mode combination.
Type in a meaningful description for this screen access configuration. This field supports up to 20 characters. Since Screen Access Configurations will be assigned to employees, it is good practice (but not mandatory) to name each Screen Access Configurations in such a way that they can be easily related to the employee job function they are intended to. For example, the Screen Access Configuration intended for Bartenders could be named “A.Bartenders”.
Floor Plan
Select the floor plan to be associated with this screen access. Select the Default option to let the POS workstation decide which floor plan to use.
The PLU option found in the Revenue Center menu allows to group sales items together for reporting purposes. You can also use the PLU option to assign a number other than the sales item number used by Maitre'D. This option is useful when the head office system already uses PLU's for reporting and that those don't necessarily match your own database numbers.
Setup
PLU
Type in the code that will be used to access the PLU. There is no limit on the quantity of PLU's that you can create.
Description
Enter a full description for the PLU. The description can have a maximum of 20 characters. Once your PLU's are created you will then need to link them to your sales items. To do so, select the Revenue Center / Items Setup / Links screen. In the PLU list, select PLU name for this sales item.
Electronic Bar Interface
Used for Bar Interface
If your system is linked to a Berg Infinity ® or Azbar ® liquor control system, you must select this option and create PLU's that will match the PLU numbers of those systems.
Ignore Balance Bar Interface
Enable this option to exclude this PLU when balancing the bar interface.
Ignore North American Protocol
Enable this option to override the North American protocol for this PLU, allowing the related item to be poured from the bar dispenser without being ordered first.
Use PLU List
With the Berg interface, this option allows to include a recipe for this cocktail. The recipe is defined in Server Control / View / Option / Bar / Cocktail Recipe.
Default Price
If you are linked with an Azbar ® liquor control system, you can enter the default price of this PLU in order to get a variance report.
Up to 32 revenue centers can be used in Maitre'D. The total number of revenue centers available for your system is configured in Point of Sale Control / View / Options / Configuration.
Revenue centers are sometimes also called "Profit Centers". Revenue Centers generally correspond to different services or locations offered by the establishment. For instance, a restaurant that has a bar/lounge, a take-out counter and a delivery service in addition to the regular dining room may want to be able to take reports for each of these entities separately. For that purpose, you may create a revenue center for each service: Dining Room, Bar/Lounge, Take-Out, Delivery. With these revenue centers, you can now take sales reports for each individual revenue center to assess the individual performance of each entity, or you can take reports that combine all revenue center to assess the global performance of the whole establishment.
Each revenue center can have up to 32 modes. Modes can be seen as price levels or price points. Modes can change automatically based on the time of day, or be selected manually. It is also possible to assign specific modes to employee screen access configurations. The number of modes available is configured in Point of Sale Control / View / Options / Configuration. Other mode options are configured in Point of sale Control / Revenue Center / Options / Configuration / Modes.
Logon to:
Select your language.
Enter your username and password.
Click the Login button.
Click the Support link, either at the very top of the page or in the main body.
Click Knowledge Base. (You may need to scroll down a bit) This will open a new browser window.
Click the Knowledge Base tile.
Click the Software Downloads tile.
Click the Maitre'D 7 Back-Office Suite Downloads link.
For Maitre'D 7, there are 3 downloads:
Download this file if Maitre'D is already installed and needs to be upgraded to the latest version.
Download this file to install Maitre'D from scratch on a new system. Includes Service Pack Update 7.08.000.180.
Download this file to have the full contents of the original Maitre'D DVD, which includes the Maitre'D Back-Office Full Install, with a graphical user interface to facilitate the installation of backup and auxiliary servers, POS workstations, etc.
IMPORTANT! Downloaded files are *.zip archives that need to be extracted for the installation to work. Please see Extracting Files
Related Topics
On the Main Back-Office screen, click on the File menu and select the Licenses… option.
The Installed Licenses window will appear.
Verify all the modules, interfaces and options listed here and make sure they correspond to your Maitre’D invoice.
Also make sure that the license Serial Number and Commerce Name are correct.
If a purchased option is missing or if there is a mistake in the commerce name, please contact the Maitre’D help desk to have the missing options added to your license.

Logon to the Maitre’D Back-Office with appropriate credentials. (Distributor or System Owner)
Start the Point of Sale Control module.
Click on the Screens menu and select Preferential Screen setup...
The list of available Preferential Screens is displayed.
Select an existing preferential screen and click the Modify button to edit its properties.
Click the Add button to create a new preferential screen from scratch.
Click the Close button to exit the list and return to the Point of Sale Control module.
The Preferential Screen Editor will appear.
Commerce Name
This is the commerce name that was assigned when the license was originally activated. It appears in the header of guest checks and receipts, as well as on the header of reports generated from the Report Center module.
Use the modify button to generate a site code and display the prompt that will allow you to enter an activation key for newly purchased Maitre'D components.
NOTE: The activation key can only be generated by authorized Maitre'D Resellers using the Maitre'D Distributor Portal, or by Maitre'D Help Desk Specialists.
Use the Print button to print the license information on the default printer.
Use the Close button to close this screen and return to the Maitre'D Back-Office.
This option is driven by the operating system. This option allows to select the printer and parameters you wish to use to print your reports.
This option allows to view the last report requested and to reprint it if necessary
The Log option allows to start and view operations traces about Maitre'D Main Module.
Log Level
Three different Log level are available: Standard, Detail and Debug.
This option is for troubleshooting purposes and should only be used with the supervision of a certified Maitre'D specialist.
Use the View button to access to log file.
The Maitre'D POS screen has 3 main components:
The Main Screen Layout area.
The Preferential Screen area.
The Display area.
The Main Screen Layout consists of fixed button rows located at the top and bottom of the POS screen. Typically, restaurants will use these fixed buttons for common commands such as Send, Print Check, Close, quick payment keys, navigation keys, etc. Direct shortcuts to frequently used Preferential Screens or variable lists can also be created. It is also very common to have different layouts based on employee functions or revenue centers. For instance, a manager may have a more comprehensive layout with more commands commands compared to a regular server. Also, dining room servers may have a different layout than bartenders or cashiers, etc.
This is the area where most sales items will be displayed. Multiple screens can be created. Each screen will typically contain items that are related to each other. Navigation keys can be added to the screen layout to cycle through all available preferential screens. Clever preferential screen designs can also allow navigation from the preferential screens directly. This area will also display variable lists, item classes and weighted modifiers.
In the bottom part of the Screen Layout, there is a space that can be shared with the Preferential Screen, as illustrated by the graphic above. The bottom part of the screen layout allows up to 3 rows of buttons. If the third row of buttons is not used, the resulting free space will automatically be assigned to the preferential screen area. If the third row is used, the preferential screen area will simply squeeze in the smaller space, making every button slightly smaller.
The display area is where employees can see table and customer information, ordered items, running total and tax amounts. By default, the display area is located on the left-hand side of the screen, as the majority of the population is right-handed. This can be reversed for left-handed employees by enabling the Left handed option in Point of Sale Control > Employees > Employees... > [Employee_Name] > POS Operation > Option.
Hardware Requirements
Optional Hardware Components
Evaluating Hardware
Operating System Requirements
Unsupported Operating Systems
Software Requirements
Software requirements are applications, drivers or libraries which may not be included with the operating system by default.
Microsoft .NET framework 3.5 is included with the Maitre'D installation program. It will be installed automatically if the Install Shield Wizard does not detect it on your system.
Windows 10 already has a more recent version of Windows Installer, but version 4.5 is still supplied with the Maitre'D installation program in case there is a need to install Maitre'D on an earlier operating system which could have an earlier version of Windows Installer.
While it is optional for Maitre'D itself, Java for Windows is required with some Electronic Funds Transfer (EFT) payment solutions like SecureTable and SecurePay. This is also often required by third-party vendors for specific applications. This component needs to be downloaded and installed manually from the Java website.
It can be downloaded and installed from here:
For operating systems prior to Windows 10, this would be supplied through Windows Updates. Since Windows 10, Internet Explorer is bundled with the operating system. It does not need to be the default browser.
Your operating system needs to be kept up-to-date with all the latest updates. This will ensure that all critical and security-related updates are installed and will help maintain PCI-DSS compliance.
Install a reputable anti-virus and anti-malware solution on the PC. The Anti-Virus / Anti-Malware solution needs to be fully operational at all times and maintained with the latest updates and virus definitions. PayFacto does not recommend any brand in particular. However, while Microsoft's Windows Defender solution is free, bundled with Windows and works in most cases, we do recommend using a reputable, independently branded and well reviewed product.
This is a critical component of the Maitre’D system’s security and a requirement for PCI-DSS compliance.
In addition to the perimeter firewall which protects your network, a software firewall needs to be installed on the main Back-Office PC as well as all POS workstations. The Windows Defender Firewall is adequate for most installations.
This is a critical component of the Maitre’D system’s security and a requirement for PCI-DSS compliance.
Follow these steps to access the Point of Sale Control module options:
Logon to the Maitre’D Back-Office with appropriate credentials. (Distributor or System Owner)
Start the Point of Sale Control module.
Click on the View menu and select the Options... option.
The Point of Sale Control module's options window opens on the Configuration branch.
Proceed to the following topic(s) for detailed information on each option.
Related Topics
Enable this option to print the percentages of tips owed to other employees on the server's reading.
Enter the percentage used to calculate the amount owed to the buss people. This percentage is applied on the Net Sales.
Enter the percentage used to calculate the amount owed to the employees seating guests. This percentage is applied on the Net Sales.
Enter the percentage used to calculate the amount owed to other employees in the same section. This percentage is applied on sales transferred from any other employee.
Enter the percentage used to calculate the amount owed to Bartenders. This percentage is applied on divisions where the Gratuity Distribution option is enabled.
Select the type of sales figures to use as a base for the calculation of the gratuity distribution.
Select Net Sales if the gratuity distribution should be calculated based on the sales without taxes.
Select Gross Sales if the gratuity distribution should be calculated based on the sales including taxes.
Related Topics
Enable this option to use the built-in default local home page for the Point of Sale Control module.
The Use Default option needs to be disabled for this field to become accessible. Enter the URL of the webpage that will be used to replace the default local home page for the Point of Sale Control module.
Enter the user name to access the Maitre'D Databoard server.
Enter the password to access the Maitre'D Databoard server.
Confirm Password
Confirm the password to access the Maitre'D Databoard server.
Related Topics
The main screen layouts are the backbone of the POS workstation display. They contain essential command keys such as Print, Close, etc, and may also contain quick links to custom command lists and preferential screens.
Logon to the Maitre’D Back-Office with appropriate credentials. (Distributor or System Owner)
Maitre'D offers a flexible tax management system that allows restaurants to automate all tax management functions and to run accurate reports on taxes. The following are some of the features that can be configured in Maitre'D.
In certain areas, regulations require that a fixed amount surcharge be charged on top of the regular tax. Maitre'D can be programmed to apply a fixed amount surcharge on top of the usual taxes. Reports can be generated to view the amount of fixed tax versus the amount of regular tax that was collected.
Prior to installing Maitre’D, the computer’s hard drive must be properly formatted and partitioned, and a compatible version of Microsoft Windows® needs to be installed. For instruction on formatting and partitioning the hard disk and installing Microsoft Windows®, please refer to Microsoft Windows® documentation or to the documentation provided by your computer's manufacturer.
This manual explains the installation for the Maitre’D software on the Microsoft Windows 10 operating system with Microsoft Network. Maitre’D can be installed on any networking system that uses or emulates the TCP/IP communication protocol. Please refer to the appropriate documentation for more information.
Revenue Center Names
All the Revenue Centers are listed on the left-hand side of the window. Screen access needs to be configured for each individual Revenue Center. Click on a revenue center to configure screen access for it.
Default Mode
Select the default mode to be used with this screen access configuration. Select the Regular option to let the POS workstation decide what the default mode should be.
USB
Keyboard wedge
RS-232 (serial)
OPOS
AEDEX
Epson ESC/POS compatible
Mintronix
Tekvision
OPOS
Toledo 8213, 8217
Weigh-Tronix 6710
RS-232 (serial) with or without status
Through a parallel or serial printer
OPOS
KDS Kitchen Display System from PayFacto
QSR ePIC (QSR Automation)
USB
Keyboard wedge
RS-232 (serial)
Digital Persona U.are.U 2000, 2000b and 2400b
ITC System 1015 or 2015
Epson TMu200AF for Venezuela
Québec Sales Recording Module (SRM) – Module d’Enregistrement des Ventes (MEV)
Belgium Black Box
Kodicom I3DVR
Generic XML interface
Azbar
Berg
Auper
Scanabar
Texas Digital Accuview
Delphi Display Systems
See the documentation specific to your processor of choice for detailed lists of supported EMV Credit/Debit Payment Devices.
Maitre'D can calculate taxes inclusively, which means that the price of an item already contains the tax and Maitre'D will calculate backwards to extract the tax amount and the price of the item. The other method is exclusive tax calculation, which means that Maitre'D will apply the tax rate on the item price.
When performing calculations, printing and calculating amounts, Maitre'D can round off numbers to the closest cent. The rounding function will drop the digits after the cents. For example, 10.33445 will become 10.33. Similarly, 10.349999 will be rounded up to 10.35.
When using the inclusive options, the tax calculation can be done based on either the gross or net calculation method. If the system calculates the tax using the gross method, then the tax rate is applied to the gross total of the products. The net calculation method will supply the tax rate from the total, assuming that the item prices already include the taxes.
If more than one tax is applied to the total, then Maitre'D can print the total tax on one line on the check, or to print each tax amount on a separate line. For example, if a state or province tax as well as a federal tax are applied to the total amount, then the check can either show the total of the two taxes on one line, or each tax amount can be shown on separate lines on the check.
For items that are ordered in multiple quantities, the tax rate can be applied to a single unit and then the tax amount can be multiplied by the quantity, or the item price can be multiplied by the quantity and then the tax rate is applied to the total.
In certain states or provinces, the state/province tax is applied on the total of the item subtotal and the federal tax. In other words, the state/province taxes the federal tax. Maitre'D supports all tax on tax configurations.
Maitre'D can apply taxes on all service charges applied to a guest check such as regular service charges or delivery charges.
When discounts are applied to the amount of a guest check, Maitre'D can calculate the tax based on the amount before the discount is applied or after the discount is applied. By charging the tax on the amount before the discount is applied, the guest will effectively pay tax on the discount amount. Depending on local regulations, this option can be configured accordingly.
Any calculated gratuity that is part of the total amount can be taxed and recorded in Maitre'D
A future rate change can be configured in Maitre'D before the effective date and will be applied as of the date specified by the user. For example, if the federal tax rate goes up from 7% to 7.5% at a certain date, then Maitre'D will start applying the rate of 7.5% at that date. This saves users the trouble of changing the rate only on a specific date, and also ensures that the restaurant does not forget to change it on the critical day.
Certain states use tax tables to define their tax rates. Maitre'D offers full support for tax tables and custom tax tables can be set up.
Tax categories group taxes for reporting purposes and allow restaurants to generate tax reports to quickly determine how much tax was collected for each group. Examples of tax categories are food and liquor.
Your operating system needs to be kept up-to-date with all the latest updates. This will ensure that all critical and security-related updates are installed and will help maintain PCI-DSS compliance.
Most recent Windows operating systems use a feature called User Account Control or UAC . This feature exists to improve the operating system's security by preventing some types of applications to run without the user's knowledge. Make sure that this feature is activated and set to the default (recommended) level before installing Maitre’D. Using UAC is required to maintain PCI-DSS compliance and to ensure basic safety of the system.
IMPORTANT! In Windows 10, disabling UAC through registry hacks or Group Policy Objects (GPOs) will cause some operating system features to stop working correctly, in addition to compromize the system's overall security. Also, installing any software in a “non-UAC” environment and re-enabling UAC afterwards WILL cause issues. For instance, automatic End of Day may not work, or you may be unable to start or stop the Maitre’D Back-Office server from the Server Control module. Other unforeseen and unwanted side effects may also occur.
Starting with Windows 10, Windows Smart Screen is an integral part of the operating system. This feature is active by default and needs to remain active in order to ensure basic safety of the system and maintain PCI-DSS compliance.
Install a reputable anti-virus and anti-malware solution on the PC. The Anti-Virus / Anti-Malware solution needs to be fully operational at all times and maintained with the latest updates and virus definitions. It needs to be installed on the main Back-Office PC as well as all POS workstations, Auxiliary Back-Office and Backup Servers. PayFacto does not recommend any brand in particular. However, while Microsoft's Windows Defender solution is free, bundled with Windows and works in most cases, we do recommend using a reputable, independently branded and well reviewed product.
This is a critical component of the Maitre’D system’s security and a requirement for PCI-DSS compliance.
In addition to the perimeter firewall which protects your network, a software firewall needs to be installed on the main Back-Office PC as well as all POS workstations, Auxiliary Back-Office and Backup Servers. The Windows Defender Firewall is adequate for most installations.
This is a critical component of the Maitre’D system’s security and a requirement for PCI-DSS compliance.
POS Workstations are generally pre-configured with an appropriate version of Microsoft Windows. Like the Maitre’D Back-Office Server PC, make sure to:
Install all Windows Updates.
Ensure that UAC is enabled and set to the default level.
Ensure that Windows Smart Screen is enabled.
Install, update and maintain a reputable anti-virus / anti-malware solution.
Install, update and maintain a reputable software firewall.
Make sure that the TCP/IP network is properly configured so that the Maitre’D Back-Office Server PC and all POS workstations can communicate with each other.
IMPORTANT! With Windows 10, Network Discovery and File & Printer sharing are disabled by default. Password Protected Sharing is enabled. These default settings may prevent Maitre'D from working correctly. See how to correctly configure these settings in this topic: Configure your Windows Network Profile
Depending on the local legislation and various card issuers, the term "Convenience Fee" may be used instead of "Surcharge". While both terms are sometimes used interchangeably, most jurisdictions and card issuers make an important distinction between both terms:
Convenience fees are charges levied for the privilege of paying for a product or service using an alternative payment, or a payment method that is not standard for the merchant. Movie theaters, for example, typically sell tickets face-to-face at the box office. However, if a movie theater gives customers the alternative option of paying by phone using a credit card, then that theater could charge a convenience fee. So technically, the cardholder is not paying for using a credit card, but for the privilege of using the pay-by-phone option.
A surcharge, also known as checkout fee, is an extra fee charged by a merchant when receiving a payment by credit card or charge card, which at least covers the cost to the merchant of accepting that means of payment, such as the merchant service fee imposed by a credit card company.
The Surcharge feature is currently available only in the United States. Also, some states currently prohibit the application of a surcharge. These states are:
Colorado (Prohibition effective through June 30, 2022.)
Connecticut
Maine
Massachusetts
Oklahoma
IMPORTANT! This list is subject to change. Please contact PayFacto support for the latest information.
The surcharge rate cannot be higher than the actual fees charged to the merchant. As previously stated, this feature is meant to transfer the actual cost of the transaction to the cardholder, not to generate additional profit for the merchant. Additionally, most states have a surcharge cap that cannot be exceeded, regardless of the actual costs to the merchant. (4% in most cases, 2% in Colorado, after the surcharge ban ends.)
Merchants are required to notify the card association(s) and their acquirers at least 30 days before implementing the surcharge. Please contact PayFacto support and we will provide assistance is filling out the appropriate forms as well as configure your merchant account accordingly.
Disclosures must be provided at the point of entry and point of sale. You can view an example provided by Visa here.
Payment Applications:
SecurePay US version 4.68.5 or later.
SecureTablePay US version 4.68.5 or later.
STPI Client Software version 1.3.1 or later.
POS Software:
Maitre'D version 7.08.000.391 or later
Once the merchant account is properly configured by PayFacto, the payment terminal(s) will automatically apply a predetermined surcharge during the payment process. The POS system will receive the surcharge amount and record it for reporting purposes.
All the required configuration is done by PayFacto support agents directly in the merchant account. Other than upgrading to Maitre'D 7.08.000.391 or later, there is no additional configuration required in the Maitre'D POS System.
Maitre'D User Editor
Maitre'D Access Editor
Overview
File
View
Employees
Revenue Center
Screens
Workstation
Payment
Frequent Diner
Screen Layout Setup
Advanced User Interface
Button Properties
Button Command List
Back-Office Overview
File
View
Tools
Accessing Options for the Point of Sale Control Module
POS Control - Configuration
POS Control Configuration - Option
POS Control Configuration - POS
POS Control - Check
POS Control - Printing
POS Control - Security
POS Control - Gratuity Distribution
POS Control - Home Page
Preferential Screen Setup
Advanced user Interface
Button Properties
Button Command List


From the drop-down list, select the command that will be performed by the selected button. Click the "X" to clear the selected command.
Depending on the selected command, a new field may appear below the command. This is the usage field, and its contents will vary depending on the selected command. For instance, selecting the Item command will display the list of sales items. Selecting the Preferential Screen command will display the list of available preferential screens, etc.
This option becomes available when commands like Variable list, Command list or Preferential screen are selected from the Command drop-down list. Enable this option to force the list to remain on the screen and allow multiple items to be ordered from it. Disabling this option will cause the list to close immediately after selecting one single item.
This option becomes available when the Preferential screen option is selected from the Command drop-down list. Enabling this option prevents the POS from recording the history of preferential screens that were accessed by the employee. This is useful for setups where employees toggle from screen to screen using dedicated buttons. Using this option also prevents the Previous preferential screen command from working, as history is not being recorded.
This option becomes available when commands like Variable list or Command list are selected from the Command drop-down list. Enable this option to sort the list according to the options selected in the variable list (Alphabetically, by priority or by external code) or command list (Alphabetically). If this option is disabled, the list will not be sorted. In the case of Variable list, this allows for custom button layouts to be created in variable list setup. For Command lists, this allows the commands to be displayed in the order they were set in the command list.
All the drop-down lists in the button properties are searchable. If you know the name of the command or item you are looking for, expand the list and simply start typing the name of the command, item or other element you are looking for.
Type the text that will be displayed on the button. All commands have default text, but it is always possible to change it after selecting the command. This is useful to abbreviate the text on small buttons that can't fit an entire item's description, for instance.
Type the text size to use (in px) for the selected button. The default is 12px. You may also use the up/down arrows to increase/decrease the text size by one px at a time and see the effect on the selected button in real-time.
Click the text color field and use the color picker to select the text color to use for the selected button.
Click the bucket icon and use the color picker to select the background color to use for the selected button.
Click the Browse button to select an image file to apply to the selected button. Supported image formats are *.svg, *.png and *.jpg.
Click the Clear button to remove the image file from the button and use a blank button instead.
Enable this option to stretch the image to cover the entire button area. The proportions of the image will be kept, which means the image may appear to be cropped if it doesn't match the button's shape exactly.
Enable this option to hide the text label for this button. This will provide a slightly larger area for the image to be displayed.
From the drop-down list, select whether the text should be displayed at the bottom, top, left or right of the button. If there is no image file selected, the text will always be centered on the button regardless of the selected option.
Start the Point of Sale Control module.
Click on the Screens menu and select Screens layout setup...
The list of available screen layouts is displayed.
Select an existing screen layout and click the Modify button to edit its properties.
Click the Add button to create a new screen layout from scratch.
Click the Close button to exit the list and return to the Point of Sale Control module.
The Screen Layout Editor screen will appear.
NOTE: For changes to the number of revenue centers to take effect, workstation data ned to be re-created. (Server Control > Workstation > All Workstation Data)
Select a multiple of 4 modes up to a maximum of 32. Modes can be used in many different ways. Typically, modes represent price points for sales items.
This field refers to the number of tables, and the actual table numbers, used in the Maitre'D POS system. A maximum of 9,999 tables is available. If you intend to create sections, and assign numbers in each section, you could set up 500 tables and use 101, 102, 103 ... for section 1 and 201, 202, 203 ... for section 2. Order numbers begin with the next number after the number programmed here. (e.g. # of tables = 500 order # begin at 501).
From the drop-down list, select a 0% tax that will be assigned to non-taxable divisions. This entry will also be used to replace the usual taxes on a check, for tax exempt customers.
This field cannot be modified. On a new installation or following a sales deletion, this value will be set to 100000. This value will increase by 1 every time a check is printed. In normal use, this field tells you what is the last check number that was printed by Maitre'D and gives a rough idea of how many checks were printed since the first day the system was used.
Select the main language to be used at the point of sale workstations. This will be the default language that is used on the POS screens before the employee logs in. For this language to also be used after the employee logs in, enable the Main Language option from Point of Sale Control > Employees > Employees > [Select employee] > POS Operation > Option.
Select an alternate language to be used by employees after they logon to the POS workstation.
For the second language to also be used after the employee logs in, disable the Main Language option from Point of Sale Control > Employees > Employees > [Select employee] > POS Operation > Option.
Related Topics

Enable this option to print taxes on the receipt.
Enable this option so that payment receipts do not contain any amounts pertaining to the total due or payment media used. Otherwise, the normal receipt is printed with the amount of the guest check.
Enable this option to print the invoice number in a bar code format. The check can be recognized using a bar code scanner at the terminal.
Enable this option to force the printout of a receipt every time a discount is applied to a check.
Enable this option to show the total of the inclusive taxes above the check total.
Enable this option to spell out the total amount on every invoice, as required in Mexico.
Enable this option to print main priced items separately from included components and regular sales items on the guest's check when Special Menu Settings are validated.
Enable this option to reprint a fully detailed duplicate of a closed check with the settlement information when touching the Print button on the Close screen, instead of only a receipt with the total and settlement.
Enable this option to prevent guest checks from printing.
Related Topics

The login prompt appears. Type Distributor (with a capital “D”) in the User Name field, and press the space bar twice in the password field. Click OK to proceed.
The language selector appears. Select the appropriate language and click OK to proceed.
You will be prompted to create a new Distributor password. Enter a password that meets requirements and click OK to proceed.
The Maitre’D Back-Office desktop will be displayed.
IMPORTANT! After the first login, it is strongly recommended to create more Maitre’D Back-Office user accounts for managers and employees who will require access to the Maitre'D Back-Office for various tasks.
NOTE: The default mode for workstations is configured in Point of Sale Control / Workstation / Options / Workstation.
Show Selection
Enable this option to make the selected Revenue Center available with this Screen Access configuration.
Modes
This area lists available modes for the selected Revenue Center. Click on a mode to configure its screen access.
Default
Select the default preferential screen to be used with the selected mode in this screen access configuration. This is the first screen that the employees will see after they login to the POS workstation.
Preferential Screens
This list provides individual checkboxes for each preferential screen. Tick every screen which should be accessible from this Screen Access configuration. A ticked box means that the employee will have access to that preferential screen in the selected revenue center and mode.
Select All
Click this button to enable all preferential screens in that mode.
Clear All
Click this button to disable all preferential screens in that mode.
Copy To
Click this button to open a window to choose multiple target modes to copy preferential screen accesses.
Copy To All
Click this button to copy the current preferential screen accesses to all modes.
Previous
Click this button to move up to the previous mode in the list.
Next
Click this button to move down to the next mode in the list.
Using downloaded files is the quickest way to get a system up and running. However, it gets a bit tricky if you need to install an auxiliary or backup server. These matters will be covered here.
Before you begin, we highly recommend downloading the latest installer and service pack, and creating your own install set. This will allow you to install Maitre'D and get it updated to the latest version in one single operation.
Please see:
Create a custom Maitre'D Installer
Make sure the installer files are extracted, either on you local hard drive or on a removable media. Installation will not work if the files are still within a *.zip archive. (See )
Using Windows File Explorer, browse to the folder containing the install files.
Locate the file called Setup.exe and double-click on it.
You may get a UAC warning. Click Yes.
The Maitre'D Back-Office InstallShield wizard will start.
Follow the steps described in .
Extract the installation files on you local hard drive. We will be using the command prompt, so to make your life easier, you can copy the files in a folder at the root of the C:\ drive. For this example, we copied the install files to a folder called MD_Install, at the root of the C:\ drive.
Open an elevated command prompt by clicking the Windows Start menu and typing "CMD". Select the Run as Administrator option.
You may get a UAC warning. Click Yes.>
The command prompt will open at the C:\Windows\System32> prompt. Jump to the root of the C:\ drive by typing the following command:
cd\ [ENTER]
navigate to the MD_Install folder by typing the following command at the C:\> prompt:
cd md_install [ENTER]
The prompt will not look like this: C:\MD_Install>. Start the Maitre'D Auxiliary Back-Office setup by typing the following command:
setup.exe aux [ENTER]
The installation process will start. Follow the steps as outlined in the .
Repeat steps 1 through 5 of the Auxiliary Back-Office setup above.
The prompt will not look like this: C:\MD_Install>. Start the Maitre'D Backup Server setup by typing the following command:
setup.exe backup [ENTER]
The installation process will start. Follow the steps as outlined in the .
Related Topics
Originally, the Maitre'D installer was shipped on a physical DVD. Being fully aware that many recent laptops and even full-sized desktop computers are no longer shipped with optical drives, and also to reduce e-waste and shipping costs, the files are available for download from the Maitre'D Distributor Portal.
Please see:
Insert the DVD in the DVD-ROM drive.
The disk should auto-play.
Use File Explorer to browse your DVD-ROM drive.
Double-click Autorun.exe.
Copy all the DVD files to the root of a removable media, such as a USB thumb drive.
Use File Explorer to browse the removable media.
Double-click Autorun.exe.
As the Autorun tool starts, you may see a Windows User Account Control (UAC) message. Click Yes.
The first installer screen will be displayed:
Select the option to take a tour of Maitre'D.
Select this option to install the Maitre'D Back-Office Server, Backup Server, Auxiliary Server or Point of Sale software. This will open another menu page with all necessary installation options.
Select this option to install the Maitre'D e-Global solution. This will open another menu page with all necessary installation options.
IMPORTANT! The DataBoard option listed here is obsolete. Please consult up-to-date DataBoard documentation and installation instructions here:
Select this option to view contact information.
IMPORTANT! This will display old Posera contact Information. Please contact PayFacto instead. View up-to-date contact information here:
Select this option to exit from the installer.
Select this option to install the Maitre'D Main Back-Office server software.
The Maitre'D Back-Office needs to be installed prior to any other Maitre'D application. After a successful installation, you will be able to proceed with the installation of the Point of Sale application, and any other software required, such as the Auxiliary Back-Office or Backup Server.
Select this option to install a Maitre'D Auxiliary Back-Office.
Install this program if you want access to the Maitre'D Back-Office software, with multi-user capability, from any other computer on the Maitre'D network. This program needs to be installed on each computer that you want to access the Back-Office from.
Select this option to install a Maitre'D Backup Server.
The Backup Server will provide additional security to your network by including full redundancy of the Maitre'D Back-Office software on any Point of Sale workstation or any other computer in your network.
Select this option to install the Maitre'D Point of Sale software on a workstation.
The Maitre'D Point of Sale provides you with every function needed in the restaurant industry. Table management, QSR, Delivery, Take-out, Drive-Thru and more. The Point of Sale software can be installed on a wide variety of hardware and supports several devices such as: Printers, scanners, scales, coin dispensers, liquor control systems, etc.
Select this option to return to the previous screen.
To start the installation of the Maitre'D Back-Office, select the first option: Install Main Back-Office. This will launch the Maitre'D Back-Office InstallShield Wizard.
Select this option to install the Maitre'D e-Global Solution.
The Maitre'D e-Global corporate solution is a powerful package developed to bring increased efficiency to multi-unit food service corporations. It allows them to receive data from all units at the frequency they desire. e-Global also allows them to manage each unit's database remotely, providing more control over menus, promotions and prices.
Do not use this option, as this version of DataBoard is now obsolete.
IMPORTANT! The DataBoard option listed here is obsolete. Please consult up-to-date DataBoard documentation and installation instructions here:
Before the license can be activated, you need:
The Maitre’D license serial number can be obtained by ordering a Maitre’D license through our ordering system, by phone or by e-mail.
Obtain the commerce name from the restaurant owner or manager. The commerce name is limited to 20 characters, including spaces.
When a new license is activated for the first time, you will be given the opportunity to configure the commerce name as it will appear in the Maitre’D Back-Office, on report headers and on the header of printed guest checks, invoices and receipts.
With the license serial number and commerce name in hand, you can proceed with the license activation.
After restarting from the installation of the Maitre’D Back-Office, Auxiliary or Backup Server software, the Maitre’D License Activation prompt will automatically appear.
Enter the required information:
a. Type in the license Serial Number as it appears on your Maitre’D invoice.
b. Type in the Commerce Name as it should appear in the Maitre’D Back-Office, on report headers and on the header of printed guest checks, invoices and receipts.
c. Click Next >> to continue the process.
The Site Code will be generated. Select it and copy it to the clipboard.
Logon to the Maitre'D Distributor Portal:
Select your language.
Enter your username and password, then click the Login button.
Click the License Activation link, near the top of the page.
Type in the license serial number and click the Submit button.
Locate the activation record for your license and click the Activate link.
If this is the very first activation of this license, you will be allowed to type in the Restaurant Name (commerce name). This name is case sensitive. Otherwise, the restaurant name will be filled in for you and cannot be modified.
Paste in the Site Code copied earlier.
Click the Generate button.
Your Activation Code (key code) will be generated. Select it and copy it to the clipboard.
Paste the key code (activation code) in the Key Code field and click Next >> to continue.
A confirmation prompt will appear, stating that the computer needs to be restarted.
Click Yes to restart your computer.
IMPORTANT! The computer MUST be restarted at this point. Otherwise, the license will not work properly.
After restarting, the Maitre’D Back-Office Server will attempt to start itself. You may see various progress bars as the Maitre'D database is updated.
If the Maitre’D Back-Office Server is not already authorized, a Windows Security Alert will be triggered from the Windows Firewall:
a. If the Maitre’D Back-Office computer is on a domain, select the Domain networks, such as a workplace network option.
b. If the Maitre’D Back-Office computer is on a network without a domain, select the Private networks, such as my home or work network option.
c. Click the Allow Access button.
The Maitre'D Back-Office Server will start, and an icon will be added to the notification area.
The Maitre'D Back-Office Software is now licensed to run on this PC.
Enable this option to display the Update button on the main screen of the workstation. This button allows to update the workstation after changes to the system from the Back-Office have been made. The Update button allows to update without having to open or access a guest check.
Enable this option to display the items separately. This option is useful if you setup an automatic item discount of type two for one or many for one. These discounts work only if the quantity stays at one. Leave it disabled to allow the items to have a modifiable quantity.
Enable this option to allow the use of the plus (+) and multiply (*) buttons on the media amount entry screen to use multiple instances of the same media type. For example, if you have 2 gift certificates of different amounts, you can use the plus button to add them together and enter a total amount of gift certificates, instead of manually adding 2 amounts before entering their total at the workstation.
Enable this option for the system to prompt you with a confirmation message ("yes" or "no") when you manually attempt to release a table.
Enable this option to quickly choose an employee from a list displayed on the workstation instead of entering the employee number every time.
Enable this option in markets where low-denomination coins were removed from circulation, like Canada and Australia. With this option enabled, cash transactions are rounded to the nearest multiple of $0.05. The rounding is displayed on the Amount Received and Change screens, and printed on the Check and Receipt. Transactions made with payment cards, gift cards or other methods of payment are unaffected.
Enable this option to enable the replacement of the Tare option by the Volume Modifier option for liquor control when setting an item's function as Price Rolled Up.
Enable this option not to prompt for modifiers again when upsizing a main item with modifiers.
Enable this option to force item with the Open Price option to be ordered at their default price point without displaying the numeric keypad. This allows third-party interfaces to change prices for those items in the back-office without affecting items that have previously been ordered on checks or bar tabs that are still open.
Enable this option to sort the list of discounts alphabetically on the point of sale. If this option is left disabled, the discounts will be sorted by their internal ID number.
Enable this option to use the high-definition, HTML-Based user interface for point of sale workstations. Disable this option to keep using the legacy user interface.
Enter the number of seconds after the end of the transaction before the line display shows the promotion lines setup in Point of Sale Control > Revenue Center > Options > Messages.
Enter the number of seconds after the request for an external custom Crystal Report on the workstation before displaying a Timeout During Report Generation prompt.
Enter the number of days that will be available for the service speed report, in the report center. Valid values are between 30 and 365, inclusively.
Related Topics
To use Maitre'D POS workstations, at least one screen layout must be created. However, most restaurants will use more than one. The total number of screen layouts will depend on many factors, like the number of revenue centers, the number of modes and the various employee roles that are available.
Type a meaningful description for this screen layout. The description should provide a clear indication as to what this screen layout is used for, like "Takeout Counter", "Managers" or "Dining Room" for instance. This field supports up to 20 characters.
As soon as the description is filled, click the Save button to save this new screen layout. Also, be sure to use the save button often to save your changes.
IMPORTANT! Be sure to click the save button before closing the screen layout editor. Otherwise, all changes will be lost.
Also, if the inactivity timeout kicks in (after 15 minutes), the Point of Sale Control window will be closed and any unsaved changes will be lost.
To add a single button to the screen layout, simply click on the button outline you wish to configure. The button will become highlighted and this will give you access to the Button properties toolbar on the right-hand side of the Screen layout editor.
To learn more on , please see the dedicated topic on this matter:
Buttons can be expanded to take up to two slots wide by two slots high.
To expand a button, hover the mouse cursor over the bottom-right corner of the selected button. The cursor will change to a resize arrow.
Click and drag the button's border to the desired width and height. Selected buttons will be highlighted in light red.
Release the mouse button to apply the new button size.
Using this method, you can create:
To copy an existing button, simply click the button once to select it. The button will become highlighted with an orange outline. Then, press CTRL + C on your keyboard. You may also right-click the button and select the Copy option from the contextual menu. The button and all of its settings will be copied to the clipboard.
To cut an existing button, simply click the button once to select it. The button will become highlighted with an orange outline. Then, press CTRL + X on your keyboard. You may also right-click the button and select the Cut option from the contextual menu. The button will disappear from the screen, and all of its settings will be copied to the clipboard.
To paste a button that was just copied or cut to the clipboard, click on an empty button or a button which you would like to have replaced, and press CTRL + V on your keyboard. You may also right-click the location where the new button should go and select the Paste option from the contextual menu. The button will be pasted in the selected location.
To delete a button, simply click the button you wish to delete, so that it becomes highlighted with an orange outline. Then, press the DEL key on your keyboard. ou may also right-click the button and select the Remove option from the contextual menu.
You can select multiple buttons and delete them all in one operation. To do so, press and hold the CTRL key on your keyboard. While holding down the CTRL key, click each button to be deleted. Each button will become highlighted with an orange outline. Then, press the DEL key on your keyboard.
To move a button, hover the mouse cursor on the button until the cursor changes to a cross with arrows. Then, click and drag the button. Release the mouse button over the location where you want the button to be.
Before the license can be activated, you need:
When activating an Auxiliary Back-Office, the serial number to use is the same as the Main Back-Office. The Auxiliary back-Office is an option that can be purchased through the same channels as new licenses and license add-ons.
When activating an Auxiliary Back-Office, the Main Back-Office should already be up-and-running, therefore the commerce name is already established and can no longer be changed.
Obtain the commerce name from printed guest checks or receipts, or by looking up the license details on the Main Back-Office PC.
With the license serial number and commerce name in hand, you can proceed with the license activation.
After restarting from the installation of the Maitre’D Back-Office, Auxiliary or Backup Server software, the Maitre’D License Activation prompt will automatically appear.
Enter the required information:
a. Type in the license Serial Number as it appears on your Maitre’D invoice.
b. Type in the Commerce Name as it should appear in the Maitre’D Back-Office, on report headers and on the header of printed guest checks, invoices and receipts.
c. Click Next >> to continue the process.
The Site Code will be generated. Select it and copy it to the clipboard.
Logon to the Maitre'D Distributor Portal:
Select your language.
Enter your username and password, then click the Login button.
Click the License Activation link, near the top of the page.
Type in the license serial number and click the Submit button.
Locate the activation record for your license and click the Activate link.
If this is the very first activation of this license, you will be allowed to type in the Restaurant Name (commerce name). This name is case sensitive. Otherwise, the restaurant name will be filled in for you and cannot be modified.
Paste in the Site Code copied earlier.
Click the Generate button.
Your Activation Code (key code) will be generated. Select it and copy it to the clipboard.
Paste the key code (activation code) in the Key Code field and click Next >> to continue.
A confirmation prompt will appear, stating that the computer needs to be restarted.
Click Yes to restart your computer.
After restarting, start the Maitre’D Auxiliary Back-Office by double-clicking the corresponding icon on the Windows Desktop.
The Maitre'D Auxiliary Back-Office Software is now licensed to run on this PC.
Enable this option to allow the use of pre-programmed card for employees. The Maitre'D will look for the password associated with that card instead of the server number and password. Make sure that you are using a card with a password that is not currently used by another valid server because the system will use the first employee that is using this password in the employee database.
Enable this option enable the Manager Takeover functionality. This gives the managers the possibility to momentarily take over a table already accessed by another employee without having to exit from the table and re-enter it.
Security Level
Enable this option to use up to 6 security levels. "6" is the highest and "1" is the lowest. These security levels control entry to the system's employee files.
Server Assignment
Enable this option to assign servers to a specific Point of Sales. If you assign an employee to a workstation, he will only be able to work from that Point of Sales. The employees that are not assigned will be able to use all workstations. The selected Point of Sales an employee is allowed to work on is saved in the Workstation field of Point of Sale Control / Employees / Employees... / POS Operation.
Use Security Algorithm
Enable this option to print on every guest's check a Security Algorithm number required for fiscal verification.
Force Employee Card Swipe
Enable this option to force employees to use their magnetic cards, and disable their passwords.
Generate Text File
Click this button to create a security file in Belgium.
Enable this option to force employees to use the biometrics device, and disable their passwords.
Biometric T&A Punch Only
Enable this option to force employees to use the biometrics device when they punch in, and disable the server's passwords, even if the employee record is linked to a server number and that server number does not need the biometrics device to order.
Biometric as Validation Device
Enable this option to use the biometrics device only to validate an employee's identity instead of a password. The employee will still have to enter his server number on the workstation to identify himself, but when the password is required, he will touch the biometrics device instead of entering his password. The same will apply when punching in or out with the Time & Attendance module.
Display Acquired Fingerprint
Enable this option to show on screen the real fingerprint scanned instead of a default generic image during the biometrics capture.
Enter the inactivity delay, in minutes, before the workstation will exit any table screen a server has left open for a long period of time, and comes back to the server Login screen. If there are items selected but yet to be ordered, or if the screen is currently displaying the hostess' floor plan, the workstation will not go back to the Login screen. Setting this field to 0 will disable this feature.
Drawer Warning
Enter the inactivity delay, in second, before the workstation will start beeping if the cash drawer is left open for a long period of time. Setting this field to 0 will disable this feature.
Related Topics
Whenever a button is selected in the Screen Layout or Preferential Screen editors, the button properties toolbar will become available.
From the drop-down list, select the command that will be performed by the selected button. Click the "X" to clear the selected command.
Depending on the selected command, a new field may appear below the command. This is the usage field, and its contents will vary depending on the selected command. For instance, selecting the Item command will display the list of sales items. Selecting the Preferential Screen command will display the list of available preferential screens, etc.
This option becomes available when commands like Variable list, Command list or Preferential screen are selected from the Command drop-down list. Enable this option to force the list to remain on the screen and allow multiple items to be ordered from it. Disabling this option will cause the list to close immediately after selecting one single item.
This option becomes available when the Preferential screen option is selected from the Command drop-down list. Enabling this option prevents the POS from recording the history of preferential screens that were accessed by the employee. This is useful for setups where employees toggle from screen to screen using dedicated buttons. Using this option also prevents the Previous preferential screen command from working, as history is not being recorded.
This option becomes available when commands like Variable list or Command list are selected from the Command drop-down list. Enable this option to sort the list according to the options selected in the variable list (Alphabetically, by priority or by external code) or command list (Alphabetically). If this option is disabled, the list will not be sorted. In the case of Variable list, this allows for custom button layouts to be created in variable list setup. For Command lists, this allows the commands to be displayed in the order they were set in the command list.
All the drop-down lists in the button properties are searchable. If you know the name of the command or item you are looking for, expand the list and simply start typing the name of the command, item or other element you are looking for.
Type the text that will be displayed on the button. All commands have default text, but it is always possible to change it after selecting the command. This is useful to abbreviate the text on small buttons that can't fit an entire item's description, for instance.
Type the text size to use (in px) for the selected button. The default is 12px. You may also use the up/down arrows to increase/decrease the text size by one px at a time and see the effect on the selected button in real-time.
Click the text color field and use the color picker to select the text color to use for the selected button.
Click the bucket icon and use the color picker to select the background color to use for the selected button.
Click the Browse button to select an image file to apply to the selected button. Supported image formats are *.svg, *.png and *.jpg.
Click the Clear button to remove the image file from the button and use a blank button instead.
Enable this option to stretch the image to cover the entire button area. The proportions of the image will be kept, which means the image may appear to be cropped if it doesn't match the button's shape exactly.
Enable this option to hide the text label for this button. This will provide a slightly larger area for the image to be displayed.
From the drop-down list, select whether the text should be displayed at the bottom, top, left or right of the button. If there is no image file selected, the text will always be centered on the button regardless of the selected option.
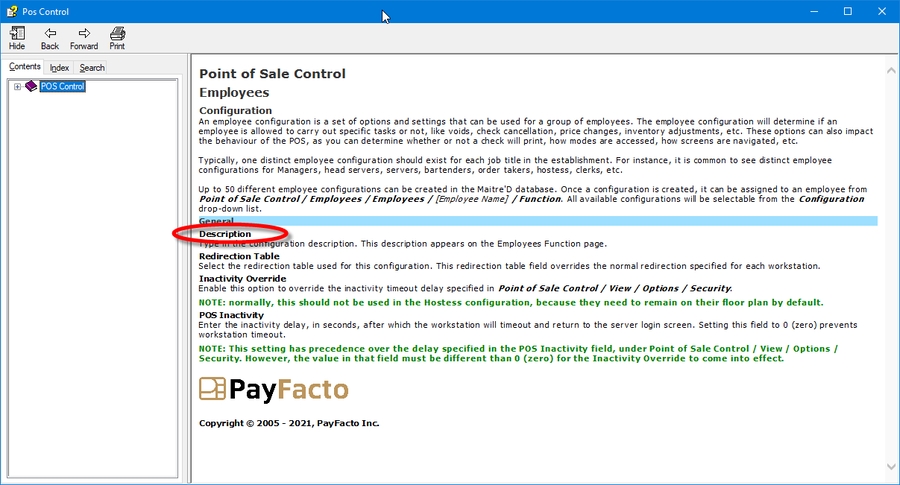
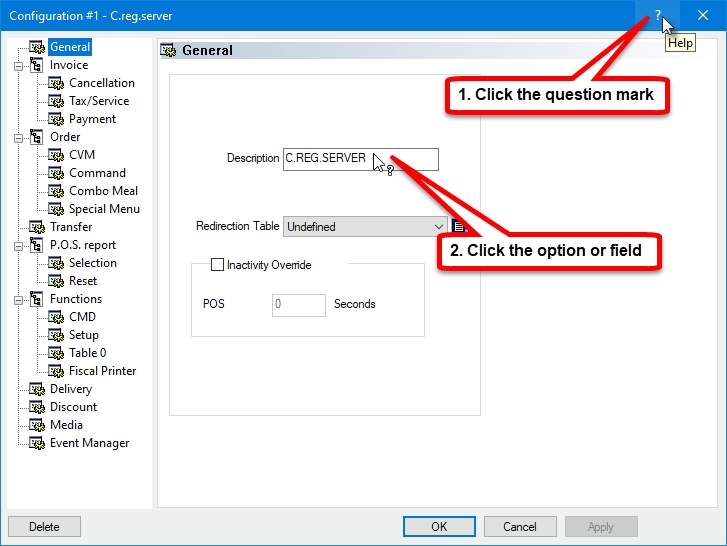
The Access Editor is located under the Tools pull down menu in the main Back-Office screen.
This option allows the creation and modification of Back-Office access levels.
There are 9 levels of access in Maitre’D. Level Zero is the highest and can access levels 1 to 8. Level 1 may access levels 2 to 8. A lower level access may not have more accesses than a higher level. E.g. Level 5 may only have access to those options available in 6 to 8.
In Maitre'D, taxes are assigned at the division level. It is not possible to assign taxes to individual items. Before you begin, make sure that division categories and divisions are created in your Maitre'D database.
Logon to the Maitre’D Back-Office with appropriate credentials. (Distributor or System Owner)
After your Maitre'D license has been activated, it is possible to add new options to it, to keep up with your business' growth. For instance, you could add a new module such as the Inventory Management module, or increase the number of POS workstations to meet your needs.
Revenue Center Overview
Items Setup
PLU
Availability
Temporary Withdrawal
Level Modifiers
Divisions
Divisions Category
Ratio Report
Revenue Center
Included Items
Buffet
Combo Meal
Special Menu List
Item Class


You can schedule internal communications to make sure that employees get important messages pertaining to the restaurant's operations. The workstation displays the message the first time the employee accesses the order, punch clock, and/or reading screen.
Title
Short description of message content.
Date
Date when to start displaying the message.
Completed On
Date when everyone targeted by the message has read it.
Message Overview
To
Employees who will receive the message.
Event
Functions that will display the message.
Message
Actual message text to display.
Enter a short description of the message content.
Select the date when to start displaying the message.
To
Click this button to select employees who will receive the message.
Enable to display the message the first time the Employee accesses the order screen.
Enable to display the message the first time the Employee accesses the reading screen.
Enable to display the message the first time the Employee access the punch clock screen.
Add Schedule to the Message
Enable to display the employee's schedule along with the message.
Continuous
Enable this option to display this messages every time an employee signs in, punches in, or prints a reading.
Once Per Day
Enable this option so that the message is displayed only once per day, the first time the employee logs on to a POS workstation.
Call External Command
Enable this option to call an external executable program instead of displaying a message.
Command
This field becomes available only if the Call External Command option is enabled. Type the path to the executable file, or click the (...) button to browse for it.
Arguments
Type any command line arguments that may be required when the external command is executed.
Message
Enter the actual text of the message to display.
Recipient(s)
List
Click the type of List to choose from, and double click on a choice within the list to add it to the users' list on the right. The four available list types are:
Employee Point of Sale
Double-click on an individual employee from the POS Control module.
Employee Time and Attendance
Double-click on an individual employee from the Time & Attendance module.
Function Point of Sale
Double-click on an employee Configuration from the POS Control module.
Task Time and Attendance
Double-click on an employee Task from the Time & Attendance module.
Users
Chosen list type.
Recipients
Selected choices within the list type.
Message/Employee(s)
Users
Individual employee from the POS Control or Time & Attendance module.
Date
Date when the individual employee has read the message.
The Maitre’D license serial number can be obtained by ordering a Maitre’D license through our ordering system, by phone or by e-mail.
Obtain the commerce name from the restaurant owner or manager. The commerce name is limited to 20 characters, including spaces.
When a new license is activated for the first time, you will be given the opportunity to configure the commerce name as it will appear in the Maitre’D Back-Office, on report headers and on the header of printed guest checks, invoices and receipts.
With the license serial number and commerce name in hand, you can proceed with the license activation.
After restarting from the installation of the Maitre’D Back-Office, Auxiliary or Backup Server software, the Maitre’D License Activation prompt will automatically appear.
Enter the required information:
a. Type in the license Serial Number as it appears on your Maitre’D invoice.
b. Type in the Commerce Name as it should appear in the Maitre’D Back-Office, on report headers and on the header of printed guest checks, invoices and receipts.
c. Click Next >> to continue the process.
The Site Code will be generated. Select it and copy it to the clipboard.
Logon to the Maitre'D Distributor Portal:
Select your language.
Enter your username and password, then click the Login button.
Click the License Activation link, near the top of the page.
Type in the license serial number and click the Submit button.
Locate the activation record for your license and click the Activate link.
If this is the very first activation of this license, you will be allowed to type in the Restaurant Name (commerce name). This name is case sensitive. Otherwise, the restaurant name will be filled in for you and cannot be modified.
Paste in the Site Code copied earlier.
Click the Generate button.
Your Activation Code (key code) will be generated. Select it and copy it to the clipboard.
Paste the key code (activation code) in the Key Code field and click Next >> to continue.
A confirmation prompt will appear, stating that the computer needs to be restarted.
Click Yes to restart your computer.
IMPORTANT! The computer MUST be restarted at this point. Otherwise, the license will not work properly.
After restarting, the Maitre’D Back-Office Server will attempt to start itself. You may see various progress bars as the Maitre'D database is updated.
If the Maitre’D Back-Office Server is not already authorized, a Windows Security Alert will be triggered from the Windows Firewall:
a. If the Maitre’D Back-Office computer is on a domain, select the Domain networks, such as a workplace network option.
b. If the Maitre’D Back-Office computer is on a network without a domain, select the Private networks, such as my home or work network option.
c. Click the Allow Access button.
The Maitre'D Back-Office Server will start, and an icon will be added to the notification area.
The Maitre'D Back-Office Software is now licensed to run on this PC.
Custom installers can be created from the Maitre'D DVD or the Back-Office full install. Download the one you want (or both), and also download the latest service pack update.
Instructions to download files are provided here:
The files downloaded from the Distributor portal are *.zip files that need to be extracted before they can be used. Fortunately, even a "vanilla" Windows 10 installation has the necessary tools to work with *.zip files.
Copy downloaded files to your Windows Desktop.
Right-Click the file you wish to extract, and select the Extract All... option.
By default, the Windows Zip extraction tool will create a folder with the same name as the Zip file where files will be extracted. Don't change anything and simply click the Extract button. (Don't worry, the original *.zip file will NOT be overwritten).
A new folder will be created to store all the extracted files. You may see a progress bar while large files are being extracted.
The folder where files were extracted will open automatically for you. You can minimize it to the task bar. We'll be using this later.
Repeat this process for all 3 downloaded files:
MDBO708000DVD.zip (Maitre'D DVD)
MDBO708000BO.zip (Maitre'D Back-Office Full Install)
MDBO708000xxx.zip (Service Pack update, where "xxx" is the Service Pack version number)
Now that all files were extracted, we need to copy the latest service pack update in the installer sets.
Open the MDBO708000xxx folder, then right-click the MDBO708000xxx.exe file and select Copy.
Open the MDBO708000DVD folder, then browse to the \bo\Disk1\ subfolder.
Right-click in an empty space within the folder and select the Paste option.
The file will be copied.
Copy the contents of the MDBO708000DVD folder to the root of a removable media, such as a DVD-ROM or a USB thumb drive.
IMPORTANT! The files must be copied at the root of the removable media (DVD-ROM or USB Thumb drive). If the files are inside a sub-folder, the links provided in the autorun program will not work, and you will get error messages when attempting to install applications.
Installer files are located at the root of the E:\ drive.
This installer will work.
Installer files are located inside a folder, in E:\MDBO708000DVD.
This installer will NOT work.
Open the MDBO708000xxx folder, then right-click the MDBO708000xxx.exe file and select Copy.
Open the MDBO708000BO folder, then browse to the \Disk1\ subfolder.
Right-click in an empty space within the folder and select the Paste option.
The file will be copied.
The installers are now ready to be used. With the service pack update file copied to the installer folder, the installer will automatically detect that an update is available and prompt for its installation during the Maitre'D setup process.
You can run the Maitre'D Back-Office installation program straight from your desktop. However, it is recommended to copy the install set(s) to removable media, such as a portable hard drive, DVD-ROM or USB thumb drive.
IMPORTANT! The DVD Installer files MUST be copied to the root of a removable media (DVD-ROM or USB Thumb Drive) to work correctly. The Autorun installer will not work if the files are located in a sub-folder.
This access is restricted to Maitre’D Certified technicians and installers. All other access levels are unable to see or grant this access. The properties of this access level cannot be modified, and except for certified technicians, no one should ever have this access, no matter the reason.
The System Owner access level is restricted to the restaurant management. Only top-level managers should have this access, as this allows them to create and delete other users, as well as take media reports with decrypted credit card PANs and expiration dates. This access cannot see or modify the distributor access.
These levels can be fully customized. Each access level can change the properties of the lower access levels, but not the higher access levels. These levels can be assigned to anyone with a business requirement to use the back-office software. These access levels are typically assigned for price maintenance tasks, report taking, batch closing, etc.
The default language used throughout the Maitre’D Back-Office and POS workstations is determined by the language configured for the System Owner access level. All access levels can be assigned different languages, but it’s the System Owner language that will decide which one is the default.
Upon opening the Access Editor tool, you will be prompted for an access level. Select the access level which you want to edit. Note that the Distributor access level cannot be edited.
Type in the quick-access password to use to open the Maitre’D Back-Office with this access level. This essentially allows the user to login by typing only a password, without a username.
Enabling the Fast Access option allows you to create scripted tasks for Maitre’D Back-Office users with this access. Instead of gaining full access to all the features of the Maitre’D Back-Office, the user will be forced to perform specific tasks.
Enable this option to enable the Fast Access feature and gain access to the Advanced Access option and Settings button. If this option is enabled without any other option, users will be constricted to their scripted tasks, without any possibility of performing any other action in the Maitre’D Back-Office.
With this option enabled, users will be able to access all the features of the Maitre’D Back-Office once the scripted tasks have been executed.
This option only affects access levels 2 to 8. Enable this option to allow users to use the blue shortcuts throughout the Maitre’D Back-Office.
Click the Settings button to configure the scripted tasks for this user access.
Select the Maitre’D Back-Office language to be used by this user access. Available choices are English, French or Spanish.
Fast Access Settings are accessed by clicking the Settings button on the Password Editor Screen. This dialog allows you to setup the tasks that users will be able to perform.
Select an existing task and click the Execute button to perform this task.
Click the Add button to create a new task and add it to the list.
Select an existing task and click the Remove button to delete it from the list.
Select an existing task and click the Edit button to change its properties.
Click the Save button to save settings and exit.
Click Cancel to exit without saving.
The access editor allows you to fully customize the Maitre’D Back-Office modules and menu options that users can or cannot access.
The access editor can be used in conjunction with the Fast Access feature to further restrict access to only the features that are necessary for specific employee job function.
A green checkmark indicates that this user can access a module or menu.
A red “X” indicates that this user cannot access the indicated module or menu.
Use the “+” and “-“ signs to expand or collapse branches and sub-branches.
Select a branch or a menu option and click the Toggle button to switch between the green checkmark and red “X”. Toggling the top level of a branch will cause all the sub-elements under that branch to be toggled in one operation.
Click the Apply button to save settings without exiting.
Click OK to save settings and exit.
Click Cancel to exit without saving.
Start the Point of Sale Control module.
Click on the Revenue Center menu and select the Divisions... option.
The list of divisions will appear.
Select an existing division and click the Modify button to edit the division's properties.
Click the Add button to create a new division.
Click the Print button to generate a report which can be printed.
Click the Close button to exit the divisions list and return to the Point of Sale Control module.
Edit an existing division, and click on the Tax branch.
Tax #1
From the drop-down list, select the first tax that applies to this division.
Tax #2
From the drop-down list, select a second tax, if required. Tax 2# applies after the first tax (Tax #1).
BC Soda Beverages Tax
The options in this section will only become available if one of the selected taxes has the option BC Soda Beverage Tax enabled, in Point of Sale Control / Payments / Taxes / [select tax] / Option. These options should be used only by merchants located in the Canadian province of British Columbia.
The purpose of these settings is to configure the calculation of the BC Soda Beverage Tax for taxable items that are part of combo meals or included with other items that are not taxable. When a taxable item is part of a combo and not sold separately, the BC Soda Beverage Tax is calculated on the lesser value between $3.00 or 50% of the sale price of the combo.
Maximum Amount
Enter the maximum amount that will be used as a base sale price for the calculation of the BC Soda Beverage Tax on an item that is part of a combo meal or included with another item.
Maximum Percentage
Enter the percentage of the combo or main item price that will be used for the calculation of the BC Soda Beverage Tax.
Click Delete to remove this division and return to the list of divisions.
Click OK to save changes and exit.
Click Cancel to exit without saving.
Click Apply to save changes without exiting.
Repeat this process until all your divisions have taxes assigned to them.
Provincial Tax
State Tax
Liquor Tax
Food Tax
Logon to the Maitre’D Back-Office with appropriate credentials. (Distributor or System Owner)
Start the Point of Sale Control module.
Click on the Payments menu and select the Tax Category... option.
The list of existing tax categories will be displayed.
Select an existing Tax Category and click the Modify button to change its description.
Click the Add button to create a new Tax Category.
Click the Print button to generate a report with the complete list of Tax Categories, which can then be printed.
Click the Close button to close the list and return to the Point of Sale Control module.
When you click Add to create a new Tax Category or Modify to edit an existing one, the properties are displayed:
Description
Type a meaningful name for this Tax Category. (Up to 20 characters)
Click OK to save changes and exit.
Click Delete to remove this Tax Category and exit.
Click Cancel to exit without making any changes.
The new Tax Category will appear in the list.
Once all required Tax Categories are created, close this window using the Close button.
IMPORTANT! Every tax that will be created needs to belong to a Tax Category. Therefore, at least one Tax Category must exist in the Maitre'D Database.
The first step to add new functionalities to your Maitre'D license is to contact your PayFacto representative to purchase the options you need. Once the purchase and invoicing process has been completed, you will be able to start the activation process.
Logon to the Maitre’D Back-Office with appropriate credentials. (Distributor or System Owner)
On the Main Back-Office screen, click on the File menu and select the Licenses… option.
The Installed Licenses window will appear.
Click the Modify button. This will bring up the Request Key Code window. Leave this window up on the screen, and proceed to the next step.
Logon to the Maitre'D Distributor Portal:
Click on Orders and Licensing.
Click on License Activation.
Enter the Maitre'D license Serial Number for which the add-on was purchased and click the Submit button.
Available add-ons will be listed here. Locate the Add-On you wish to activate and click the Activate link. For the purpose of this example, we are activating an add-on for two new Mobile POS workstations.
IMPORTANT! If the add-on you are looking for is not listed, make sure it was ordered and invoiced. Also remember that there is a 72 hours turn-around time for new orders.
The Distributor Portal will request a Site Code.
Copy the Site Code from the Request Key Code window which you left open earlier. Paste the Site Code in the Site Code field of the Distributor Portal. Click the Generate button on the Distributor Portal and click the Next >> button on the Request Key Code window.
The Distributor Portal will now display the Activation Code. Select the entire code and copy it to the clipboard by pressing CTRL + C on your keyboard.
Maitre'D will now request a Key Code. Paste the Activation Code which you copied from the website by pressing CTRL + V on your keyboard. Click Next >>
The Maitre'D license will be updated, which could take a few seconds. Once the license is updated, click Close.
You will be prompted to restart the computer. Log off from the Maitre'D distributor portal, save your work and close applications that may be running, then click Yes to restart your computer.
IMPORTANT! Do not attempt to skip or bypass the computer restart. This may cause your license to deactivate itself completely along with other unwanted effects.
Once the computer finishes restarting, logon to the Maitre'D Back-Office as you normally would and start using your new options.
When activating an Auxiliary Back-Office, the serial number to use is the same as the Main Back-Office. The Auxiliary back-Office is an option that can be purchased through the same channels as new licenses and license add-ons.
When activating an Auxiliary Back-Office, the Main Back-Office should already be up-and-running, therefore the commerce name is already established and can no longer be changed.
Obtain the commerce name from printed guest checks or receipts, or by looking up the license details on the Main Back-Office PC.
With the license serial number and commerce name in hand, you can proceed with the license activation.
After restarting from the installation of the Maitre’D Back-Office, Auxiliary or Backup Server software, the Maitre’D License Activation prompt will automatically appear.
Enter the required information:
a. Type in the license Serial Number as it appears on your Maitre’D invoice.
b. Type in the Commerce Name as it should appear in the Maitre’D Back-Office, on report headers and on the header of printed guest checks, invoices and receipts.
c. Click Next >> to continue the process.
The Site Code will be generated. Select it and copy it to the clipboard.
Logon to the Maitre'D Distributor Portal:
Select your language.
Enter your username and password, then click the Login button.
Click the License Activation link, near the top of the page.
Type in the license serial number and click the Submit button.
Locate the activation record for your license and click the Activate link.
If this is the very first activation of this license, you will be allowed to type in the Restaurant Name (commerce name). This name is case sensitive. Otherwise, the restaurant name will be filled in for you and cannot be modified.
Paste in the Site Code copied earlier.
Click the Generate button.
Your Activation Code (key code) will be generated. Select it and copy it to the clipboard.
Paste the key code (activation code) in the Key Code field and click Next >> to continue.
A confirmation prompt will appear, stating that the computer needs to be restarted.
Click Yes to restart your computer.
IMPORTANT! The computer MUST be restarted at this point. Otherwise, the license will not work properly.
After restarting, start the Maitre’D Auxiliary Back-Office by double-clicking the corresponding icon on the Windows Desktop.
The Maitre'D Auxiliary Back-Office Software is now licensed to run on this PC.
Enable this option to use automatic redirection table by revenue center instead of mode.
Enable this option to print the courses on separated chits on the shared printers. Disable it to print them on the same chit.
Enable this option to use a slightly different looking check printout.
Enable this option to remove any extraneous line feeds on checks and reduce the amount of paper used.
Enable this option to eliminate the printing of previously ordered items in the kitchen when reopening a closed check.
Enable this option to get the same check settlement information on checks and receipts generated by a Bartender as on those generated with the Fast-Food and Order functions, with the mandatory amount tender on a running bill opened with a customer name.
Enable this option to print the control items indented under the included sales items on the kitchen coupon when Special Menu Settings are validated.
Enable this option to allow modifiers attached to a main item to control how the item is printed on kitchen printers. For example, a revenue item could be configured not to print on any kitchen printers. However, if a modifier is ordered with that item and that the modifier is set to print to the kitchen, the main item would then be printed at the same printer as its modifier.
Enable this option to ensure that revenue items ordered as modifiers are properly placed under the main item that called them on the kitchen chit.
Enable this option to ensure that revenue items prints to all printers configured for that item, even if ordered as a modifier.
These options apply to print jobs coming from mobile devices such as Adroid or iOS tablets.
Select the workstation that is responsible for handling print jobs send by mobile devices.
Set the polling interval (in seconds) at which the workstation will check for print jobs from mobile devices.
These settings apply to systems using the EFSTA Fiscal Register to record sales data and print fiscal signatures on receipts.
Type the TCP port number used by the EFR server. The default value is 5618. However, please verify the actual setting in your EFR server installation to be sure to use the correct value.
Enable this option to print a QR code containing the fiscal data on the receipt.
Related Topics

The detailed meter report contains meters sold by 15 minutes intervals. Enable this option to have the report in 30 minutes intervals instead.
Enable this option to use the price encoded within the barcode instead of the price defined in the sales item setup.
The first digit of the barcode must be 2 and the first seven digits are tested to find the corresponding items. Digits 8 through 11 are used as the item price. See the UPC guideline # 11 for more details on barcodes.
Enable this option to manually enter the sales item cost for each item, in Point of Sale Control > Revenue Center > Items Setup... > [Select an item] > Configuration > [Select a configuration] > Price and Cost > Cost. Leave this options disabled to use the cost value calculated by the Inventory Management module.
Enable this option to request the daily deposit before starting the end of day. When the end of day is started, the user will automatically be prompted to enter a daily deposit amount. The amount entered will appear in the daybook reports with the daily balance.
Enable this option to force the entry of a PLU code link every time a new sales item is created.
Enable this option for businesses that operate 24 hours a day. This will allow the end of day to run with open checks or tables. Any open checks or tables are automatically transferred to the next fiscal day.
Enable this option to calculate inclusive taxes for the European, UK and Australian markets.
Enable this option to calculate the Value Added Tax on the invoice total instead of per item.
Enable this option to count the number of meals on the activity report. For more information on counting the Number of Meals, refer to the Items Setup Options. Disable this option to display the customer count on the activity report instead. (Servers enter the number of customers when they enter orders.)
Enable this option to have the Hostess function manage the sections of the restaurant, including table verification, floor plan, section assignment, smoking status, number of customers seated and seating availability. Otherwise, the Hostess function will work in the "Control Buffet" mode.
You can calculate Item/Division discounts with two inclusive taxes using the same method as in European Operation option. With this option enabled, Maitre'D extracts the inclusive taxes from the sales item price before the discount is calculated. With this option disabled, Maitre'D calculates the discount before extracting the inclusive taxes.
Enable this option to allow the use of Fast Cash buttons lower than the check total multiple times. Every time a Fast Cash button is touched, if the button is not enough to close the invoice, this amount will be cumulated with the next Fast Cash button. Once the total cumulated amount is enough to cover the check total, the payment will be accepted.
Activate this option to disable the Temporary Withdrawal option of all items for the next fiscal day so that they can be sold again from the External Order System (EOS) and the Points of Sales.
Activate this option to automatically close external (web) orders during the End-of-Day process. This will only affect orders which already have a payment applied. Unpaid orders will remain open.
Related Topics


Start the installation process using one of the following methods:
, or;
.
Before performing the actual installation, the InstallShield Wizard will analyze your system. If required software components are missing, these will be installed at this point. Click the Install button to proceed.
A splash Screen will be briefly displayed.
The InstallShield Wizard will prepare the installation. This could take a few seconds.
The welcome screen appears. Click Next > to continue the installation.
Read the license agreement and select I accept the terms of the license agreement. Click Next > to continue.
Select the Maitre’D installation folders and click Next > to continue.
Select the type of installation and click Next > to continue. The available types are described below.
Select this option to install Maitre’D with an empty database. It will need to be fully programmed before use.
Select this option to install a generic restaurant data for demonstration purposes in the French language.
Select this option to restore an existing restaurant data when the software is started for the first time.
Select this option to install a generic restaurant data for demonstration purposes in the English language.
Select the Maitre’D program group that will be created in the Windows Start Menu. Click Next > to continue.
Files will be installed automatically. This could take a few minutes.
If a service pack is available, installation will start automatically. It is highly recommended to always install the latest service pack available before using the Maitre’D software. Click Yes to begin the installation of the service pack.
IMPORTANT! Installation of the latest service pack available is required to maintain PCI-DSS compliance. Installation of the latest service pack is also required to benefit from the latest feature updates and bug fixes.
a. The InstallShield Wizard will prepare the Service Pack installation. This could take a few seconds.
b. The welcome screen appears. Click Next > to continue the installation.
c. Read the license agreement. Click Yes to agree and continue the installation.
d. Select the path where the BO.INI file can be found. This should not need to be changed, but you can click Browse… to change the folder if required. The service pack files will be installed in the path as defined in the BO.INI file. Click Next > to proceed.
e. Files will be copied. This could take a few minutes.
After files are copied, the InstallShield wizard will remind you that the computer needs to be restarted before Maitre'D can be used. Click the Finish button.
A dialog box will inform you that your computer is about to be restarted. Click OK, and your computer will restart.
WARNING! Do not attempt to override the computer restart. This will damage the Maitre'D files and cause various issues.
After the computer restart, the Maitre'D Back-Office Server will attempt to start.
Since there is no license installed, you will be prompted to enter a license serial number and a commerce name.
IMPORTANT! Now that the Maitre'D files are in place, it is strongly suggested to configure the Maitre'D Shared Folder correctly, even before activating the license. Please see
The installation process is now completed. Please proceed to the Maitre’D license activation.
Related Topics
After the initial logon and initial user creation is completed, other user accounts will need to be created. These accounts can be used for various tasks, ranging from basic reporting to all types of configuration changes. Due to the sensitive nature of the data that can be accessed through the Maitre’D Back-Office, its access needs to be protected adequately by usernames and passwords.
Furthermore, to ensure compliance with PCI-DSS, individual user accounts need to be created for each user requiring access to the Maitre’D Back-Office. Sharing accounts or disclosing passwords will automatically make your site non-compliant against PCI-DSS rules.
Logon to the Maitre’D Back-Office with appropriate credentials. (Distributor or System Owner)
From the main back-office screen, click on the Tools menu, and select the User Editor option.
The User Editor window will be displayed. All existing users with access levels equal or lower than yours will be listed here, if any.
Click the New button to create a new user.
Click the Delete button to permanently delete an existing user
.
This button is only available to PayFacto technicians to reset an account’s password history for troubleshooting purposes.
Click the UnLock button to unlock a locked account.
Click the Discard button to clear information that was entered during the process of creating a new user.
Click OK to commit changes and exit out of the User Editor tool.
Click Apply to commit changes without exiting from the User Editor Tool.
Click Cancel to exit out of the User Editor tool without saving changes.
Type a user name for this account. The user name should allow the person logging in to be identified.
Choose an access level for this user:
Distributor
This access is restricted to Maitre’D Certified technicians and Resellers. All other access levels are unable to see or grant this access.
System Owner
The System Owner access level is restricted to the restaurant management. Only top-level managers should have this access, as this allows them to create and delete other users, as well perform any administrative task on the Maitre’D system.
Access Levels 2 through 8
These access levels can be fully customized. These access levels can be used for anyone requiring access to the Maitre’D back-office software.
Type in a password for the new user. The password must be at least 7 characters, and comprised of a mix of letters and numbers.
Confirm the password for this new user.
Enable this option to force the user to change the login password during the next login. This option should be used for every new account and afterwards if there is a doubt that an account password may have been compromised.
Click the Apply button to create the user without exiting the User Editor. This will allow you to create more users.
Click OK to save your changes and exit.
Maitre’D will automatically force users to change their passwords every 90 days. Also, Maitre’D keeps a history of each user’s passwords so that the last 4 passwords cannot be re-used. In case a password becomes compromised or if you have any doubts to that effect, you can force any user to change their password by checking the User must change password at next login box in their account’s properties. Of course, you need to be logged in with Distributor or System Owner access in order to do this.
After 5 unsuccessful login attempts, Maitre’D will automatically lock the user account. To unlock an account, someone with Distributor or System Owner access needs to login, access the user editor, select the locked account and click the Unlock button.
Locked accounts are marked with a padlock icon:
Never share your password with anyone, for any reason, under any circumstances.
Use complex passwords. Maitre’D already forces you to use a minimum of 7 characters with a mix of letters and numbers, however:
Try using 8 or more characters. Long passwords are harder to guess.
Avoid using combinations like 123abcd, or 123456a, or abcdef1, etc. These combinations are easy to guess and can get your system compromised.
The Network Profile feature was introduced with Windows Vista and was carried over to later versions of Microsoft Windows. In Windows 10, the default Network Profile settings will prevent Maitre'D from working correctly by disabling File & Printer sharing and forcing Password Protected Sharing. This topic explains how to configure these settings to allow Maitre'D to operate normally.
By default, on a new Windows 10 installation, your Network Profile will be set to "Public". This is the most secure setting, and is intended for use on public networks, such as public WiFi provided at airports, coffee shops, etc. This setting will "hide" the PC from other devices on the network, which will cause issues with Maitre'D. This profile also hides settings that need to be enabled for Maitre'D to work correctly. This needs to be changed to either Private or Domain.
In the Windows Notification area, click on the Network Connection icon, then click on the network connection you wish to configure. (there could be more than one.)
This will bring up basic settings. Click on the Network connection (again).
The Network profile options will be displayed. Select either Private or Domain.
If your Maitre'D Main Back-Office PC is part of an Active Directory Domain, your Network Profile needs to be set to "Domain". If the PC is not on a domain, this option will not be available, therefore your Network Profile needs to be set to "Private".
If you believe that the PC should be using the Domain Network Profile but this option is not available, please ask your network administrator for advice.
Just like before, in the Windows Notification area, click on the Network Connection icon, then click on the network connection you wish to configure. (there could be more than one.)
This will bring up basic settings. This time, click Change advanced sharing options.
Under the Private (or domain) profile, make sure that:
a. Turn on network discovery is selected.
b. Turn on file and printer sharing is selected.
Click on the down-arrow next to All Networks. This will display more options.
Scroll down to the Password Protected Sharing section and select Turn off password protected sharing.
Click Save changes.
This configuration needs to be done on the Main Back-Office PC, all Auxiliary Back-Office and Backup Server PCs, as well as on all POS workstations.
The connectivity between the Main Maitre'D Back-Office PC and other components of the Maitre'D network can easily be tested. For the example below, we are testing connectivity to a PC named "MAIN-BACK-OFFICE".
From any PC or POS on the Maitre'D network, right-click the Windows Start button and select Run...
In the Run... box, type two back-slashes (\\) followed by the name of the PC you want to connect to. For example:
\\MAIN-BACK-OFFICE
Click OK.
a. If the Maitre'D Back-Office is already installed, you will see the MaitreD shared folder on the PC named MAIN-BACK-OFFICE.
b. If the Maitre'D Back-Office is not yet installed, you will see an empty folder on the PC named MAIN-BACK-OFFICE.
c. If the network settings are not configured properly, you will see an error message.
The network settings now allow communication between all the components of the Maitre'D Network.
The Main Back-Office desktop is the starting point for all tasks that can be carried out at the Maitre'D Back-Office PC. It gives you access to all the Maitre'D modules as well as tools to manage your license options and Back-Office users.
Below is a short description of every module and option that can appear on the Maitre'D Main Back-Office Desktop. For more information on a specific module, please consult the documentation specific to that module.
The Point of Sale (POS) Control module is a core Maitre'D module that is included with every license. It allows restaurants to manage their day-to-day operations from one central location. This is where employee access to the POS workstations is managed and where sales items are created.
Delivery is an optional module that can be purchased separately. It allows restaurants to configure the delivery system, including creating, modifying and deleting customers and street code records.
Electronic Funds Transfer is an optional module that allows Maitre'D to interface with various payment solution providers to process credit and debit card payments.
Inventory Management is an optional module that allows restaurants to keep track of all the stock trough recipes linking ingredients to sales items.
Account Receivable is an optional module that allows restaurants to manage their customer's accounts. Customers can charge meals to their account and restaurants can send statements to their customers.
Time and Attendance is an optional module that allows restaurants to manage employee's schedules, tasks, pay rates, punch-in, punch-out and break times.
The Accounting Interface is an optional module that allows Maitre'D to interface with third-party accounting software such as Quickbooks and ACCPAC.
The report Center is a core Maitre'D module that is included with every license. It allows restaurants to generate reports for all aspects of their business.
System Configuration is a core Maitre'D module that is included with every license. It is used to configure general restaurant data such as postal and shipping addresses, and also to configure localization data such as currency symbols, date and time formats, etc. This module is also used to manage backups of the Maitre'D settings and contains advanced configuration options to modify all the prompts contained in the Maitre'D system.
Server Control is a core Maitre'D module that is included with every license. As its name implies, this module contains all the options to manage the Maitre'D Back-Office Server, like starting and stopping the server, performing end-of-days, etc. This module also includes many optional interfaces such as the hotel Interface, gift certificate interface, discount manager, etc.
The Local Workstation icon appears when the Local Workstation option is enabled within the Server Control module. This option allows the main Back-Office PC to be used as a POS workstation.
Converter is an optional module that is included with E-Global and DataBoard solutions. It allows the conversion of data files from sales, management, payroll and inventory in industry-standard database format for consumption by E-Global Corporate Communication Module (CCM), DataBoard, or other third-party solution. It also manages incoming data from E-Global.
Floor Management is an optional module that allows restaurants to manage their floor plans, create sections and view the floor plan with a graphical representation.
The Exit and log on icon is used to quickly close all open Maitre'D Back-Office modules and display the login prompt.
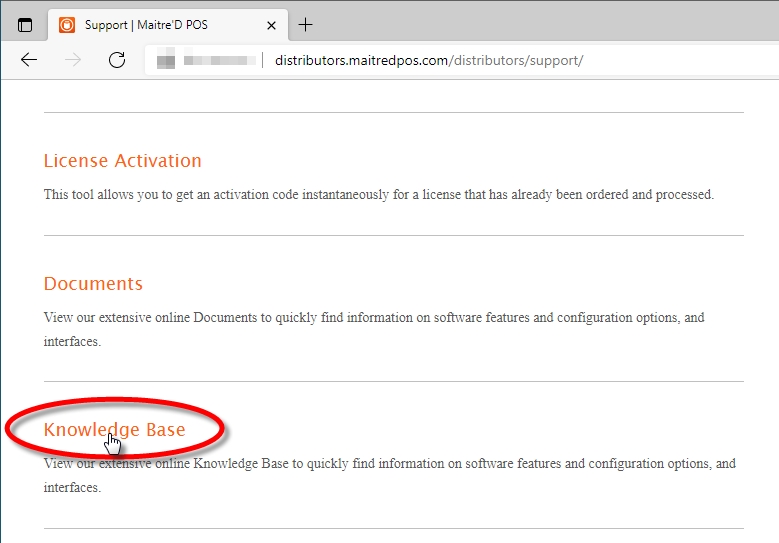
To use Maitre'D POS workstations, at least one preferential screen must be created. However, most restaurants will use many screens. The total number of preferential screens will depend on many factors, like the number of items on the menu, the number of revenue centers, the number of modes and the general look & feel you're going for while designing the menu.
Type a meaningful description for this preferential screen. The description should provide a clear indication as to what this preferential screen is used for, like "Delivery", "Grill" or "Pasta" for instance. This field supports up to 20 characters.
Maitre'D is a Point Of Sale Software Suite with an integrated Back-Office application that allows restaurants to manage their operations from front-end sales to inventory control and employee management. Maitre'D helps restaurant owners and managers streamline and centralize operations, track the status of the restaurant in real time, analyze data and follow trends from past periods, and plan for the future. The following points highlight key features that make Maitre'D an indispensable tool for any restaurant.
The Maitre'D Point Of Sale workstation screens provide an elegant yet intelligent user interface that simplifies order entry and management functions. This means that customers are serviced more quickly, and it is easier to train new employees on the system. Using the Maitre'D POS Screen Designer, the user interface of each workstation can be completely customized to suit the look and needs of any restaurant.
The Maitre'D Back-Office allows restaurants to manage everything from one central location. Every task from managing inventory to managing employees and time schedules can be done using the Maitre'D Back-Office Suite. By centralizing management functions, the restaurant owner or manager can access real time information about the restaurant and make timely decisions when required. All common management functions can also be accessed using any Point Of Sale workstation connected to the network.
Maitre'D supports a wide range of industry standard peripheral devices such as scales, biometric reading devices, scanners and more. By fully supporting OLE for Retail POS (OPOS) Drivers, Maitre'D is compatible with all major peripheral devices in the industry that can be connected using a serial, parallel, USB or an IP connection.
Supporting the latest wireless network technologies, wireless Maitre'D networks eliminate the need to hide connection wires that may otherwise be difficult to conceal in a restaurant environment. Maitre'D allows restaurants to mix and match traditional wire based networks with wireless networks allowing heterogeneous networks to seamlessly integrate with each other.
With wireless handheld support, wireless Point Of Sale devices can be connected to the main network, offering mobility to restaurant staff.Wireless scanning devices can scan inventory items and directly input the data in the Maitre'D inventory database making inventory counting a breeze.
Using the Inventory Management module, all items in the inventory can be monitored in real time. This allows the restaurant to control food cost, reduce waste items and generate up to date inventory reports. The Inventory Management module also features an advanced Purchase Order Management system that facilitates ordering.
Designed for quick but effective operation, the QSR and Drive-Thru functions include customizable macros that allow restaurants to program a sequence of order events for quick processing, and a new combo engine for automatic combo discount detection. The Maitre'D Software Suite supports multiple drive-thru lanes, as well as a kitchen monitor for order efficiency.
The Delivery module allows orders to be quickly taken over the phone and entered in the Maitre'D system. Orders are forwarded automatically to the kitchen and checks can quickly be printed. When the customer information is keyed in, the system stores it for future orders thereby generating a database of customers. The Delivery module manages drivers by optimizing their routes, and provides an interface with Microsoft® MapPoint®.
The Floor Management module is an easy to use graphical interface that uses a graphical representation of the restaurant allowing customers to be seated quickly and the restaurant seating space to be used optimally. The purpose of the Floor Management Module is to distribute guests evenly among servers so that every server is occupied during all periods. Real time alerts warn restaurant employees if customers are waiting to be served, or are waiting to pay, and managers can keep track of service levels using the Floor Management application.
Restaurants can create multiple floor plans based on the number of servers working at different times of the day. For example, a floor plan with three servers can be created for lunch, and a floor plan with 7 servers can be created for dinner.
One of the powerful features of the Floor Management module is the waiting list. The waiting list is enabled when all tables in the restaurant are occupied, and allow hostesses and servers to keep track of guests waiting for a table. Using the waiting list, guests can order drinks at the bar, and the bartender can start a tab using the guest information found on the waiting list. When a table is ready and the guests are seated, the running tab can be transferred directly to the table and guests only pay at the end of their meal.
The Floor Management module also offers a set of reports that can be customized, and help analyze employee performance.
A redundant server can be configured to insure that in case of primary server failure, the redundant server will take over and allow uninterrupted service. For convenience, one of the Point of Sale workstations can be configured to act as a redundant server, saving costs because the restaurant does not need to invest in a separate computer to host the redundant server. A convenient Restore function allows the redundant server to transfer control back to the primary server as well as any updated data.
Loaded with features such as Hold and Fire, customizable meals,“On the fly”modifiers, and instructions for special orders, the Maitre'D Table Service Restaurant (TSR) solution allows servers to offer the highest level of table service to customers and provide them with an exceptional dining experience.
With built-in support for both a central cashier configuration and a server banking configuration, Maitre'D TSR can adapt to any restaurant business model.
Employees can be managed using the Maitre'D Back-Office. Employees can clock-in and clock-out directly from any Point of Sale workstation thereby eliminating the need for an expensive third party time tracking hardware. Maitre'D also provides a graphical view of the employee schedule and instantly provides a list of availabilities. Using the payroll interface, payroll data can be transferred to an accounting software system such as Automatic Data Processing (ADP) ®.
Maitre'D also provides an analysis of labor costs versus revenue in real time so that managers can determine if they are over-staffed or under-staffed at any given time. This feature allows restaurants to control labor costs while ensuring that customers are receiving the best service.
A fully integrated electronic funds transfer (EFT) module allows Point of Sale transactions information to be sent to debit and credit card processors, speeding up transaction processing time. This ensures accuracy throughout the transaction by limiting keypunch errors.
If you are using a generic EFT interface, Maitre'D is compatible with a wide variety of industry standard processors. Internet Processing support allows credit card transactions to be completed within 2 or 3 seconds through a completely secure Internet channel.
The Maitre'D Report Center provides a comprehensive set of reports that can be customized to answer the specific needs of any restaurant. Built using the industry standard Crystal Reports ® reporting tools, Maitre'D reports are easy to use, easy to customize and packed with features. Furthermore, as new optional modules are installed, new reports become available in the report center.
The accounting modules allow restaurants to manage accounts receivable and print invoices and monthly reports, as well as manage their accounts payable and general ledger. The accounting interfaces allow data to be transferred to almost every major accounting software such as ACCPAC® and QuickBooks™.
With Maitre'D Databoard®, restaurants can send data to a central website that can be accessed over the Internet. Restaurants can publish reports from Maitre'D to an Internet website, and service packs can be deployed from one central location. Maitre'D Databoard® can be set up to send real time alerts to devices such as pagers, cell phones, or a customized email can be sent to a list of recipients. Encrypted transmissions over a secure Internet channel to transmit information and enforced password protection ensure that all communication between the user and the central website are safe and reliable.
The Maitre'D e-Global Suite allows incremental database information from all restaurants to be sent to a corporate office location for backup and storage on a daily basis. Another powerful feature of Maitre'D e-Global is Broadcasting. This allows the corporate office to push database information, such as new screens or item prices, directly from the corporate office to the individual restaurants. The corporate office system can be programmed to send the data on specific dates thereby automating all updates.
The Maitre'D cooking schedule organizes the schedule for items on the menu that take time to prepare and ensures that items advertised on the restaurant menu are always available. Based on past sales, the cooking schedule determines the quantity of an item to prepare for any given time period.
Real time display warns employees when item levels are low, and the cooking schedule constantly updates itself in real time to display the quantity remaining.
Using the Maitre'D Inventory Management module, purchase orders can be generated and tracked. When items in the purchase order are received in Maitre'D, the system automatically updates the inventory levels. Maitre'D offers a versatile purchase order system with a powerful wizard function that uses past sales history and future projections to determine what items to order and the quantities to order. Based on the Product Mix formula, the purchase order wizard can generate purchase orders based on minimum and maximum inventory levels, based on the production schedule, or based on sales history. Other features such as copying from a previous purchase order and setting up recurrent purchase orders simplify the ordering process.
Purchase order information can be exported through the Maitre'D Accounts Payable Interface to a 3rd party accounts payable software for processing.
Restaurant managers can send customized messages to specific employees or a group of employees using the Maitre'D Message Center. The message will display the first time the employee logs in, enters a sales transaction, clocks or accesses other employee functions. The manager can attach an employee schedule with the message, and the employee can print the message as well as the attached schedule.
Loyal customers can be rewarded using the Frequent Diner feature. A database of Frequent Diner Customers is stored in the Maitre'D database, and Frequent Diner Promotions can be offered to these customers. The Frequent Diner Customer database information can be distributed to multiple locations so that Frequent Diners can receive their perks in every restaurant belonging to that chain.
Restaurants can also offer Rewards Coupons to guests when their purchases reach a certain amount. The coupons print automatically when the check is acquitted and restaurants can configure Maitre'D to print different promotions at different times of the day and of the week. For example, when guests purchase sales items that equal 15$ or more at breakfast time, the restaurant can give a Rewards Coupon for a free medium sized French fries when they buy a cheeseburger at lunch time. Similarly, if guests purchase for 15$ or over at lunchtime, they will receive a Rewards Coupon for a free beer during happy hour. The Rewards system is a great way to encourage guests to return to the restaurant.
The Maitre'D system provides full integration with major hotel Front Desk systems allowing Maitre'D transactions to be posted directly on hotel bills for customers residing in the hotel.
Maitre'D MealZone is a web-based application that allows restaurants to offer their menus online for customers wishing to order their meals using the Internet.
The Maitre'D MealZone is linked to the Maitre'D Point of Sale via the Back-Office. Orders that are placed using the restaurant website can be sent directly to the kitchen printer so that they are processed immediately. Customers receive an email to confirm that their order was placed, and also an email to let them know when their order is ready. With Maitre'D MealZone, there is no need for manual entry thereby eliminating the risk of making mistakes and saving valuable time and resources.
With built-in multi-language support, Maitre'D is designed to function in English, French and in Spanish. The system can also be configured to use one language when an employee accesses a Point Of Sale workstation and another language when the customer check is printed. For example, the POS workstations can display the information in Spanish when a server is entering an order, but the customer's check will print in English.
The Maitre'D Open Architecture allows for other ISO 8859-1 (LATIN 1) languages to be configured using an XML file. For example, an XML file can be created to support German, Danish or Italian, and easily incorporated into Maitre'D.


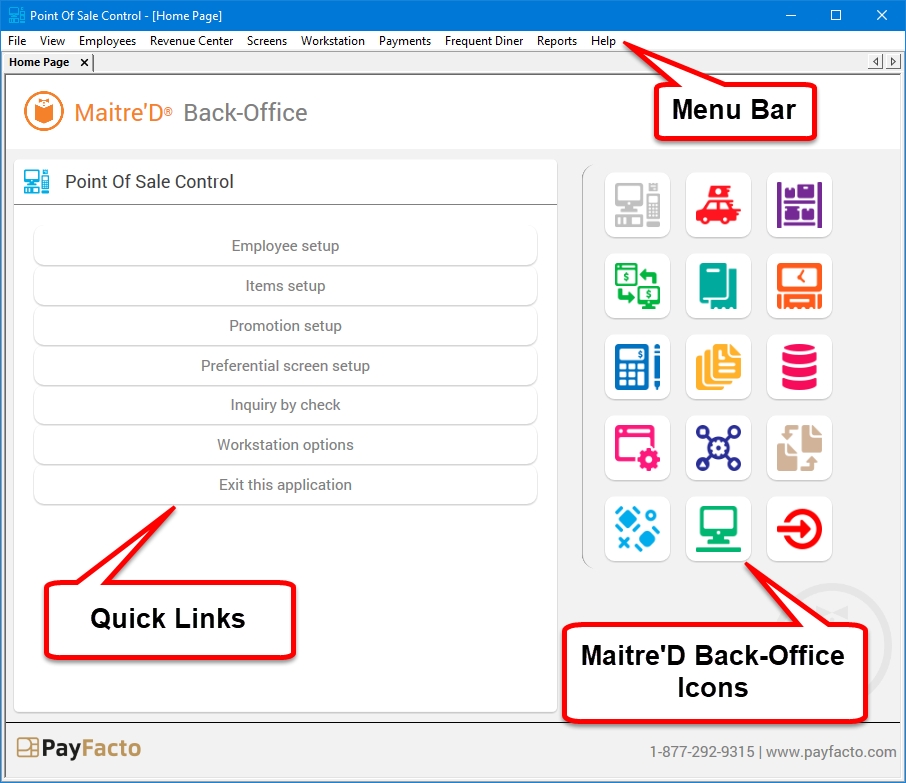
Avoid using combinations of adjacent letters and numbers on the keyboard, such as “qwertyu8”.
Avoid using common words with letters replaced by numbers or symbols, such as “P@ssw0rd” or M1cro$0ft. Unfortunately, hackers know these tricks, too.
Try using 8 or more characters mixed in with capital letters, numbers and special characters. A very effective technique is to choose a phrase which only you would know, then take the first few letters of each word to start building your password. Then, throw in a few numbers and add a special character or two.
Do not use any word from any dictionary in any language. Hackers can use sophisticated dictionary attacks; therefore, any dictionary words are not safe to use as passwords.
Compare your password against "Most Common Password Lists", such as NordPass' annual list: NordPass Top 200 Most Common Passwords. If your password (or a close variant) appears on this kind of lists, change it immediately.
Never use any kind of personal information as your password, such as your spouse’s name, children’s names, birth dates, anniversaries, etc.
Make sure that only key personnel have Distributor or System Owner access. Give lower access to everyone else.
If you have even the smallest doubt that someone may know your password, have it changed immediately.
When an employee quits or is terminated, immediately delete this person’s account from Maitre’D. If you need to keep the account for audit purposes, then immediately change the password.
Strictly enforce passwords management policies with all employees using any part of your computer system.


Start the installation process using one of the following methods:
Before performing the actual installation, the InstallShield Wizard will analyze your system. If required software components are missing, these will be installed at this point. Click the Install button to proceed.
A splash Screen will be briefly displayed.
The InstallShield Wizard will prepare the installation. This could take a few seconds.
The welcome screen appears. Read the welcome message to make sure that the InstallShield Wizard will install an Auxiliary Back-Office. Click Next > to continue the installation.
Read the license agreement and select I accept the terms of the license agreement. Click Next > to continue.
Select the Maitre’D installation folders and click Next > to continue.
Select whether you prefer connecting to the Maitre'D Main Back-Office Server by Machine Name or by IP Address.
a. If Select by Machine Name was selected, you will be asked to select the PC on which the Maitre'D Main Back-Office Server is running. Click OK after making a selection.
b. If Select by IP Address was selected, you will be asked to type the IP address of the PC on which the Maitre'D Main Back-Office Server is running. Click Next > after typing the IP address.
You will be asked to provide a Workstation User ID Number for the Auxiliary Back-Office. This number needs to be unique (not already used by a POS, another auxiliary or another backup server) and between 1 and 63 inclusively.
Files will be installed automatically. This could take a few minutes.
If a service pack is available, installation will start automatically. It is highly recommended to always install the latest service pack available before using the Maitre’D software. Click Yes to begin the installation of the service pack.
IMPORTANT! Installation of the latest service pack available is required to maintain PCI-DSS compliance. Installation of the latest service pack is also required to benefit from the latest feature updates and bug fixes.
a. The InstallShield Wizard will prepare the Service Pack installation. This could take a few seconds.
b. The welcome screen appears. Click Next > to continue the installation.
c. Read the license agreement. Click Yes to agree and continue the installation.
d. Select the path where the BO.INI file can be found. This should not need to be changed, but you can click Browse… to change the folder if required. The service pack files will be installed in the path as defined in the BO.INI file. Click Next > to proceed.
e. Files will be copied. This could take a few minutes.
After files are copied, the InstallShield wizard will remind you that the computer needs to be restarted before Maitre'D can be used. Click the Finish button.
A dialog box will inform you that your computer is about to be restarted. Click OK, and your computer will restart.
WARNING! Do not attempt to override the computer restart. This will damage the Maitre'D files and cause various issues.
After the computer restart, start the Maitre'D Auxiliary Back-Office by double-clicking the icon on the Windows desktop.
Since there is no license installed, you will be prompted to enter a license serial number and a commerce name.
IMPORTANT! Now that the Maitre'D files are in place, it is strongly suggested to configure the Maitre'D Shared Folder correctly, even before activating the license. Please see Configure the Maitre'D Sharing Options
The installation process is now completed. Please proceed to the Maitre’D license activation.
Related Topics
Click the Change Layout button to configure the number of columns and rows to be displayed on this preferential screen.
Use the Save button to save all changes.
Use the navigation keys to cycle through the pages within a preferential screen.
Use the navigation keys to cycle through the pages within a preferential screen.
Click the Change Layout button to bring up the Change layout dialog:
Type the number of columns or use the up/down arrow buttons to increase or decrease the number of columns.
Type the number of rows or use the up/down arrow buttons to increase or decrease the number of rows.
If the maximum of 50 buttons per screen is exceeded, a warning will be displayed on the screen. Reduce the number of rows or columns to bring the number of buttons to 50 or less.
If you create a layout that contains few buttons, the preferential screen may span across multiple pages up to a maximum of 50 buttons. For instance, using a 2 x 5 layout will allow up to 5 pages of buttons (10 buttons per page, for a total of 50).
To add a single button to the screen layout, simply click on the button outline you wish to configure. The button will become highlighted and this will give you access to the Button properties toolbar on the right-hand side of the Screen layout editor.
To learn more on Button Properties, please see the dedicated topic on this matter:
Buttons can be expanded to take up to two slots wide by two slots high.
To expand a button, hover the mouse cursor over the bottom-right corner of the selected button. The cursor will change to a resize arrow.
Click and drag the button's border to the desired width and height. Selected buttons will be highlighted in light red.
Release the mouse button to apply the new button size.
Using this method, you can create:
To delete a preferential screen:
Open the screen to be deleted in the preferential screen editor.
Clear the Description field and click the Save button.
A confirmation dialog box will be displayed. Click OK to delete the screen.
The preferential screen will be deleted, along with all the buttons in contained.
To copy an existing button, simply click the button once to select it. The button will become highlighted with an orange outline. Then, press CTRL + C on your keyboard. You may also right-click the button and select the Copy option from the contextual menu. The button and all of its settings will be copied to the clipboard.
To cut an existing button, simply click the button once to select it. The button will become highlighted with an orange outline. Then, press CTRL + X on your keyboard. You may also right-click the button and select the Cut option from the contextual menu. The button will disappear from the screen, and all of its settings will be copied to the clipboard.
To paste a button that was just copied or cut to the clipboard, click on an empty button or a button which you would like to have replaced, and press CTRL + V on your keyboard. You may also right-click the location where the new button should go and select the Paste option from the contextual menu. The button will be pasted in the selected location.
To delete a button, simply click the button you wish to delete, so that it becomes highlighted with an orange outline. Then, press the DEL key on your keyboard. ou may also right-click the button and select the Remove option from the contextual menu.
You can select multiple buttons and delete them all in one operation. To do so, press and hold the CTRL key on your keyboard. While holding down the CTRL key, click each button to be deleted. Each button will become highlighted with an orange outline. Then, press the DEL key on your keyboard.
To move a button, hover the mouse cursor on the button until the cursor changes to a cross with arrows. Then, click and drag the button. Release the mouse button over the location where you want the button to be.
Date
Select the start date from which guest checks should be saved. Maitre'D will save all the guest checks from the selected date up until the last closed day.
Archive
Click this button to start the check archiving process.
This function is used to recall checks and view essential information about them. Information available includes whether the check is closed or still open, sales, service, tax, tips and gratuity amounts, media types used, etc. Any printed check can be recalled, for as long as the archive exists in the Maitre'D installation folder.
Check Info Area
In addition to the information described below, this area also indicates if a check is currently open or if was re-opened. This information will appear in large watermark letters across the whole section.
Table Number
This field displays the table number that was used for this check.
Server Number
This field displays the server number of the employee responsible for this check. This number corresponds to the Employee Number found in Point of Sale Control / Employees / Employees.
Number of Customers
This field displays the number of customers recorded on the check.
Number of Prints
This field displays the number of times the check was printed.
Revenue Center
This field displays the name of the revenue center used for this check.
Date
This field indicates the calendar date at which the check was started
Order Time
This field indicates the time at which the ordering process started for the selected check.
Check Time
This field indicates the time at which the check was printed for the last time.
Tax Info Area
Description
This column displays the names of all the taxes that were applied to the check.
Taxable
This column displays the amount of taxable sales for each tax on the check
Taxes
This column displays the amount of each tax.
Financial Info Area
Description
This column displays the description of all the payments used to settle the check as well as any special charges, such as service and gratuity. The total sales amount and any non-taxable sales amount are also indicated.
Amount
This column displays amounts corresponding to each of the elements described above.
Invoice Copy Area
The right-hand side of the inquiry by check window displays the check as it was printed, with the addition of payment information if the check is currently closed. The words "Invoice Copy" appear as a watermark across the window.
Current day only
Enable this option to limit the search to current day checks only. Checks from previous days will remain hidden until this option is disabled.
Navigation buttons
First Check
Click this button to go directly to the first (oldest) available check recorded in the system.
Previous Check
Click this button to go to the previous check.
Check Number Field
If the full check number is known, type it in this field to display it without using the navigation keys.
Next Check
Click this button to go to the next check.
Last Check
Click this button to go directly to the last (newest) available check recorded in the system.
Click this button to print the check at the default printer.
Close
Click this button to exit the Inquiry by Check window and return to the Point of Sale Control module.
The Daily Deposit tool is used to register the total cash deposit for a given fiscal day. After all the employees have counted their drawers and floats and have made their employee deposits at the POS, the manager can count and add all deposits and record the total amount for reporting purposes and to ensure that the cash deposited balances with daily cash sales.
Date
Select a date for which to do the daily deposit.
Amount
Enter the amount of the cash deposit.
Use this function to export Sales Items in an XML format for a third party application. For example, use this when creating or updating the database of kiosks or websites used to place orders through the internet.
Maitre'D can read a frequent diner customer information file in XML format. This is useful when opening a new local site and copying the customer base, but the points will not be shared across the chain of restaurants automatically. Each location will count money spent and points earned individually.
Select this function to read the Customer list from the file of another location.
Maitre'D can write a frequent diner customer information file in XML format. This is useful when opening a new local site and copying the customer base, but the points will not be shared across the chain of restaurants automatically. Each location will count money spent and points earned individually.
Select this function to write a new Customer list, ready to be sent to the new location.
This option is driven by the Windows ® operating system. This option allows to select the printer and parameters to be used to print reports.
The Log option allows to start and view operation traces about the Point of Sale Control Module.
Log Level
Three different Log levels are available: Standard, Detail, and Debug. This option is for trouble-shooting purposes and should only be used under the supervision of a Maitre'D reseller.
View
Use the View key to access a log file.


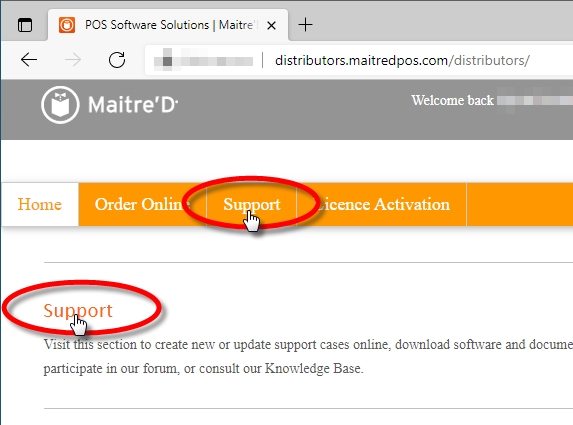
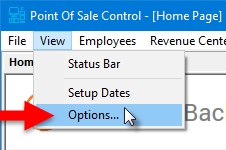
IMPORTANT! Before installing a Maitre'D Backup Server, the main Maitre'D Back-Office must be installed. Its license must also be activated, and the Maitre'D Back-Office Server must be running.
Additionally, the POS software must be installed locally on the PC where the Backup Server will be installed.
Start the installation process using one of the following methods:
, or;
.
Before performing the actual installation, the InstallShield Wizard will analyze your system. If required software components are missing, these will be installed at this point. Click the Install button to proceed.
A splash Screen will be briefly displayed.
The InstallShield Wizard will prepare the installation. This could take a few seconds.
The welcome screen appears. Read the welcome message to make sure that the InstallShield Wizard will install a Maitre'D Backup Server. Click Next > to continue the installation.
Read the license agreement and select I accept the terms of the license agreement. Click Next > to continue.
Select the Maitre’D installation folders and click Next > to continue.
Select whether you prefer connecting to the Maitre'D Main Back-Office Server by Machine Name or by IP Address.
a. If Select by Machine Name was selected, you will be asked to select the PC on which the Maitre'D Main Back-Office Server is running. Click OK after making a selection.
b. If Select by IP Address was selected, you will be asked to type the IP address of the PC on which the Maitre'D Main Back-Office Server is running. Click Next > after typing the IP address.
You will be asked to provide a Workstation User ID Number for the Backup Server. This number needs to be unique (not already used by a POS, another auxiliary or another backup server) and between 1 and 63 inclusively.
Files will be installed automatically. This could take a few minutes.
If a service pack is available, installation will start automatically. It is highly recommended to always install the latest service pack available before using the Maitre’D software. Click Yes to begin the installation of the service pack.
IMPORTANT! Installation of the latest service pack available is required to maintain PCI-DSS compliance. Installation of the latest service pack is also required to benefit from the latest feature updates and bug fixes.
a) The InstallShield Wizard will prepare the Service Pack installation. This could take a few seconds.
b) The welcome screen appears. Click Next > to continue the installation.
c) Read the license agreement. Click Yes to agree and continue the installation.
d) Select the path where the BO.INI file can be found. This should not need to be changed, but you can click Browse… to change the folder if required. The service pack files will be installed in the path as defined in the BO.INI file. Click Next > to proceed.
e) Files will be copied. This could take a few minutes.
After files are copied, the InstallShield wizard will remind you that the computer needs to be restarted before Maitre'D can be used. Click the Finish button.
A dialog box will inform you that your computer is about to be restarted. Click OK, and your computer will restart.
WARNING! Do not attempt to override the computer restart. This will damage the Maitre'D files and cause various issues.
After the computer restart, start the Maitre'D Back-Office Server will attempt to start itself in Backup mode.
Since there is no license installed, you will be prompted to enter a license serial number and a commerce name.
IMPORTANT! Now that the Maitre'D files are in place, it is strongly suggested to configure the Maitre'D Shared Folder correctly, even before activating the license. Please see
The installation process is now completed. Please proceed to the Maitre’D license activation.
Related Topics
The Main Back-Office desktop is the starting point for all tasks that can be carried out at the Maitre'D Back-Office PC. It gives you access to all the Maitre'D modules as well as tools to manage you license options and Back-Office users.
Below is a short description of every module and option that can appear on the Maitre'D Main Back-Office Desktop. For more information on a specific module, please consult the documentation specific to that module.
The Point of Sale (POS) Control module is a core Maitre'D module that is included with every license. It allows restaurants to manage their day-to-day operations from one central location. This is where employee access to the POS workstations is managed and where sales items are created.
Delivery is an optional module that can be purchased separately. It allows restaurants to configure the delivery system, including creating, modifying and deleting customers and street code records.
Electronic Funds Transfer is an optional module that allows Maitre'D to interface with various payment solution providers to process credit and debit card payments.
Inventory Management is an optional module that allows restaurants to keep track of all the stock trough recipes linking ingredients to sales items.
Account Receivable is an optional module that allows restaurants to manage their customer's accounts. Customers can charge meals to their account and restaurants can send statements to their customers.
Time and Attendance is an optional module that allows restaurants to manage employee's schedules, tasks, pay rates, punch-in, punch-out and break times.
The Accounting Interface is an optional module that allows Maitre'D to interface with third-party accounting software such as Quickbooks and ACCPAC.
The report Center is a core Maitre'D module that is included with every license. It allows restaurants to generate reports for all aspects of their business.
Database is a core Maitre'D module that is included with every license. It is mainly used by trained Maitre'D specialists to troubleshoot issues or repair corrupt data.
System Configuration is a core Maitre'D module that is included with every license. It is used to configure general restaurant data such as postal and shipping addresses, and also to configure localization data such as currency symbols, date and time formats, etc. This module is also used to manage backups of the Maitre'D settings and contains advanced configuration options to modify all the prompts contained in the Maitre'D system.
Server Control is a core Maitre'D module that is included with every license. As its name implies, this module contains all the options to manage the Maitre'D Back-Office Server, like starting and stopping the server, performing end-of-days, etc. This module also includes many optional interfaces such as the hotel Interface, gift certificate interface, discount manager, etc.
The Local Workstation icon appears when the Local Workstation option is enabled within the Server Control module. This option allows the main Back-Office PC to be used as a POS workstation.
Converter is an optional module that is included with E-Global and DataBoard solutions. It allows the conversion of data files from sales, management, payroll and inventory in industry-standard database format for consumption by E-Global Corporate Communication Module (CCM), DataBoard, or other third-party solution. It also manages incoming data from E-Global.
Floor Management is an optional module that allows restaurants to manage their floor plans, create sections and view the floor plan with a graphical representation.
The Exit and log on icon is used to quickly close all open Maitre'D Back-Office modules and display the login prompt.


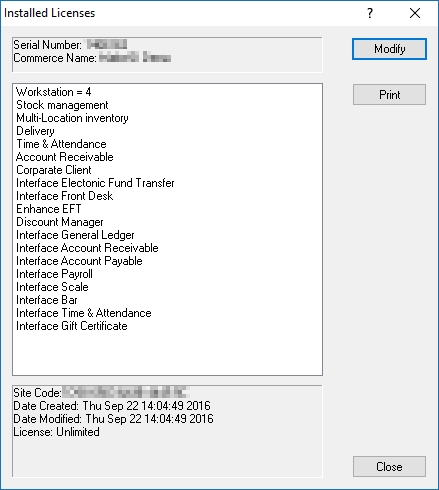
Once a Microsoft operating system (OS) reaches the end of support, customers will no longer receive security updates. The OS may still work with programs and hardware after the sale or support of the operating system has been discontinued. However, the possibility increases that new programs and hardware will not be performant on an older OS. This frequently occurs because the manufacturers of new hardware and software make product-design decisions that take advantage of the increased functionality and features in newer operating systems. These manufacturers may decide to discontinue support of their products on older operating systems as appropriate.
For Maitre'D, this means that the POS system will continue to work after the end of support. However, as updates and features are added to Maitre'D after EOL, the possibility increases that new Maitre'D releases become incompatible with older operating systems. Furthermore, deprecated operating systems represent a liability which may compromise the entire POS system's security.
For more information, please see:
Up to 900 employee records can be created in the Maitre'D system. Each employee can use personalized language and function settings. The various options and settings configured in each employee record will determine how the workstation behaves when the employee logs on to any workstation in the restaurant. If the Time & Attendance module is in use, the employee records from Point of Sale Control can also be linked to the employee file in the Time & Attendance module in order to keep track of punches, overtime, wages, etc.
Each employee record can use up to 5 different functions, such as regular server, bartender, delivery driver, manager, etc. This features provides flexibility by allowing employees to work in different areas of the establishment without having to remember multiple employee numbers or having to carry multiple employee cards.
This option allows the creation and modification of Back-Office access levels.
There are 9 levels of access in Maitre’D. Level Zero is the highest and can access levels 1 to 8. Level 1 may access levels 2 to 8. A lower level access may not have more accesses than a higher level. E.g. Level 5 may only have access to those options available in 6 to 8.


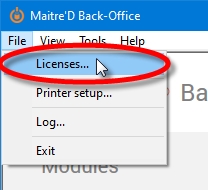
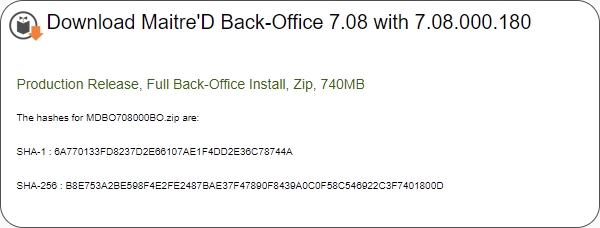
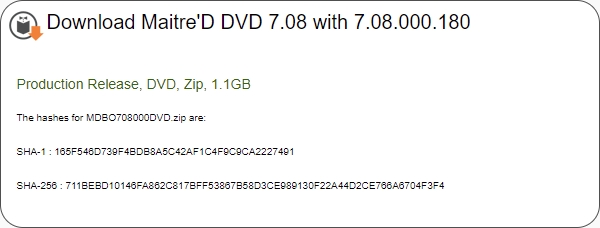
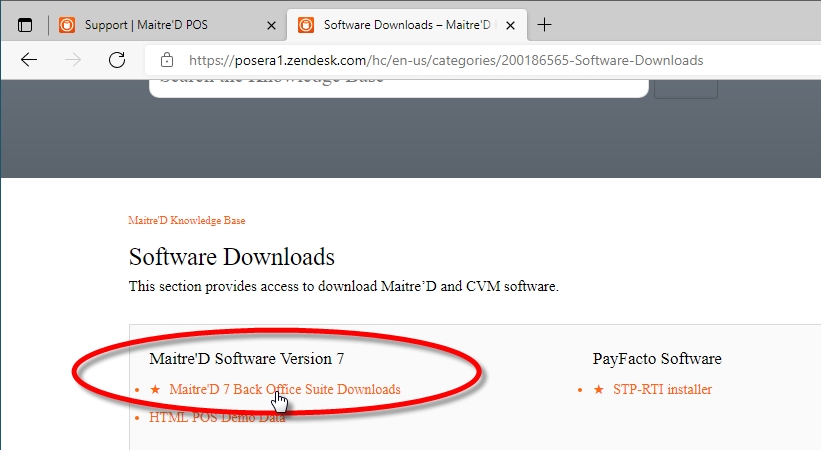
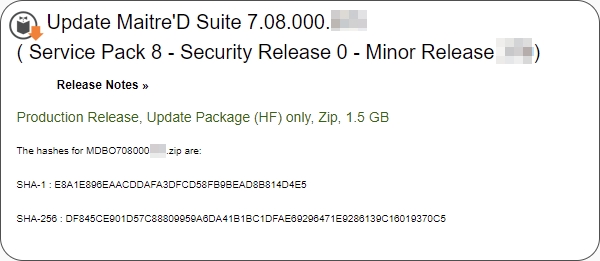
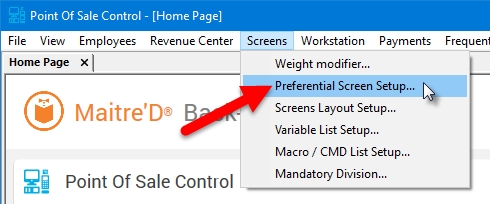
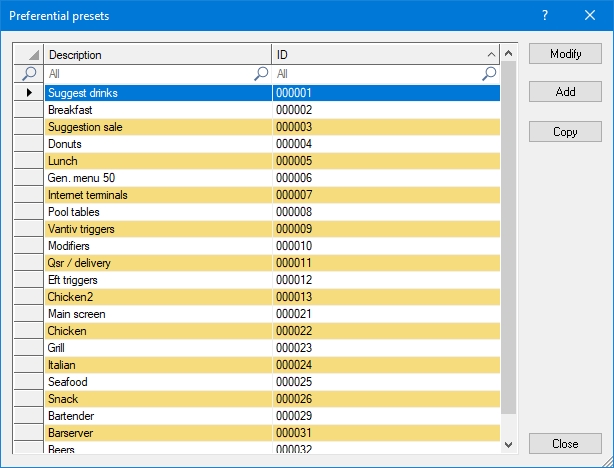
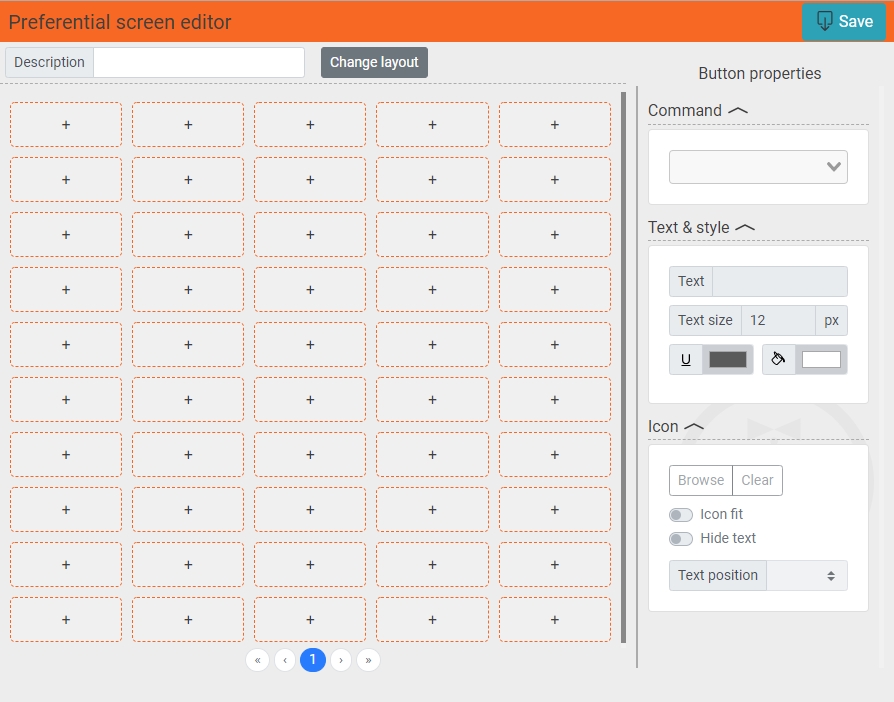
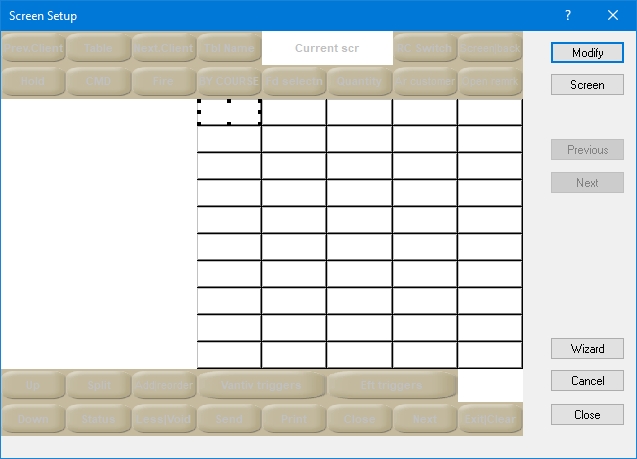
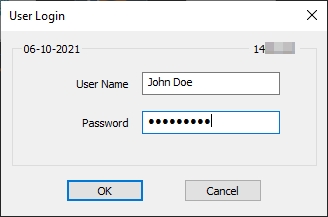

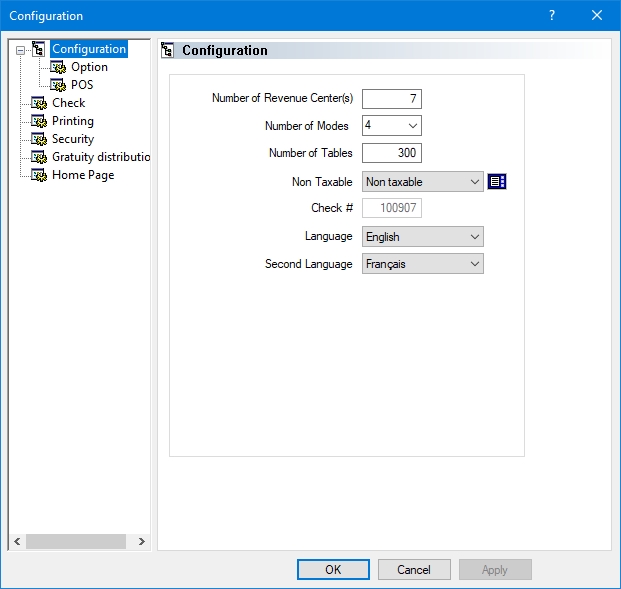
Any system using an unsupported or deprecated operating system automatically falls out of PCI-DSS compliance due to the inability of such systems to meet PCI-DSS Requirement 6.2.
Some operating systems are not supported by PayFacto even though they are still supported by Microsoft. These can be divided in two categories:
Some operating systems never received wide market adoption, such that PayFacto never deemed necessary or profitable to perform any kind of testing on these products. While these operating systems may work with Maitre'D, PayFacto cannot provide any form of guarantee to that effect, as they were never tested. Such products include Microsoft Windows Vista (which is now also EOL) and Microsoft Windows 8 / 8.1.
Microsoft publishes a wide array of Windows editions targeted for home users, educational versions for schools and other specialized versions for niche users. These versions of windows are not supported due to the lack of certain key features, or because of the Microsoft End-User License Agreement (EULA), which may not cover commercial or industrial use cases.
Name
Support Status
(PayFacto)
End-of-Life
(Microsoft)
Microsoft Windows 95
UNSUPPORTED
December 31, 2001
Microsoft Windows NT
UNSUPPORTED
December 31, 2004
Microsoft Windows 98
UNSUPPORTED
July 11, 2006
From the employee records list, select an existing employee record and click the Modify button to change the properties of that employee record.
Click the Print button to generate the Employees Detailed List report. This report is also available from the Report Center module.
To configure a new employee, first select an unused employee record from the list and click the Modify button. This will bring up the employee setup window.
Name
Type in the name of the employee. The name prints on each check and on all reports
Password
A password is required to give the employee access to the tables and offers him/her added protection as he/she logs on to the workstation. The password can comprise as many as five digits.
Special Password
Same as Password except that it is used for specific functions, such as reading, closing of the day, table void, etc., that are done at the workstation by the employee.
Employee
If the Time & Attendance module is available, select the employee file name that will be linked to this employee.
Drawer
Each time a check is closed, the chosen drawer will open. Select the drawer that should be opened for this employee. You can have up to two different drawers per workstation. If you do not have a drawer connected to your workstation, select Not Available.
Tips Declaration
Choose the moment the employee declares cash tips. Below are explanations of the options:
Prior to S.F.R.: Before running the employee's financial report.
Before Punch Out: Before the employee clocks out.
Anytime: Whenever the employee selects the TIP DECLARATION key.(This key is under the FUNCTION key on the workstation).
Not Available: Tip declaration cannot be used.
Workstation
Select the Point of Sales this employee is allowed to work on. Choose ALL for all workstations.
Option
Punch
Enable this option if the Time & Attendance module is in use, to force the employee to punch in before using the Point of Sales.
Training
Enable this option to set the employee in Training Mode. Transactions done in training mode will not affect your sales figures, and EFT media types such as integrated credit cards, gift cards and Receivables are not available to employees in training mode. If required, back-office reports like the Summary of Servers have filters that allows training sales to be reviewed. Make sure that this option is disabled for all regular employees.
Main Language
Enable this option to display messages in the main language of the workstation for this employee. If it is disabled, the messages will be displayed in the secondary language, according to the preference of the employee.
Automatic Release
Enable this option to automatically release a table once all the checks on this table are printed.
Client's Name
Enable this option to display the CLIENT button to this employee at the bottom left of the workstation screen after entering the server number.
This button allows the employee to open a table using the client's name instead of using a table number. This feature is especially useful for a Bartender to start a running bill.
Modify Check Amount
Enable this option to allow the employee to apply a "Pre-auth Capture" to a check closed by a credit card authorization transaction. This is necessary to close the check to an amount that is different from the pre-authorized amount, and also to add tips to the charged amount.
Release Table
Enable this option to allow the employee to release a table and then close the check later. Once the table is released, other employees can use that table number. If this option is disabled, the server can only release a table by settling the check.
Close Button
Enable this option to display the CLOSE button to this employee at the bottom left of the workstation screen after entering the server number. This button will display the list of open and printed checks of this employee. The server can access any of those checks by touching its button. If this option is disabled, the close key is only available from the Order entry screen.
Section
Set the section where this employee's transaction will be reported. Each order by this employee will be reported in the programmed section, regardless on which workstation the order is placed.
Key
If you're using an Azbar system, you can set up the employee key number that the employee will use in that system, so that when the employee pours a drink from the Bar unit, the Azbar system will be able to send the employee key number used to the Back-Office. When the employee orders a drink in Maitre'D, the key number programmed in Azbar will be used to track the number of orders and pours.
Operator
Enable this option to allow the employee to pour drinks.
Open Tables
If you enable this option, the server can print their financial report even though he/she has open tables or checks. A list of all the open tables or checks will print at the end of the report. Otherwise, the server will have to close all open tables or checks before printing the report.
Item Report
When this option is enabled, items sold by an employee will be compiled in the daily sales report. If the option is disabled however, the item sold by the employee will not be compiled (Item by server report).
Sales Unit Report
When this option is enabled, the sales unit (counter) will appear in the daily sales report of a given employee. If this option is disabled however, the sales unit (counter) will not appear in the daily sales report of the employee (Sales units by server report).
Bar Interface Report
When this option is enabled, the bar interface report becomes available to the server. This report will give you the difference between poured and sold quantities.
Key
Type in the key description that you want your employee to see after entering their POS employee number. For example, TABLE # for a table service employee.
Function
There are 12 employee functions available, and each employee can have a maximum of five functions. A short description of each function follows.
Day Off:
Indicates an employee's day off .The employee does not have access to POS.
Server:
This employee function is used for a "Regular Server" in a table service restaurant. Open, Send, Print and Close checks.
Bar Server:
This employee function performs similar to regular servers; however, this employee cannot open/assign tables. The "Bar Server" employee function permits access to the Cash Bar operations. This type of configuration may be used for employees who are taking orders on the floor and picking up their orders at the bar.
Bar Tender:
This employee function performs similar to regular servers. In addition, the "Bartender" employee function permits access to the Cash Bar operations. This type of configuration may be used for employees who work behind the bar in a nightclub.
Manager:
This employee function is designed to facilitate customer service and restaurant management; however, it does not allow the user to open new tables. The "Manager" employee function may be used to perform global sales and employee report readings, voids, collect employee deposits, reprogram the touch screen, change prices, etc. Access to the special menu (FUNCTION) is programmed in the employee configuration. Removing the check mark in the individual functions will restrict access to various manager functions; however, you must assign the Manager function to at least one employee.
Head Server:
This function works like a regular server function but it can also give access to other server's tables.
Delivery:
This employee function is used for taking delivery orders using the telephone number and requires an AT keyboard. If the customer is on file, the system prints the check with complete file information. If the customer is not on file, the system requests billing information. The system verifies if the address is in a delivery zone.
Fast Food:
Enters multiple orders without re-entering the employee number and settles guest checks immediately. The system returns to order entry mode automatically. Checks are programmed to print by request only using the Print Last Check feature. Works in table #0 and remains in table #0 with the same server number.
Delivery Driver:
Close delivery orders. You may use this function with the Driver Delivery option.
Cashier:
This employee function is used in a restaurant that uses central cashier /cashier banking. The "Cashier" employee function is used to close checks printed by the server w/cashier by entering the last four digits of the guest check. This employee may select or change form of payments, reorders item on same check and discounts sale items.
Order:
Settle checks immediately (table #0) or opens regular tables. The system returns to order entry mode automatically and remains in table #0.
Hostess:
This function allows to enter a server's number of buffets when using the Control Buffet option, or to manage the waiting list when using the Floor Management module.
Configuration
Select the appropriate configuration for this employee.
Access
Select the appropriate Access for the employee.
Default
Select the Default Revenue Center for this employee. To assign another function to this employee, select the Function-2 branch and repeat the previous setup.
Screen Layout
Select the appropriate screen layout for this employee.
This section displays information about the employee's Time & Attendance file. You can modify any of those fields and the Time & Attendance files will be updated. For more information on these fields, please refer in the Time & Attendance manual.
Employee
Enter Employee number.
Name:
Enter the employee's Name.
Adress1 Address 2 Address 3
Enter the employee's full address in the 3 lines provided. (number, street name, City, State/Province, Zip/Postal Code)
Area Code
Enter the three digits Area Code of the employee's phone number.
Phone
Enter the employee's phone number.
Password
Enter the employee's Password.
Security
Enter the Security level the employee will have.
Payroll Code
Enter the employee's Payroll Code.
Language
Select the employee's preferred Language.
Supervisor
If this option is enabled, the employee has access to the following functions on the touch screen workstation: Employees on the Clock, Time Clock Adjustments, Turn Time Clock Off. For more information on these functions, refer to the Touch screen Workstation User Guide. Usually, only management personnel have the SUPERVISOR function.
No Punch Edit
Enable this option to prevent an employee with the above Supervisor option enabled to edit punches from the workstation.
Time Card Access
Select this option for the employee to be able to print his time card from the workstation.
Borrowed
If the employee is borrowed from another site of the chain of restaurant, check this field.
This access is restricted to Maitre’D Certified technicians and installers. All other access levels are unable to see or grant this access. The properties of this access level cannot be modified, and except for certified technicians, no one should ever have this access, no matter the reason.
The System Owner access level is restricted to the restaurant management. Only top-level managers should have this access, as this allows them to create and delete other users, as well as take media reports with decrypted credit card PANs and expiration dates. This access cannot see or modify the distributor access.
These levels can be fully customized. Each access level can change the properties of the lower access levels, but not the higher access levels. These levels can be assigned to anyone with a business requirement to use the back-office software. These access levels are typically assigned for price maintenance tasks, report taking, batch closing, etc.
Password
Type in the quick-access password to use to open the Maitre’D Back-Office with this access level. This essentially allows the user to login by typing only a password, without a username.
Enabling the Fast Access option allows you to create scripted tasks for Maitre’D Back-Office users with this access. Instead of gaining full access to all the features of the Maitre’D Back-Office, the user will be forced to perform specific tasks.
Fast Access
Enable this option to enable the Fast Access feature and gain access to the Advanced Access option and Settings button. If this option is enabled without any other option, users will be constricted to their scripted tasks, without any possibility of performing any other action in the Maitre’D Back-Office.
Advanced Access
With this option enabled, users will be able to access all the features of the Maitre’D Back-Office once the scripted tasks have been executed.
Shortcut Access
This option only affects access levels 2 to 8. Enable this option to allow users to use the blue shortcuts throughout the Maitre’D Back-Office.
Settings
Click the Settings button to configure the scripted tasks for this user access.
Select the Maitre’D Back-Office language to be used by this user access. Available choices are English, French or Spanish.
Fast Access Settings are accessed by clicking the Settings button on the Password Editor Screen. This dialog allows you to setup the tasks that users will be able to perform.
Select an existing task and click the Execute button to perform this task.
Click the Add button to create a new task and add it to the list.
Select an existing task and click the Remove button to delete it from the list.
Select an existing task and click the Edit button to change its properties.
Click the Save button to save settings and exit.
Click Cancel to exit without saving.
The access editor allows you to fully customize the Maitre’D Back-Office modules and menu options that users can or cannot access.
The access editor can be used in conjunction with the Fast Access feature to further restrict access to only the features that are necessary for specific employee job function.
A green checkmark indicates that this user can access a module or menu.
A red [X] indicates that this user cannot access the indicated module or menu.
Use the [+] and [-] signs to expand or collapse branches and sub-branches.
Select a branch or a menu option and click the Toggle button to switch between the green checkmark and red [X]. Toggling the top level of a branch will cause all the sub-elements under that branch to be toggled in one operation.
Click the Apply button to save settings without exiting.
Click OK to save settings and exit.
Click Cancel to exit without saving.
Use this tool to create Maitre'D Back-Office user accounts with various access levels, tailored to the user's needs.
Click the New button to create a new user.
Click the Delete button to permanently delete an existing user.
This button is only available to PayFacto technicians to reset an account’s password history for troubleshooting purposes.
Click the UnLock button to unlock a locked account.
Click the Discard button to clear information that was entered during the process of creating a new user.
Click OK to commit changes and exit out of the User Editor tool.
Click Apply to commit changes without exiting from the User Editor Tool.
Click Cancel to exit out of the User Editor tool without saving changes.
User Name
Type a user name for this account. The user name should allow the person logging in to be identified.
Access Level
Choose an access level for this user:
Distributor
This access is restricted to Maitre’D Certified technicians and Resellers. All other access levels are unable to see or grant this access.
System Owner
The System Owner access level is restricted to the restaurant management. Only top-level managers should have this access, as this allows them to create and delete other users, as well perform any administrative task on the Maitre’D system.
Access Levels 2 through 8
These access levels can be fully customized. These access levels can be used for anyone requiring access to the Maitre’D back-office software.
Password
Type in a password for the new user. The password must be at least 7 characters, and comprised of a mix of letters and numbers.
Confirm Password
Confirm the password for this new user.
User must change password at next login
Enable this option to force the user to change the login password during the next login. This option should be used for every new account and afterwards if there is a doubt that an account password may have been compromised.
Maitre’D will automatically force users to change their passwords every 90 days. Also, Maitre’D keeps a history of each user’s passwords so that the last 4 passwords cannot be re-used. In case a password becomes compromised or if you have any doubts to that effect, you can force any user to change their password by checking the User must change password at next login box in their account’s properties. Of course, you need to be logged in with Distributor or System Owner access in order to do this.
After 5 unsuccessful login attempts, Maitre’D will automatically lock the user account. To unlock an account, someone with Distributor or System Owner access needs to login, access the user editor, select the locked account and click the Unlock button.
Locked accounts are marked with a padlock icon.


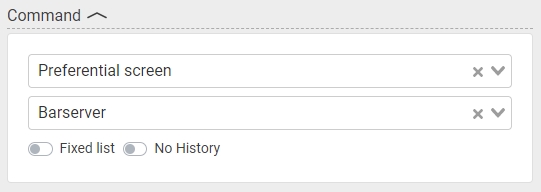

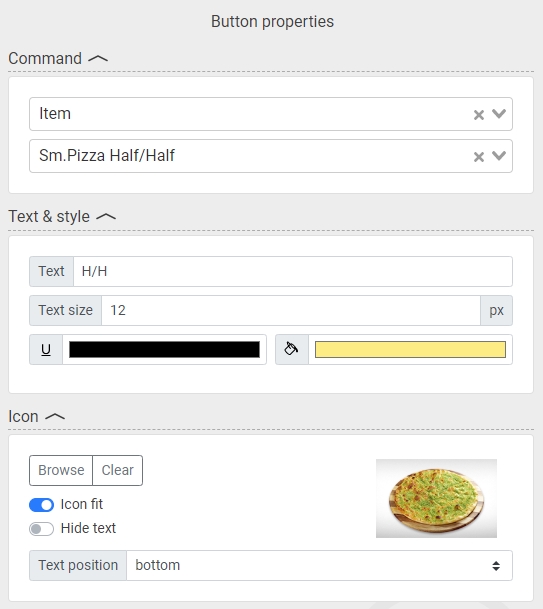


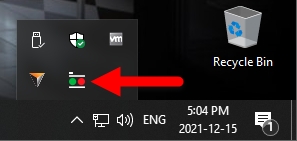
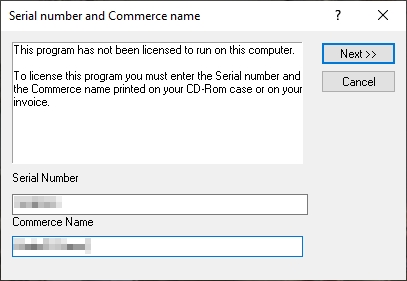
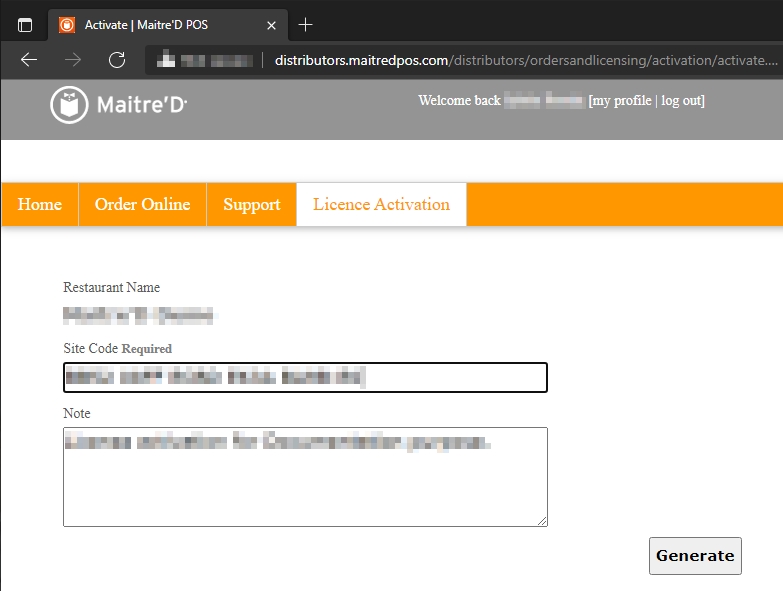
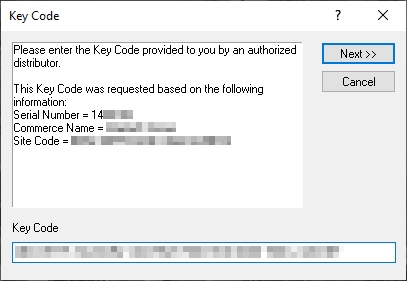
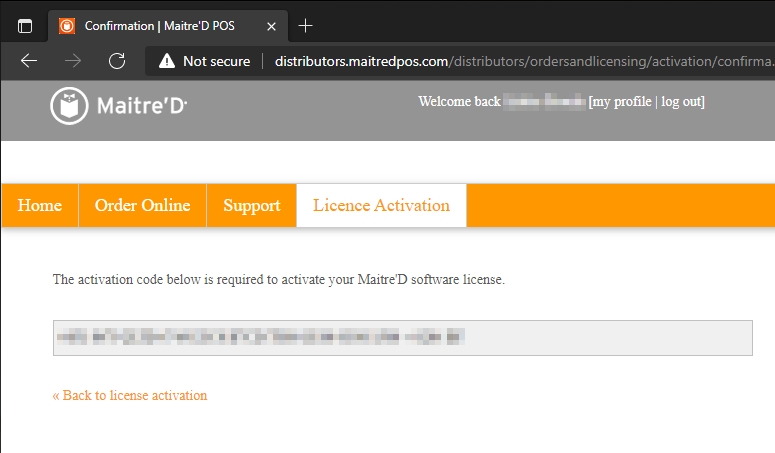
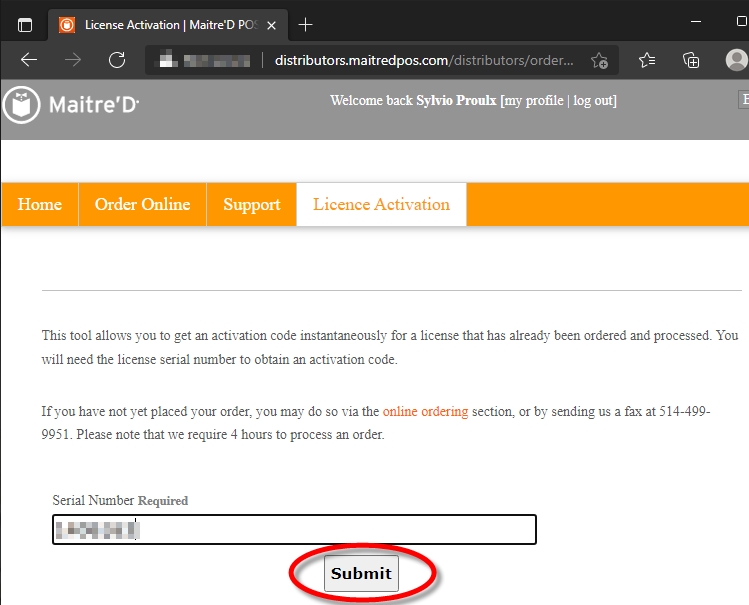
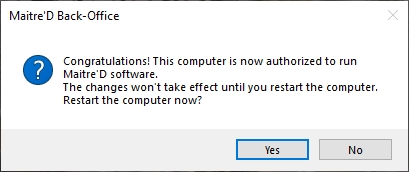
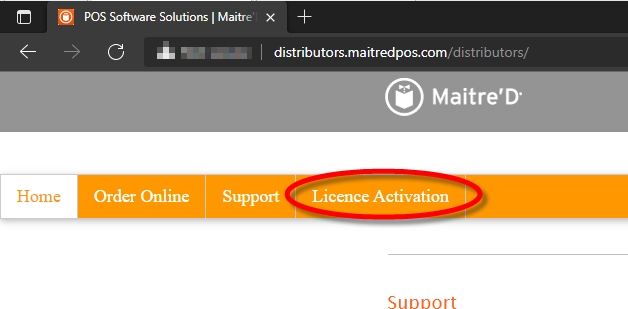
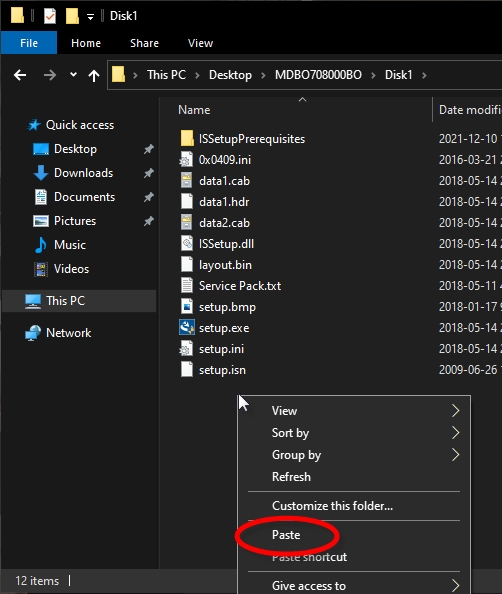
The Cash Discount feature offers an incentive for customers to use cash by discounting the credit card processing fees from the bill total.
In environments where applying a surcharge to cover credit processing fees is not permitted, merchants will typically mark up all their prices to pass down these costs to their customers. In doing so, customers who don't use card payments end up paying as much as those using credit cards, even if they don't generate processing fees for the merchant. With the cash discount feature, customers using cash get rewarded by a small reduction on their check total.
Microsoft Windows 98 SE
UNSUPPORTED
July 11, 2006
Microsoft Windows millennium Edition
UNSUPPORTED
July 11, 2006
Microsoft Windows 2000
UNSUPPORTED
July 13, 2010
Microsoft Windows XP (ALL EDITIONS)
UNSUPPORTED
April 8, 2014
Windows Embedded for Point of Service (WEPOS) 1.x SP3
UNSUPPORTED
April 12, 2016
Microsoft Windows Vista (ALL EDITIONS)
UNSUPPORTED
April 11, 2017
Windows Embedded POS Ready 2009
UNSUPPORTED
April 9, 2019
Microsoft Windows 7 Starter
UNSUPPORTED
January 14, 2020
Microsoft Windows 7 Home Basic
UNSUPPORTED
January 14, 2020
Microsoft Windows 7 Home Premium
UNSUPPORTED
January 14, 2020
Microsoft Windows 7 Professional
UNSUPPORTED
January 14, 2020
Microsoft Windows 7 Enterprise
UNSUPPORTED
January 14, 2020
Microsoft Windows 7 Ultimate
UNSUPPORTED
January 14, 2020
Microsoft Windows POSReady 7
UNSUPPORTED
October 12, 2021
Microsoft Windows 8 (ALL EDITIONS)
UNSUPPORTED
January 10, 2023
Microsoft Windows 8.1 (ALL EDITIONS)
UNSUPPORTED
January 10, 2023
Microsoft Windows 8 Core
UNSUPPORTED
January 10, 2023
Microsoft Windows "RT"
UNSUPPORTED
January 10, 2023
Microsoft Windows 10 Home
UNSUPPORTED
October 14, 2025
Microsoft Windows 10 Education
UNSUPPORTED
October 14, 2025
Microsoft Windows 10 Pro Education
UNSUPPORTED
October 14, 2025
Microsoft Windows 10 IoT Core
UNSUPPORTED
October 14, 2025
Microsoft Windows 10 Mobile
UNSUPPORTED
October 14, 2025
Microsoft Windows 10 Mobile Enterprise
UNSUPPORTED
October 14, 2025
Microsoft Windows 10 Team
UNSUPPORTED
October 14, 2025
Microsoft Windows 10 "X"
UNSUPPORTED
October 14, 2025
Microsoft Windows 2000 Server
UNSUPPORTED
July 13, 2010
Microsoft Windows Server 2003
UNSUPPORTED
July 14, 2015
Microsoft Windows Server 2008
UNSUPPORTED
January 14, 2020
Microsoft Windows Server 2008 R2
UNSUPPORTED
January 14, 2020
Microsoft Windows 10, version 1507
UNSUPPORTED
May 9, 2017
Microsoft Windows 10, version 1511
UNSUPPORTED
October 10, 2017
Microsoft Windows 10, version 1607
UNSUPPORTED
April 9, 2019
Microsoft Windows 10, version 1703
UNSUPPORTED
October 8, 2019
Microsoft Windows 10, version 1709
UNSUPPORTED
April 14, 2020
Microsoft Windows 10, version 1803
UNSUPPORTED
November 10, 2020
Microsoft Windows 10, version 1809
UNSUPPORTED
November 10, 2020
Microsoft Windows 10, version 1903
UNSUPPORTED
December 8, 2020
Microsoft Windows 10, version 1909
UNSUPPORTED
May 11, 2021
Microsoft Windows 10, version 2004
UNSUPPORTED
December 14, 2021
Microsoft Windows 11 Home, version 21H2
UNSUPPORTED
October 10, 2023
Microsoft Windows 11 Education, version 21H2
UNSUPPORTED
October 8, 2024
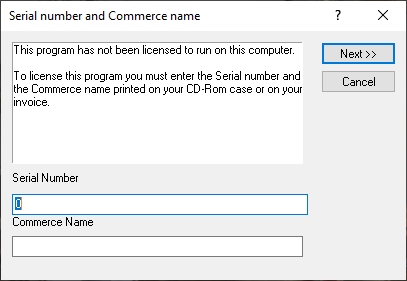
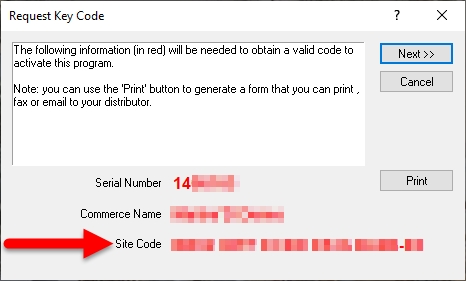
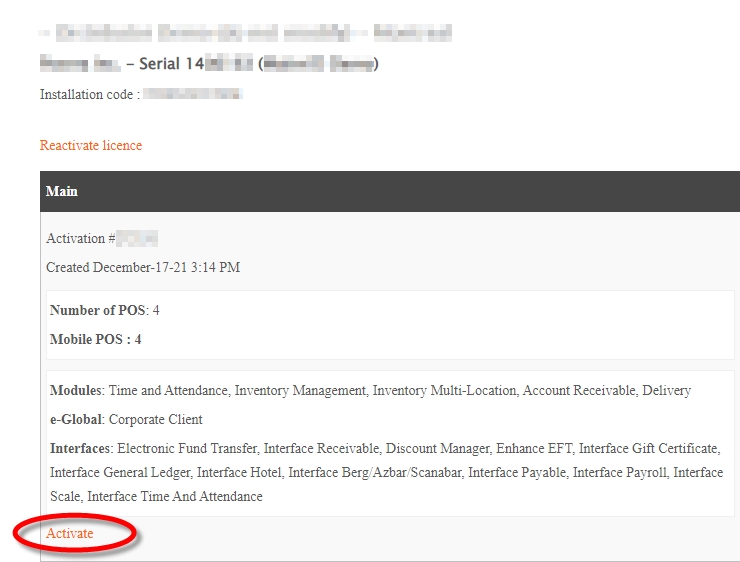
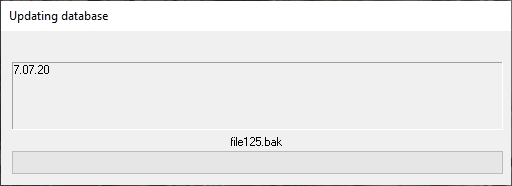
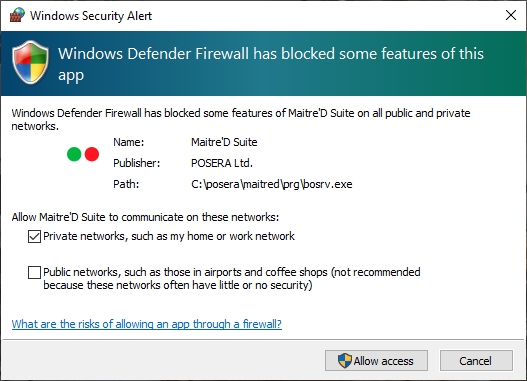


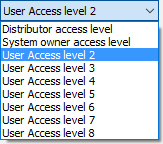
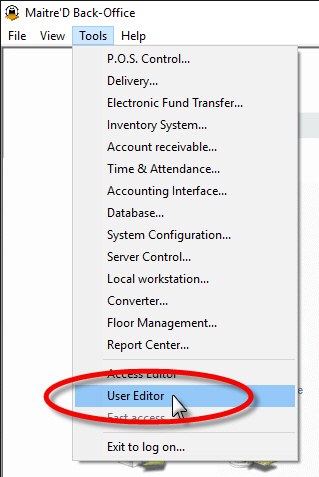
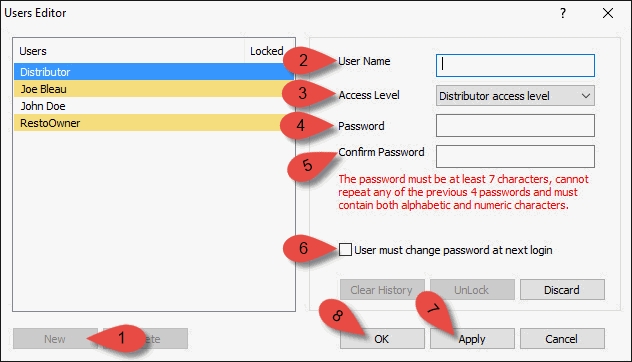
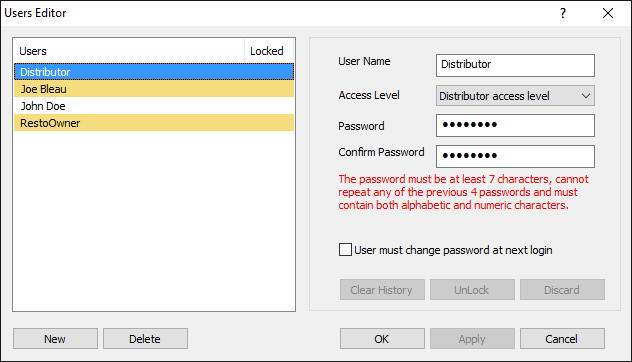

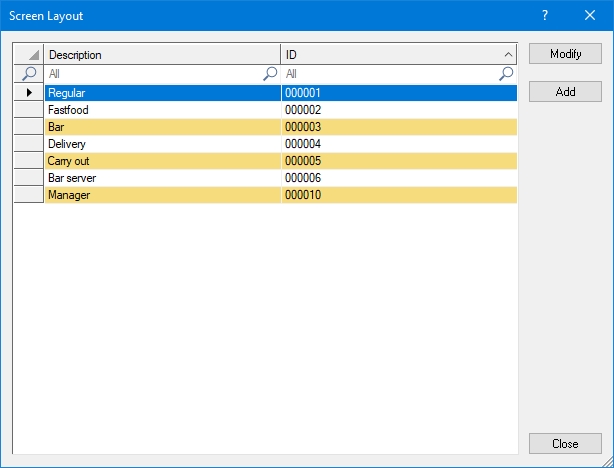
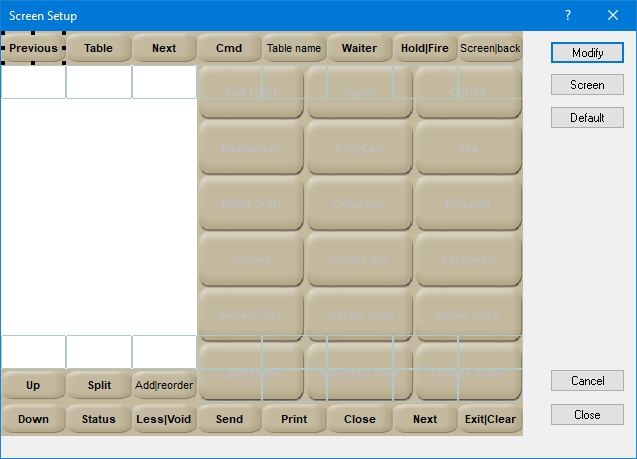
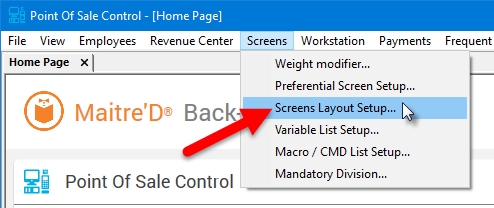
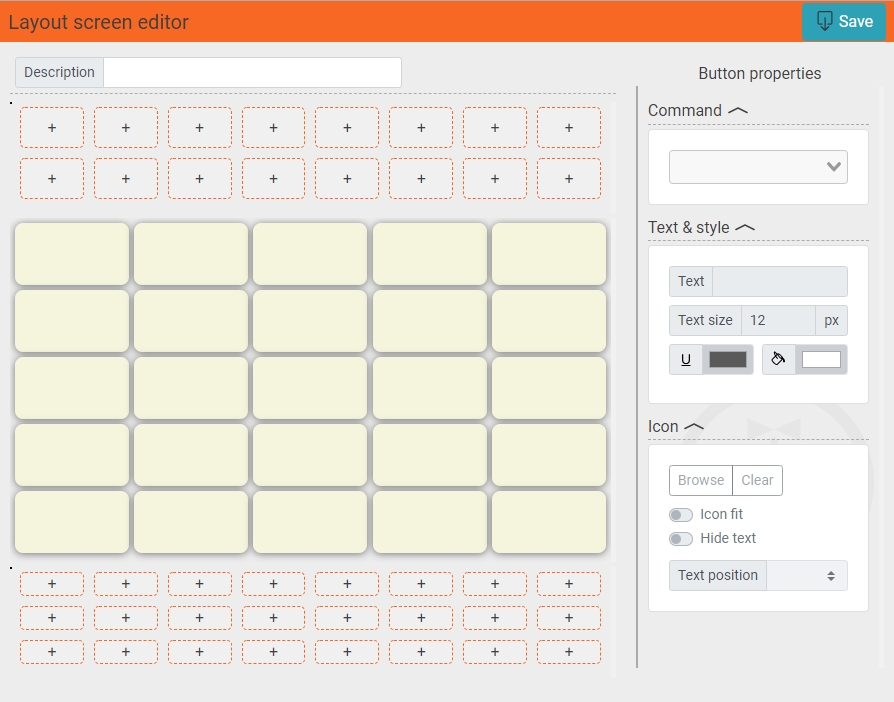
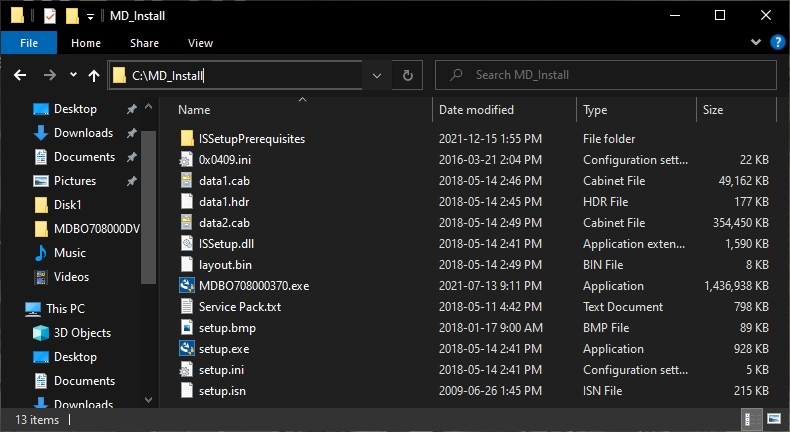
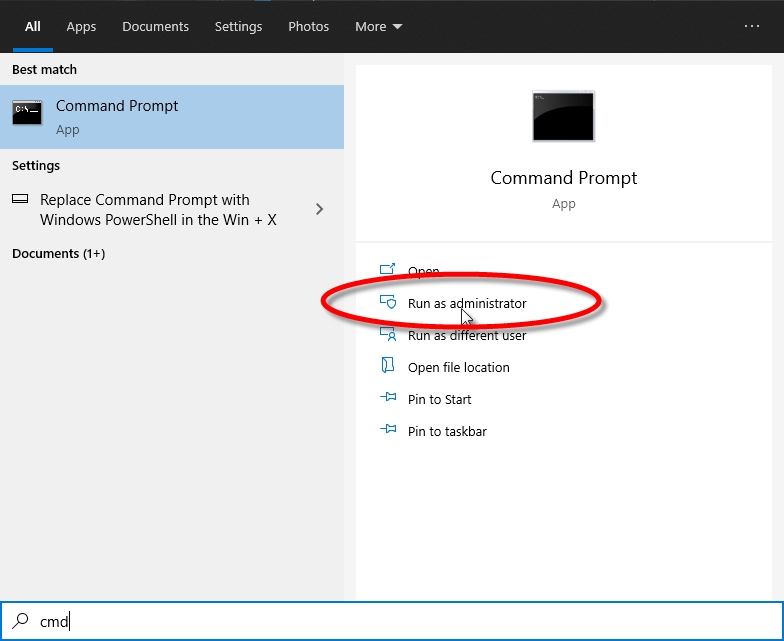
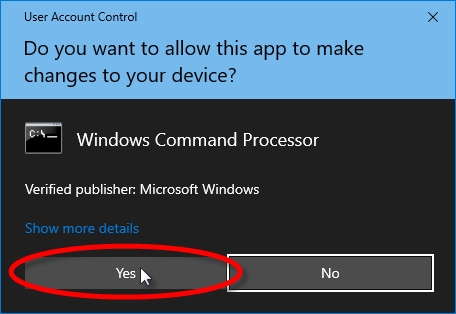


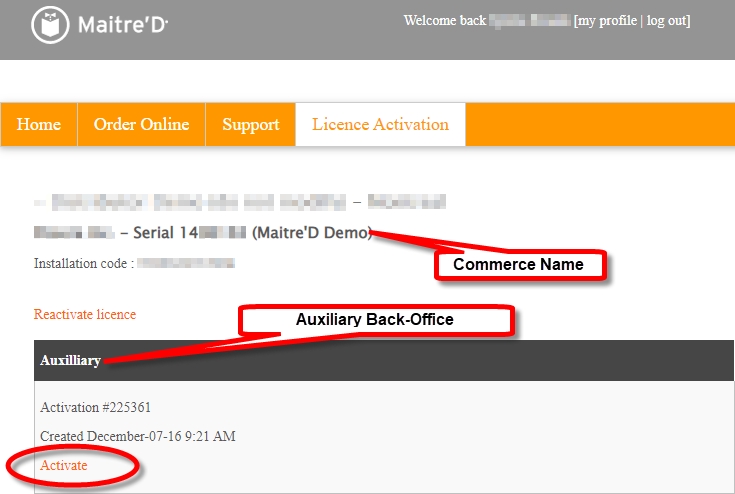


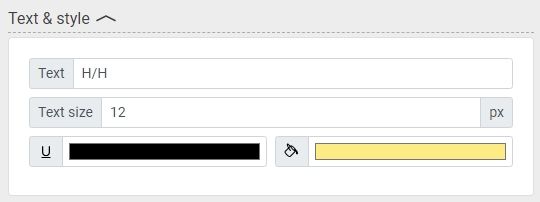
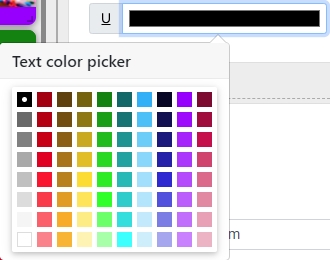
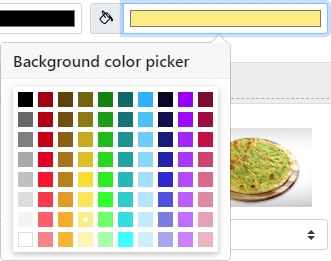
Currently, the Cash Discount feature is only available for U.S. merchants using the Retail Terminal Interface for Semi-Integrated Payment Applications (RTI-SIPA) plugin (EFT-RTI v 1.0) for Electronic Funds Transfer (EFT) processing.
Maitre'D version 7.08.000.400 or later, with Electronic Funds Transfer Interface.
RTI-SIPA version 1.31.05 or later.
In order to use Cash Discount, the Electronic Funds Transfer module mush be configured to use the EFT-RTI v 1.0 Interface.
Please find detailed instructions on installing and configuring the Retail Terminal Interface for Semi-Integrated Payment Applications (RTI-SIPA) plugin (EFT-RTI v 1.0) for Electronic Funds Transfer (EFT) processing here:
To enable the Cash Discount feature, 3 main steps need to be carried out in the Point of Sale Control module:
Create a discount in Point of Sale Control / Payments / Promotions...
Enable the discount for all required employee configurations in Point of Sale Control / Employees / Configuration / [select config] / Discount.
Associate the discount to the Cash media type in Point of Sale Control / Payments / Media Types... / Cash / Media Type.
Logon to the Maitre’D Back-Office with appropriate credentials. (Distributor or System Owner)
Start the Point of Sale Control module.
Click on the Payments menu and select Promotions...
The list of available promotions will appear. Click Add to create a new promotion.
A blank promotion configuration screen will appear. Configure the various branches as follows:
Description
Type a meaningful description for this discount. This will appear on Receipts, POS Reports as well as Back-Office Reports.
Category
Select Item by division for the purpose of Cash Discount.
Type
Select [ % ].
Application
Select Fix.
Rate
Enter the percentage of discount to apply when a customer pays with cash.
On Total
Enable this option to make sure that the Cash Discount is calculated on the check total rather than on each individual item.
Activation Date (optional)
Select the date from which this discount will become active. If the setting is left to its default setting, the discount will be active immediately.
Expiration Date (optional)
Select the expiration date from which this discount will become inactive. If the setting is left to its default setting, the discount will never expire.
Auto. item select
Enable this option. This will force the discount to apply on all ordered items and is necessary for the Cash Discount to function.
Multiple
Enable this option to allow the cash discount to be used at the same time as other discounts.
Make sure that the promotion is available all the time, so that it always applies.
Repeat these steps for every Revenue Center:
Enable the Available checkbox.
Click the Select All button to enable all divisions.
Proceed to the next Revenue Center.
Click OK to save changes. The new promotion will appear in the list.
Click Close to exit this window and return to the Point of Sale Control module. This completes the promotion creation process.
From the Point of Sale Control module, click the Employees menu and select Configuration...
The list of available Employees General Configurations will be displayed. Select a configuration that requires access to the Cash Discount and click the Modify button.
The configuration opens. Click on the Discount branch and enable the Cash Discount by ticking the checkbox next to the discount.
Click OK to save your changes. The Employee Configuration window will close, and you will be back at the Employees General Configurations list.
Select the next configuration that requires access to the Cash Discount and repeat the process until all required configurations have access to the Cash Discount.
Once all required configurations are given access to the Cash Discount, click Close on the Employees General Configurations list.
From the Point of Sale Control module, click the Payments menu and select Media Types...
The list of available media types will appear. Select the Cash media type and click the Modify button.
The Cash media type properties will open on the Media Type branch. The Cash Discount options are located near the bottom of the window:
Cash Discount
Select the discount that will be applied when a customer pays with cash.
Cash Discount Prompt
Configure the text that will be displayed on the POS screen and on the guest check to identify the total to be paid if the customer elects to pay with cash. the default text is "Cash Total".
Click OK to save changes. This will close the media type window.
Click Close on the media type list. This will bring you back to the Point of Sale Control module.
You may now close the Point of Sale Control module and log out of the Maitre'D Back-Office.
This topic describes the general workflow of the Cash Discount feature at the Point of Sale.
At the order screen, the Cash Total line is displayed immediately above the usual TOTAL line. This provides a visual cue to the employee to keep track of how much the customers can save on their purchase if they pay using cash instead of using a payment card.
Blank Order Screen
Order Screen with ordered items
The Cash Total value is also displayed at the Print Check screen:
At the Payment screen, only the full amount (without the cash discount) is displayed until the cash payment is fully applied:
Payment Screen
Applying amount
Cash Payment Applied
The Cash Total value is printed on the guest check to inform the customer of the potential savings involved when paying with cash. If the customer does pay with cash, the check total will be adjusted on the receipt, and the Cash Discount amount will be printed on the receipt.
Guest Check
Receipt
In POS reports such as employee readings and the Main reading, the amount discounted through Cash Discounts is displayed along other discounts.
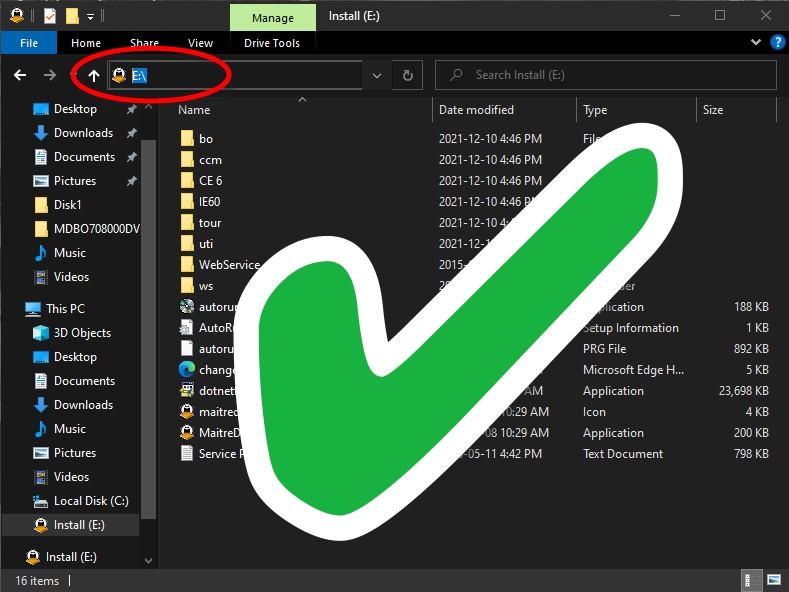
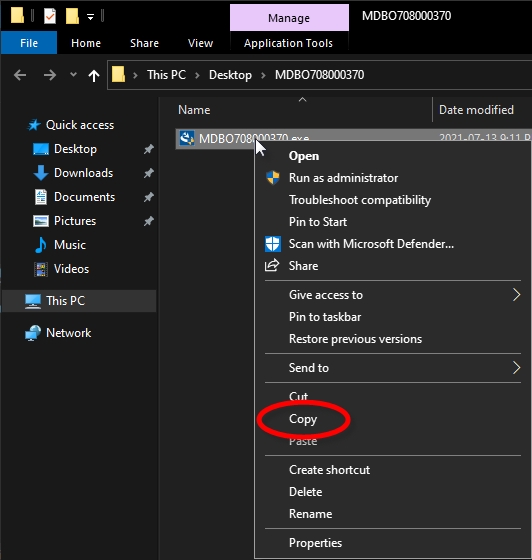
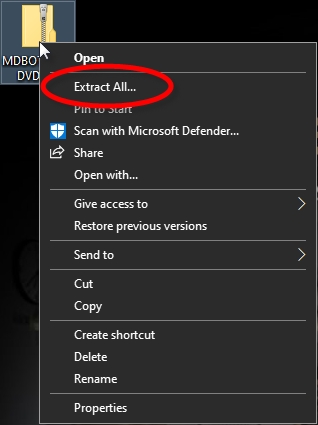
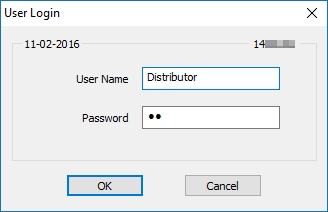
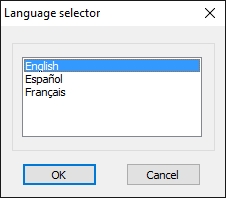
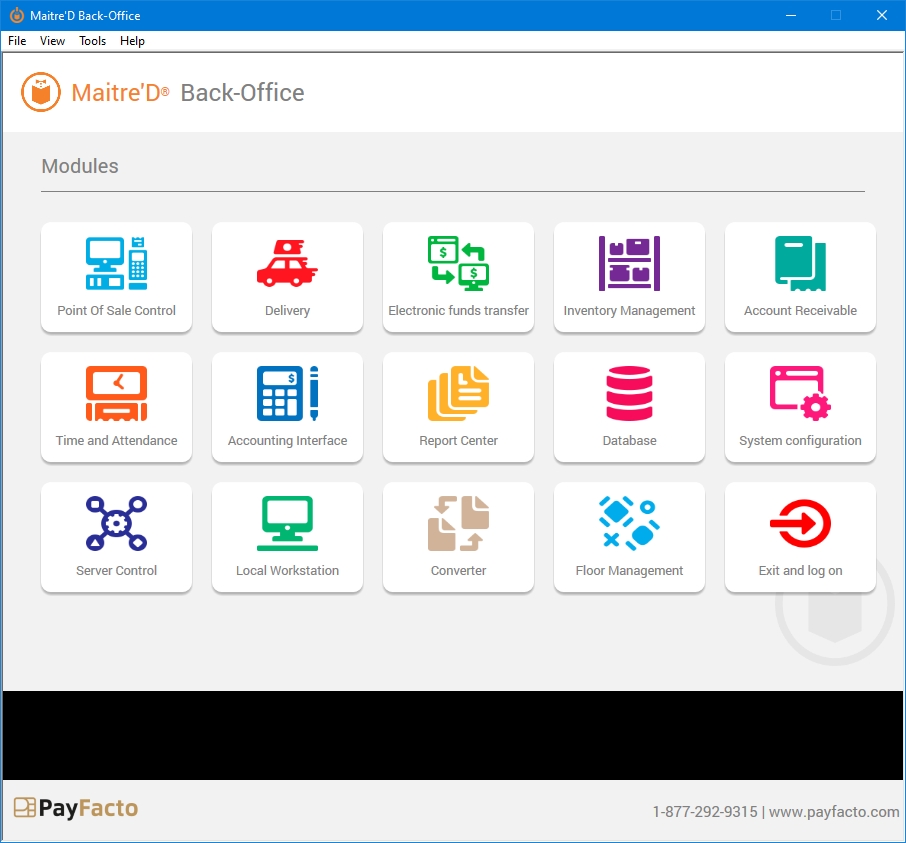


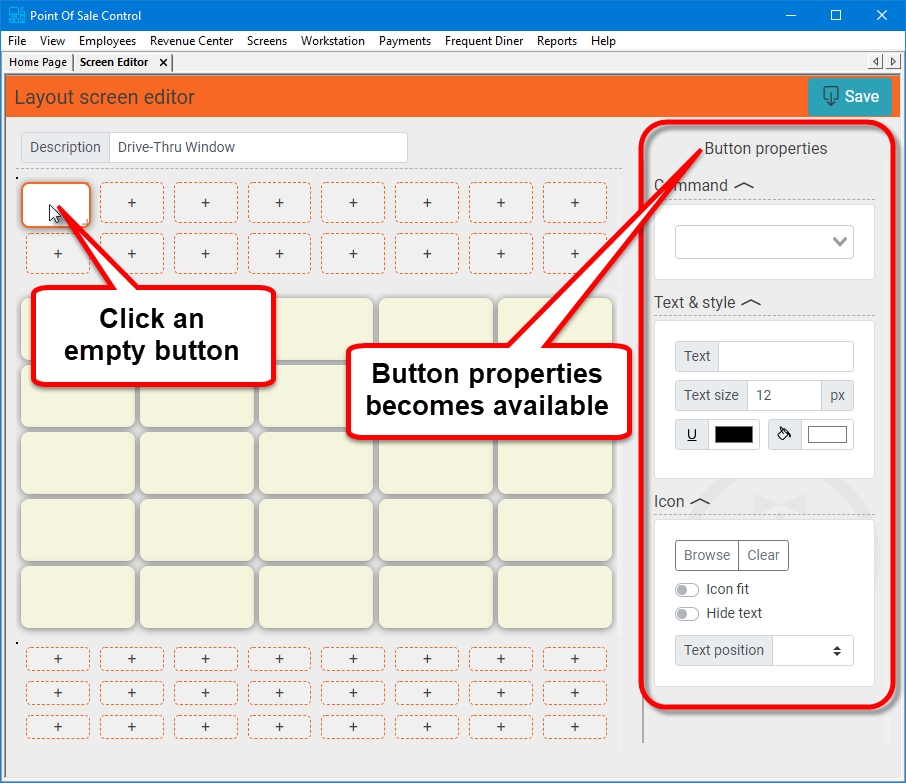
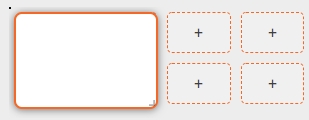
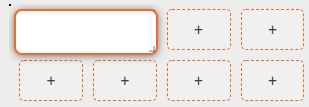

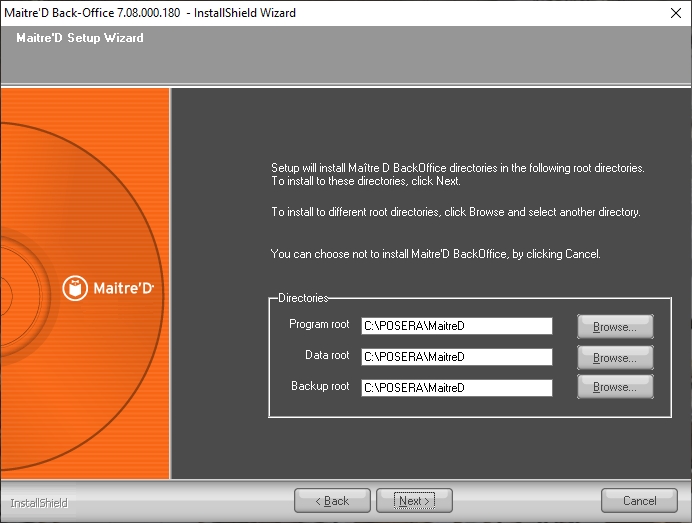
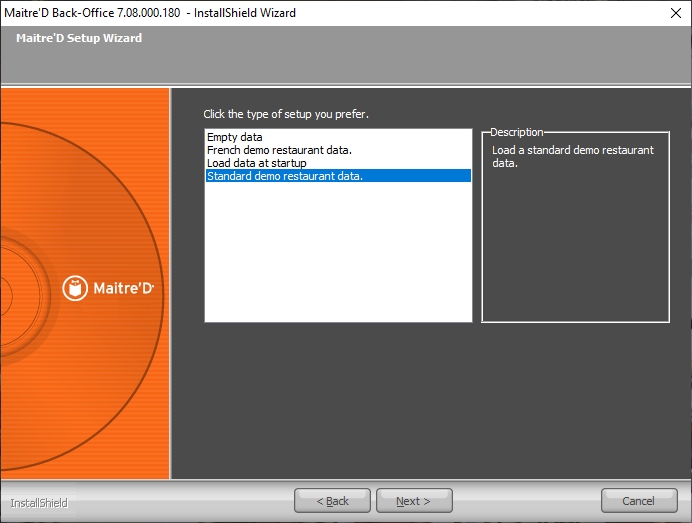
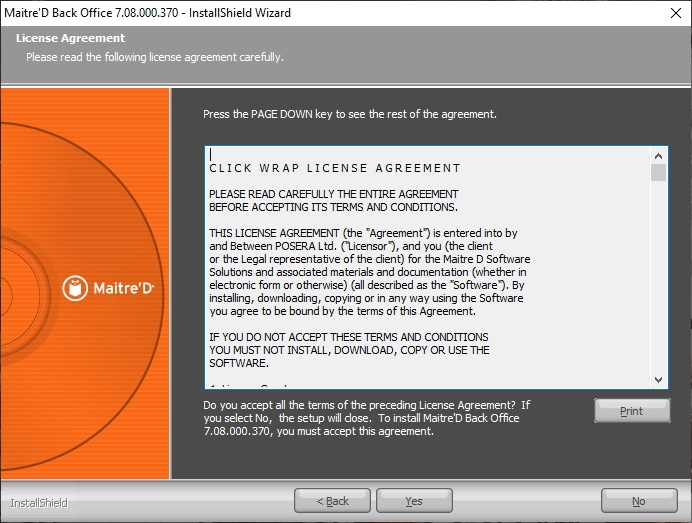
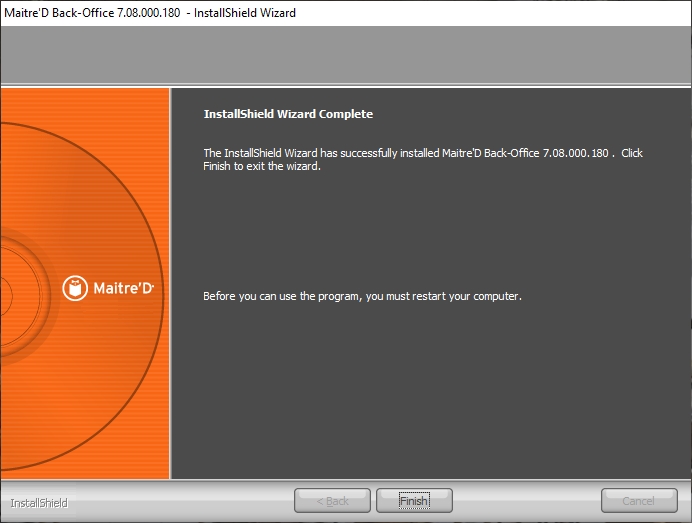
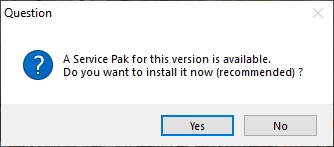
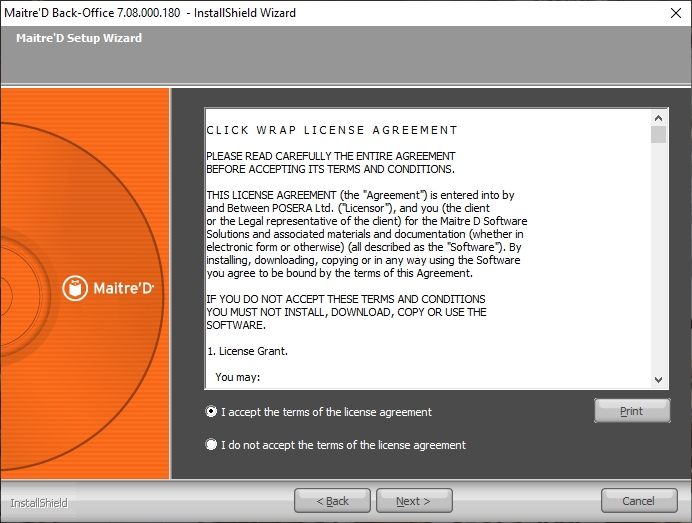
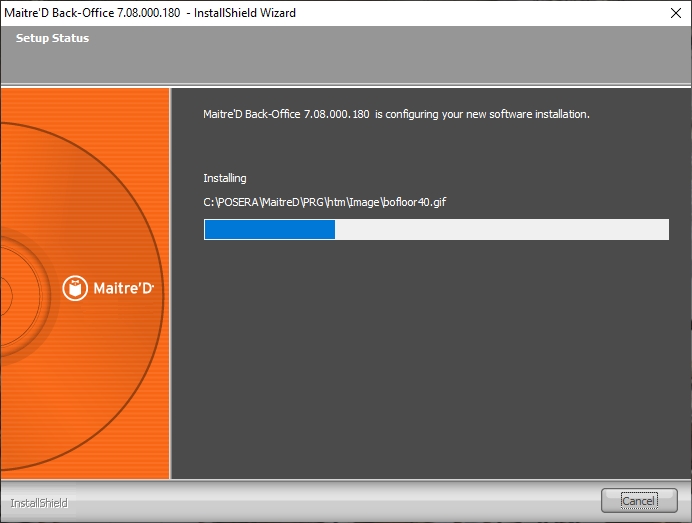
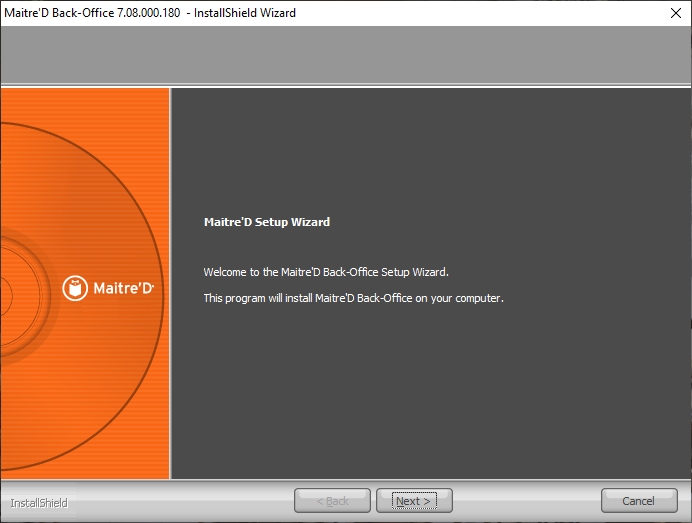
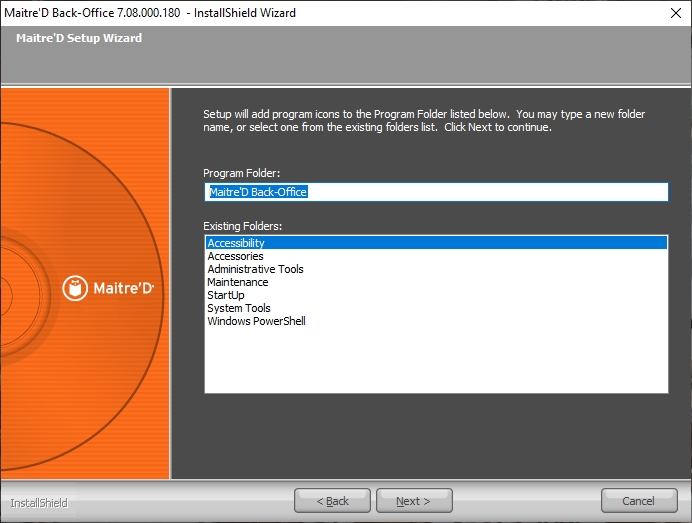

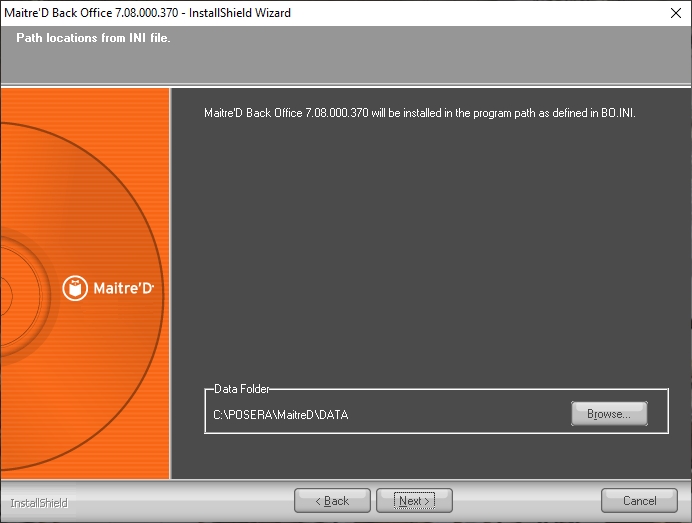
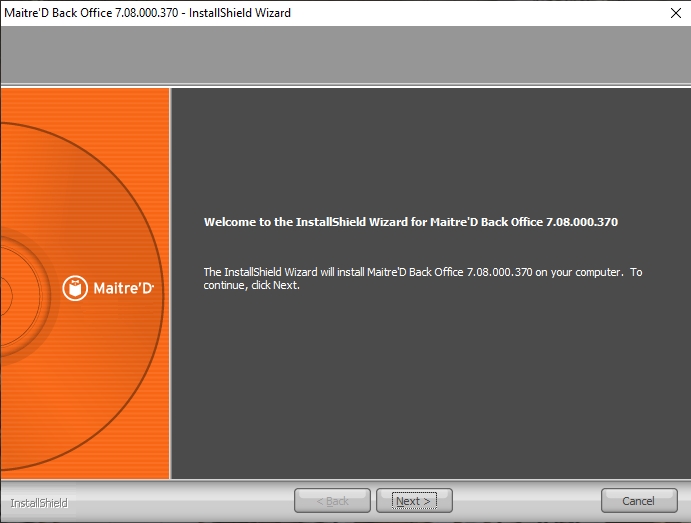
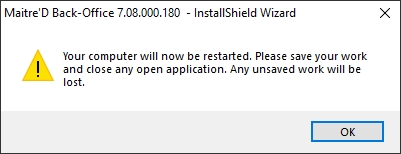
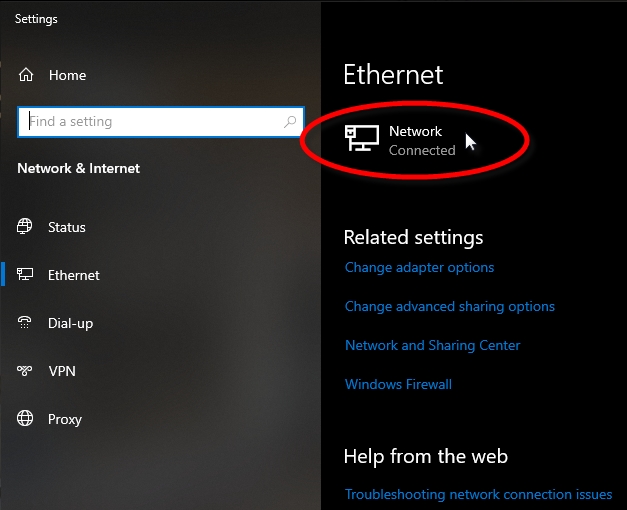
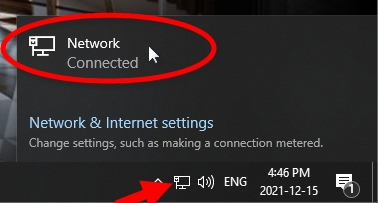
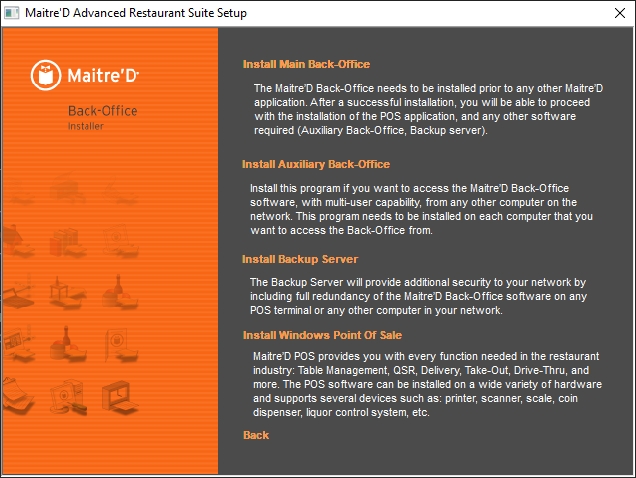
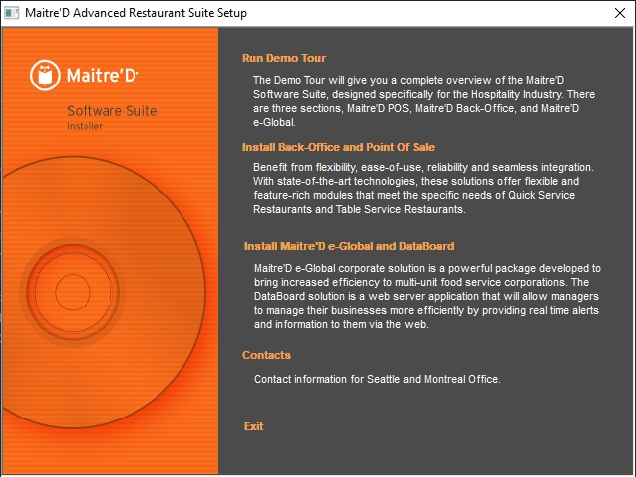


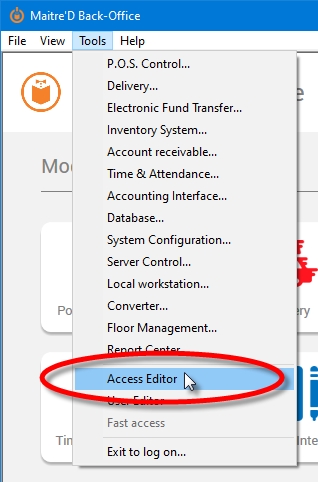


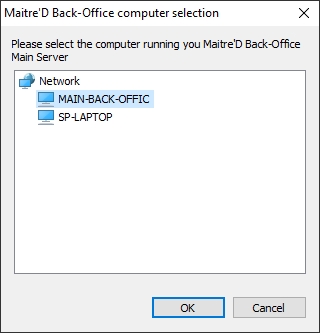


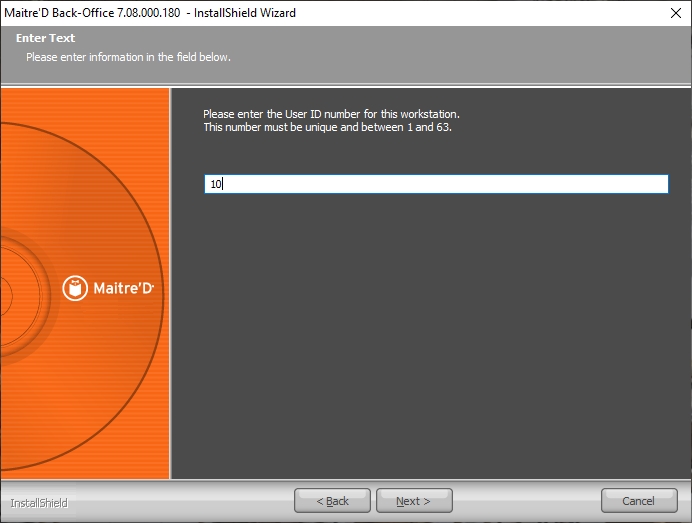
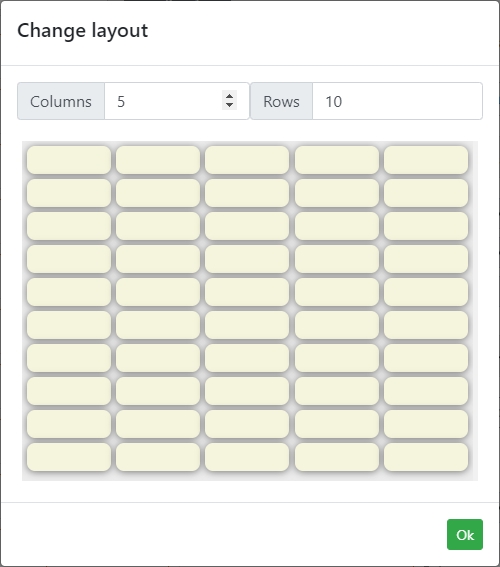
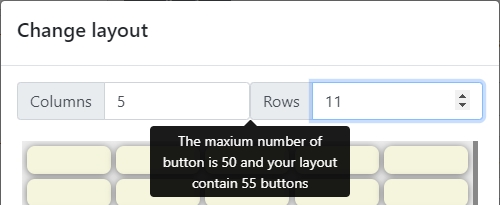
Before creating taxes, make sure that you understand your local tax laws and regulations. Also, remember that every tax you create in Maitre'D needs to belong to a Tax Category. Therefore, at least one Tax Category must exist in your Maitre'D Database.
Logon to the Maitre’D Back-Office with appropriate credentials. (Distributor or System Owner)
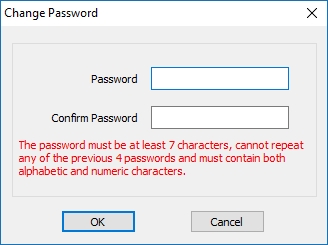
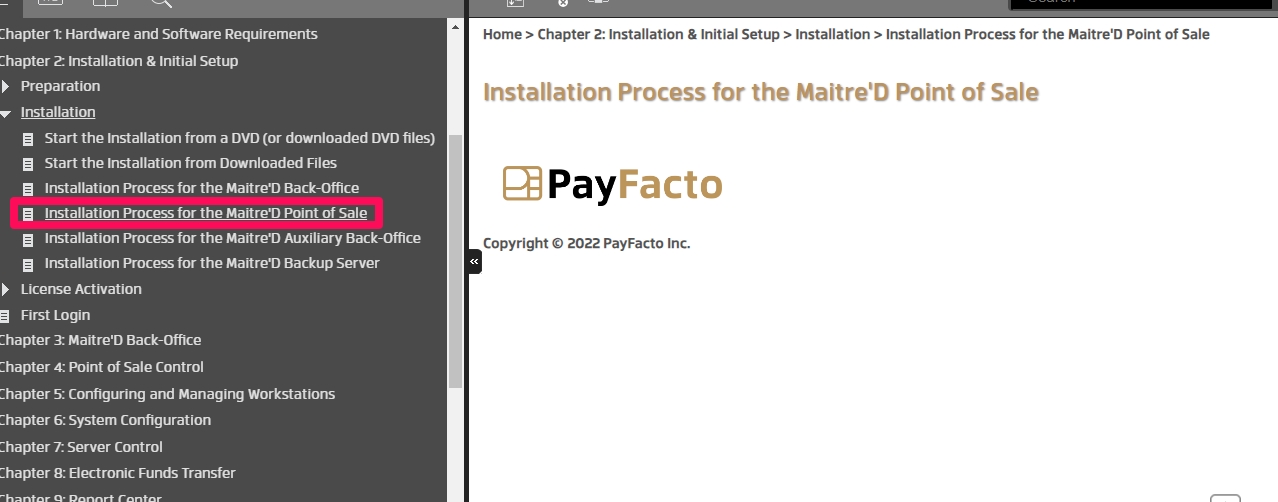


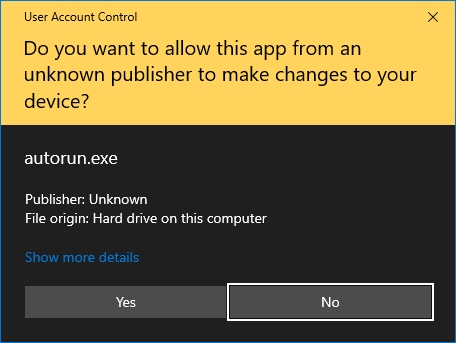
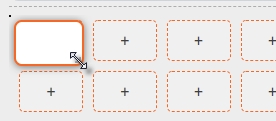
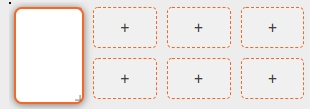
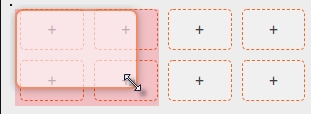


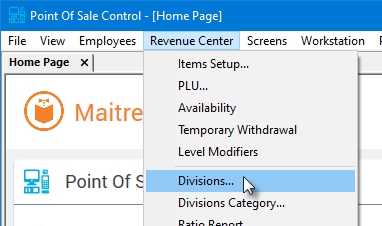
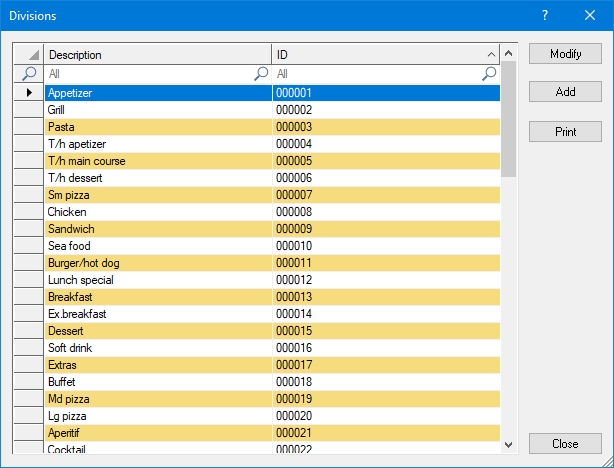
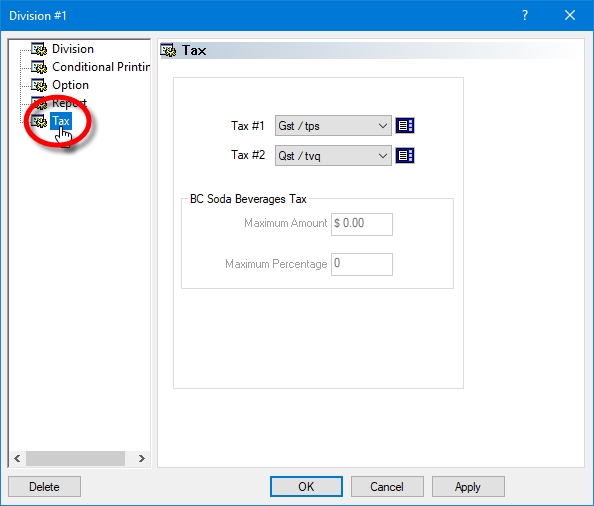

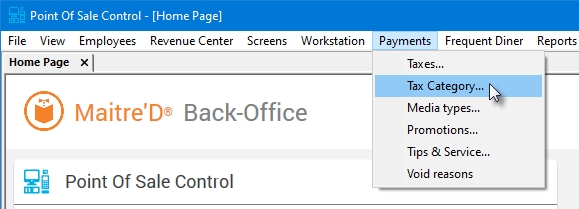
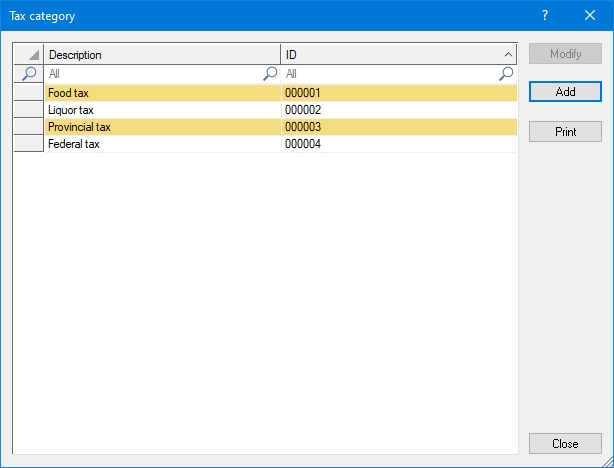
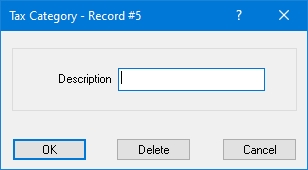
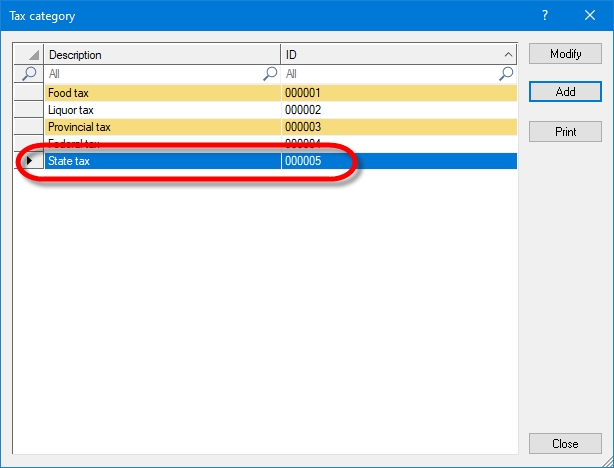
Start the Point of Sale Control module.
Click on the Payments menu and select the Taxes... option.
The list of existing taxes will be displayed:
Select an existing tax and click the Modify button to edit the tax settings.
Click the Add button to create a new tax from scratch.
Click Print to generate a report of all available taxes, which can be printed.
Click Close to close this window and return to the Point of Sale Control module.
When a new tax is created or when an existing tax is modified, the tax properties open on the Setup branch.
Description
Type a meaningful description for the tax. You can use up to 20 characters. This description will appear on guest checks, POS reports and back-office reports.
Category
From the drop-down list, select the tax category which this tax belongs to.
Fiscal Identification
This field is used in Russia only. Type in the VAT entry number to use from the VAT table of the OPOS driver for the Spark 617TF fiscal printer.
Tax Type
This field is used in the province of Québec, Canada only. Select the appropriate tax type for the Québec Sales Recording module (SRM). If you are not located in Québec of if you are exempt from using the SRM, set this drop-down list to Undefined.
Click Delete to remove this tax and return to the list of taxes.
Click OK to save changes and exit.
Click Cancel to exit without saving.
Click Apply to save changes without exiting.
Fixed Tax branch:
Fixed Tax
Enable this option if the tax being configured is a fixed amount rather than a percentage.
Amount
Enter the fixed amount to be charged as tax.
Click Delete to remove this tax and return to the list of taxes.
Click OK to save changes and exit.
Click Cancel to exit without saving.
Click Apply to save changes without exiting.
Rate branch:
Current
This section contains information on current tax parameters.
Rate
Type in the percentage of tax to apply to taxable items. The rate can be anything from 0% to 100%, with a precision up to 5 decimal places.
Minimum Taxable
Type in the minimum sales amount to reach for this tax to apply. If the sales amount is lower than the amount entered in this field, Maitre'D will not calculate taxes on this sale.
Special Mode Tax
From the drop-down list, select the replacement tax that will apply when using modes with the Special Tax option enabled. This is especially useful for jurisdictions where a different tax rate is applied based on dine-in or take-out food.
Upcoming
This section contains information on future tax parameters. Use this section if an upcoming tax modification is expected in the near future. This will ensure that the new parameters automatically come into effect at the prescribed date.
Rate
Type in the new percentage of tax that will apply to taxable items. The rate can be anything from 0% to 100%, with a precision up to 5 decimal places.
Minimum Taxable
Type in the new minimum sales amount to reach for this tax to apply. If the sales amount is lower than the amount entered in this field, Maitre'D will not calculate taxes on this sale.
Date
Select the date at which the new tax parameters will become effective.
Click Delete to remove this tax and return to the list of taxes.
Click OK to save changes and exit.
Click Cancel to exit without saving.
Click Apply to save changes without exiting.
Tax Table branch:
Use Tax Table
Enable this option to use a tax table instead of a tax rate.
Repeat At
Enter the tax amount corresponding to the start of the repetitive cycle of the tax table. A repetitive cycle is when the range of cents taxed starts a consistent pattern. Maitre'D will repeat the tax brackets table starting with this tax amount, after the tax amount set in the Last Entry field below.
Last Entry
Enter the tax amount corresponding to the last position of the table to be filled. Maitre'D will repeat the tax brackets table after this tax amount, starting with at the tax amount set in the Repeat At field above.
Click the Tax Bracket... button to access the tax table and modify each entry in the table. You will need the tax table provided by your local tax authorities for this task.
Select an entry from the tax table and click Modify to edit its properties.
Click OK to save changes and exit.
Click Cancel to exit without saving.
When you click Modify on a tax bracket, configure as follows:
Tax
The amount of tax to be applied for each bracket.
From
As the [To] amount of each tax level is entered, the lowest [From] amount of the next tax level is automatically set to this top amount plus one cent.
To
Enter the highest amount on which this tax level applies.
Click Delete to remove this tax and return to the list of taxes.
Click OK to save changes and exit.
Click Cancel to exit without saving.
Click Apply to save changes without exiting.
Options branch:
Inclusive
Maitre'D uses this field with a tax rate, but not with tax tables. If you select this option, Maitre'D will include the tax on the check's item line, but it will separate the tax from the total at the bottom of the check as well as on the Back-Office reports. If this option is disabled, Maitre'D will not include the tax in the item's price.
Here is an example of how the inclusive tax works: The check shows a tax of 10 cents on a soft drink that is priced at $2,00, as it appears on the item line. However, the Back-Office report will show that the item's actual price is $1.90 and the tax 10 cents (which amounts to the $2.00 found on the item line of the check). Therefore, when setting the price of the sales item, you will need to set the soft drink price at $2.00.
Check Total
If you enable this option, Maitre'D will compare the total amount of all items on the check to the minimum taxable amount. Otherwise, Maitre'D will compare the total amount of all items associated with a given tax to the minimum taxable amount.
Rounding
Enable this option to round to the nearest cent. For example, 3.2 cents will be rounded to 3 cents, and 5.8 cents will be rounded to 6 cents. If this option is disabled, Maitre'D will cut off the last digits to form a whole cent. For example, 3.2 cents will be truncated to 3 cents, but 5.8 cents will also be truncated to only 5 cents.
Gross Method
This field applies to inclusive tax only. If this option is enabled, Maitre'D will use the gross method to calculate inclusive tax; otherwise, Maitre'D will use the net method to find out the inclusive tax. Here are a few examples of how the gross and net methods work:
The Gross Method
The item price is $10.00. The tax is 7%. Maitre'D uses this formula to determine the tax: 10.00 * .07 = $ 0.70
The Net Method
The item price is again $10.00 and the tax is 7%. Maitre'D uses this formula to determine the tax: 10.00 - (10.00 /1.07) = $ 0.65
Separate Printout
If this option is enabled and more than one tax is applied to a check, Maitre'D will print each amount on a separate line along with a description. If it is disabled, Maitre'D will accumulate the total of all taxes and print the total on one line with the description "TAX". For Inclusive taxes, this option only determines wether the total included tax amount is printed or not.
Tax Before Quantity
This field applies to inclusive tax only. If this option is enabled, Maitre'D will calculate the tax for a single item, and then multiply the tax by the quantity. If it is disabled, Maitre'D will calculate the tax but only after the price has been multiplied by the quantity.
BC Soda Beverage Tax
Enable this option to activate the calculation method that is specific to the Soda Beverage tax applicable in the Canadian province of British Columbia. Enabling this option also allows you to use the BC Soda Beverages Tax options located in the Tax branch of each division.
Click Delete to remove this tax and return to the list of taxes.
Click OK to save changes and exit.
Click Cancel to exit without saving.
Click Apply to save changes without exiting.
Apply Tax On branch:
Taxes the Tax
This option is effective only if 2 taxes apply on a division, and only for the tax defined in the Tax #2 field of that division.
If this option is enabled, Maitre'D will calculate the amount of the second tax based on the sales amount plus the first tax. For example, suppose you have to apply a federal tax then a state tax to sales items. If you enabled this option, Maitre'D will include the federal tax in the amount used to calculate the state tax. If this option is disabled, Maitre'D will only calculate the state tax using the sales amount.
Taxable Discount
Enable this option to calculate the tax before any discounts are applied on a check. If this option is disabled, taxes will be calculated on the discounted price.
Taxable Service
Enable this option to calculate the tax on service charges added to the check. If this option is disabled, the Service Charge will not be taxed.
Tax on Delivery Charges
Enable this option to calculate the tax on Delivery Charges added to the check. If this option is disabled, the Delivery Charge will not be taxed.
Tax on Charged Discount
Enable this option to calculate the tax on charged discounts added to the check. If this option is disabled, the charged discounts will not be taxed.
Taxable Gratuity
Enable this option to calculate the tax on gratuity added to the check. If this option is disabled, the gratuity will not be taxed.
Click Delete to remove this tax and return to the list of taxes.
Click OK to save changes and exit.
Click Cancel to exit without saving.
Click Apply to save changes without exiting.
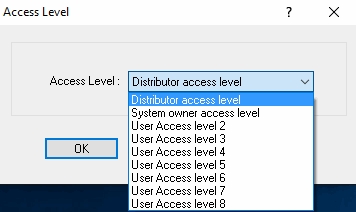
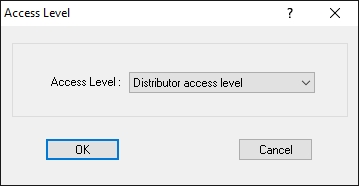
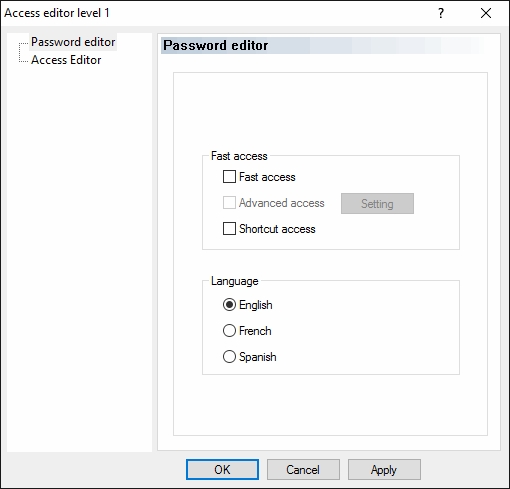
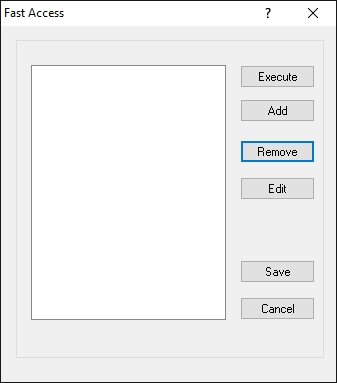


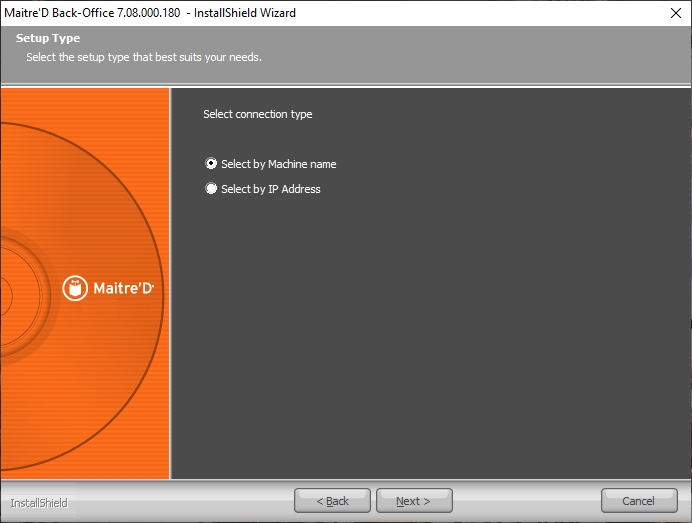

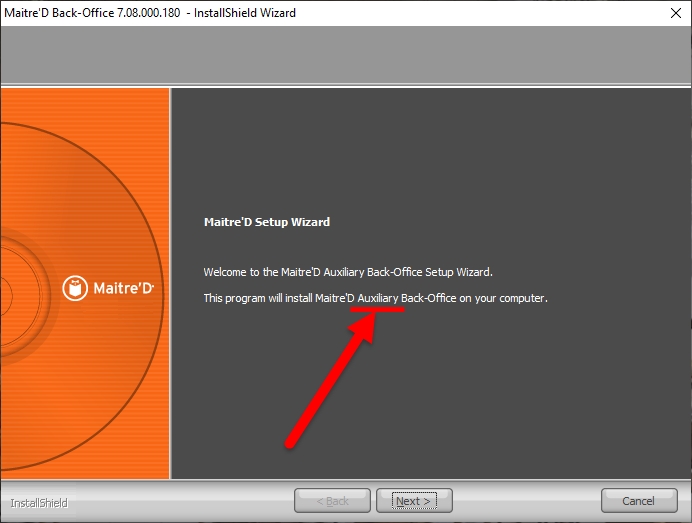

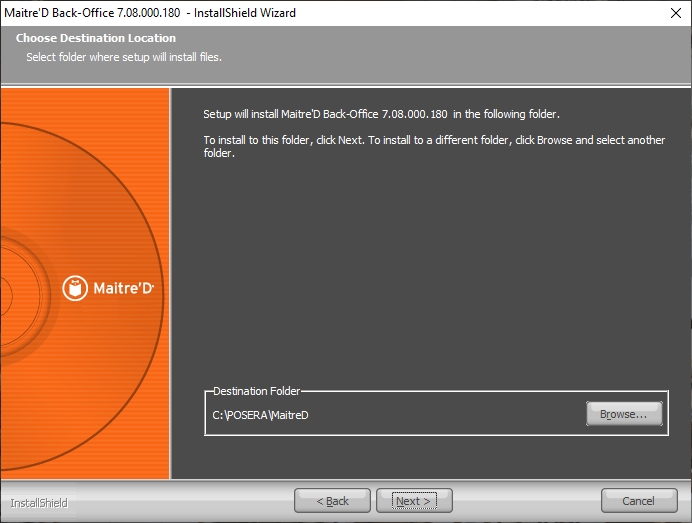
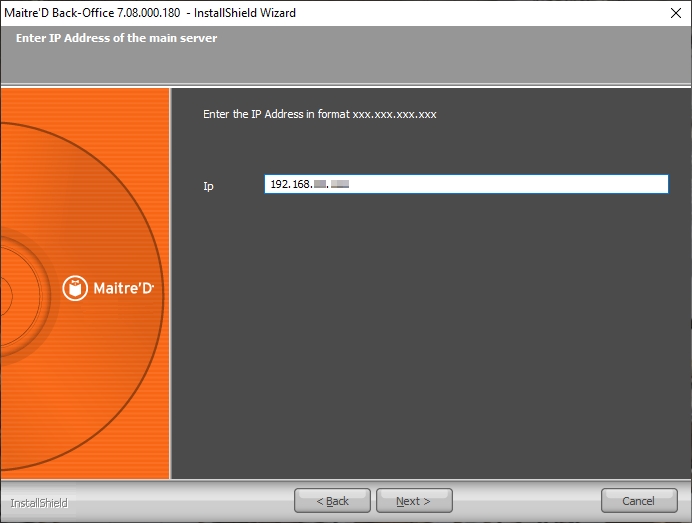
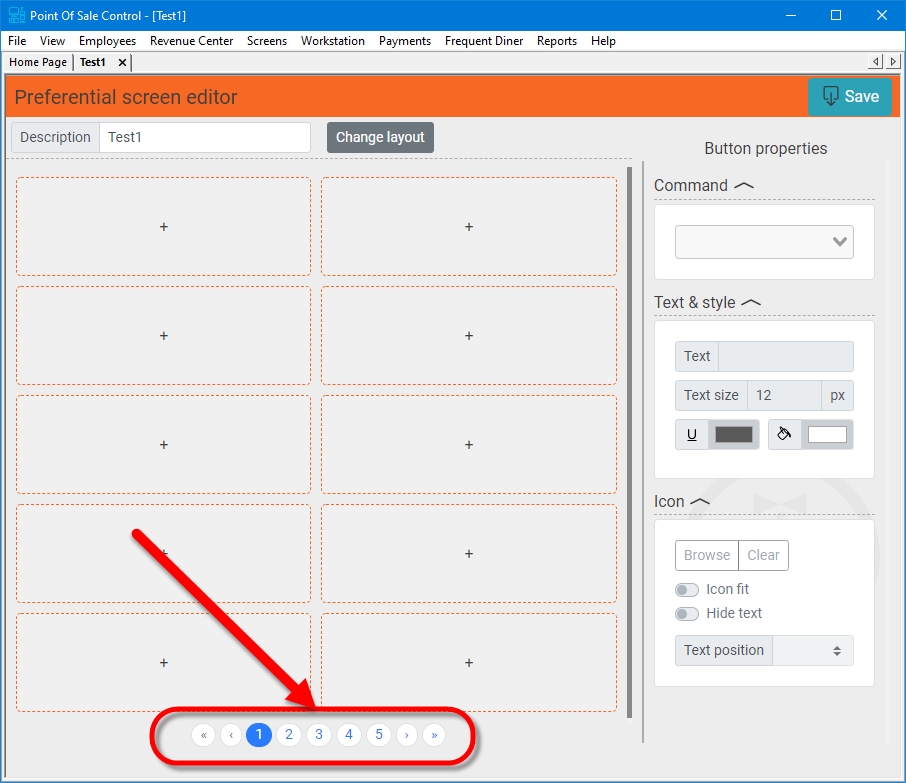


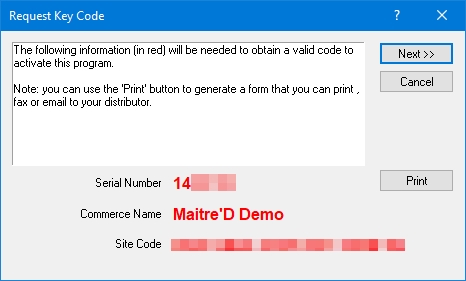
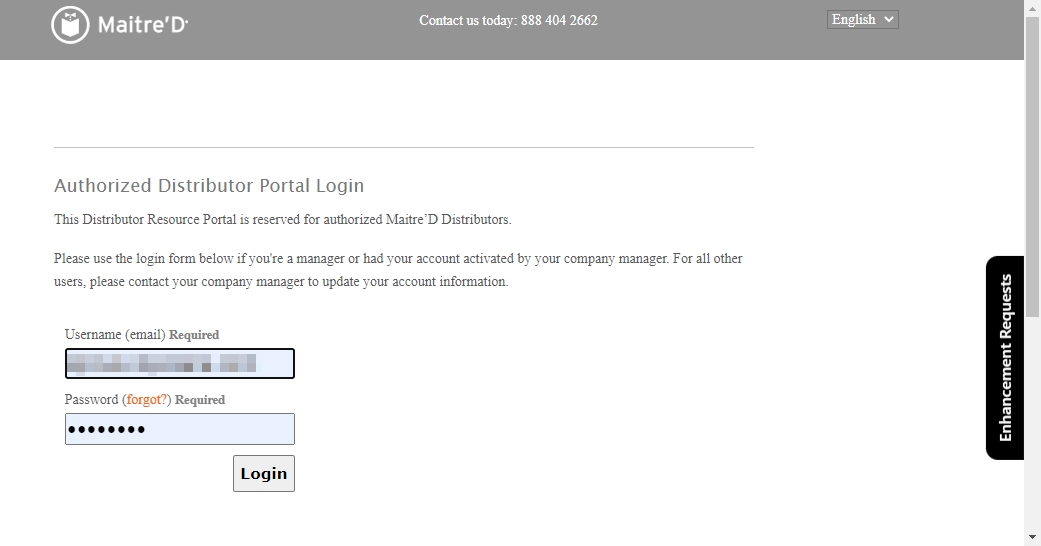
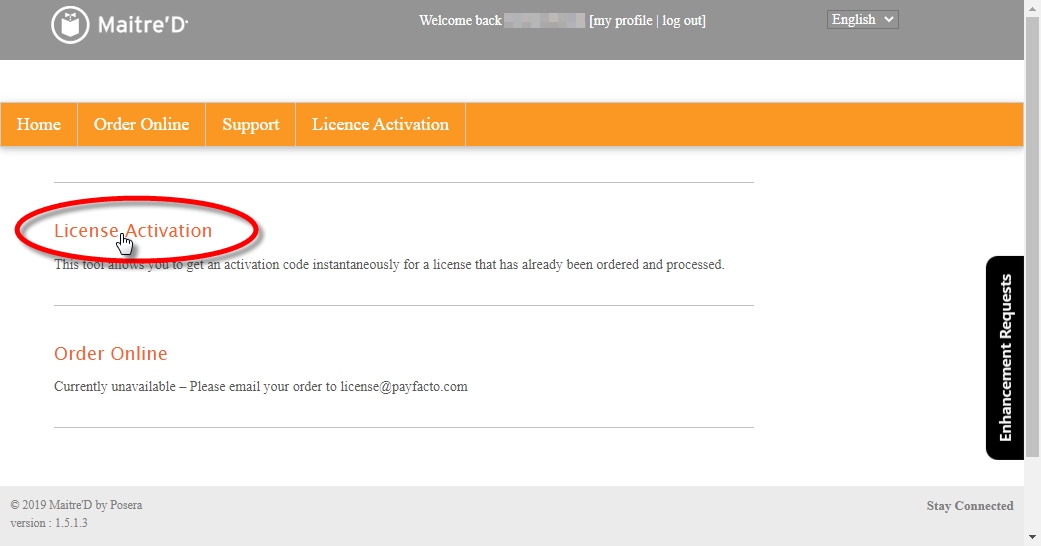
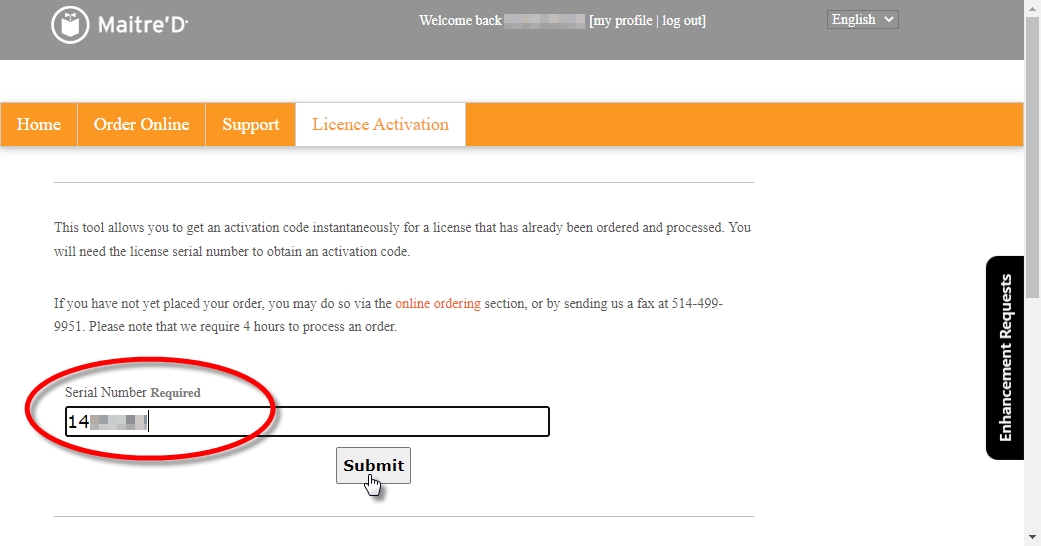
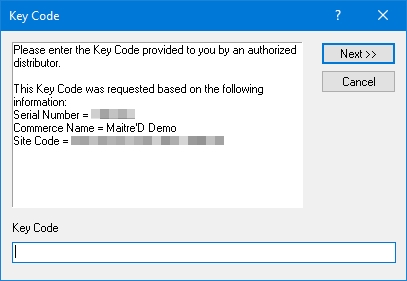
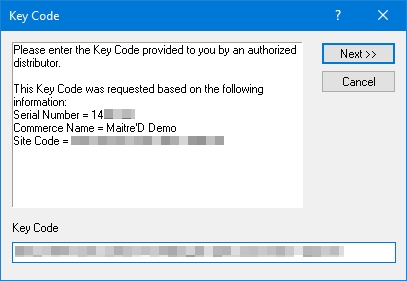
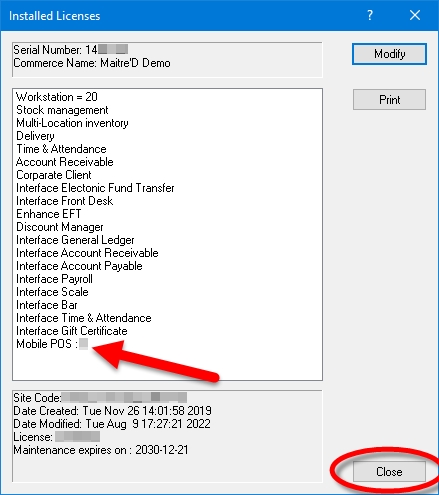

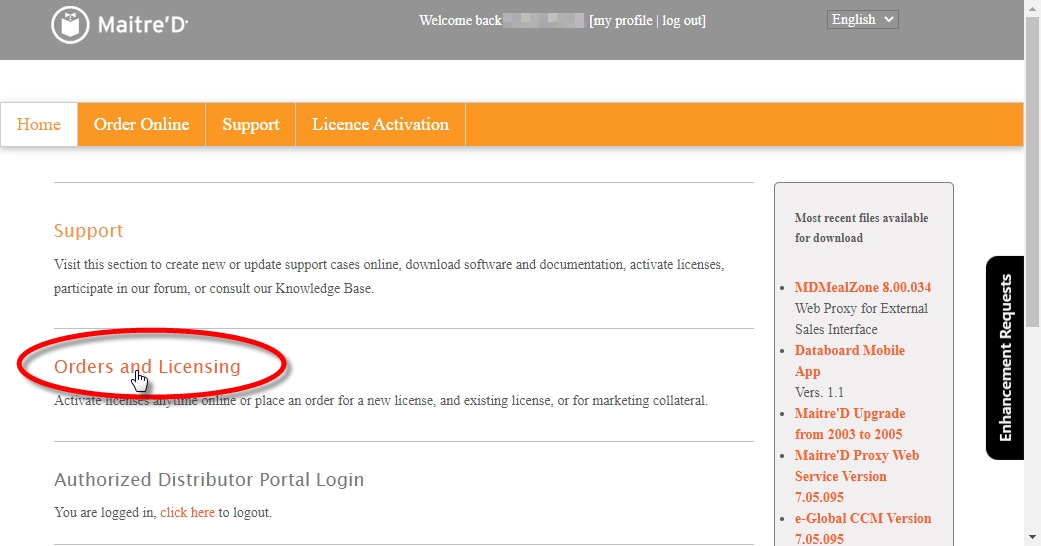
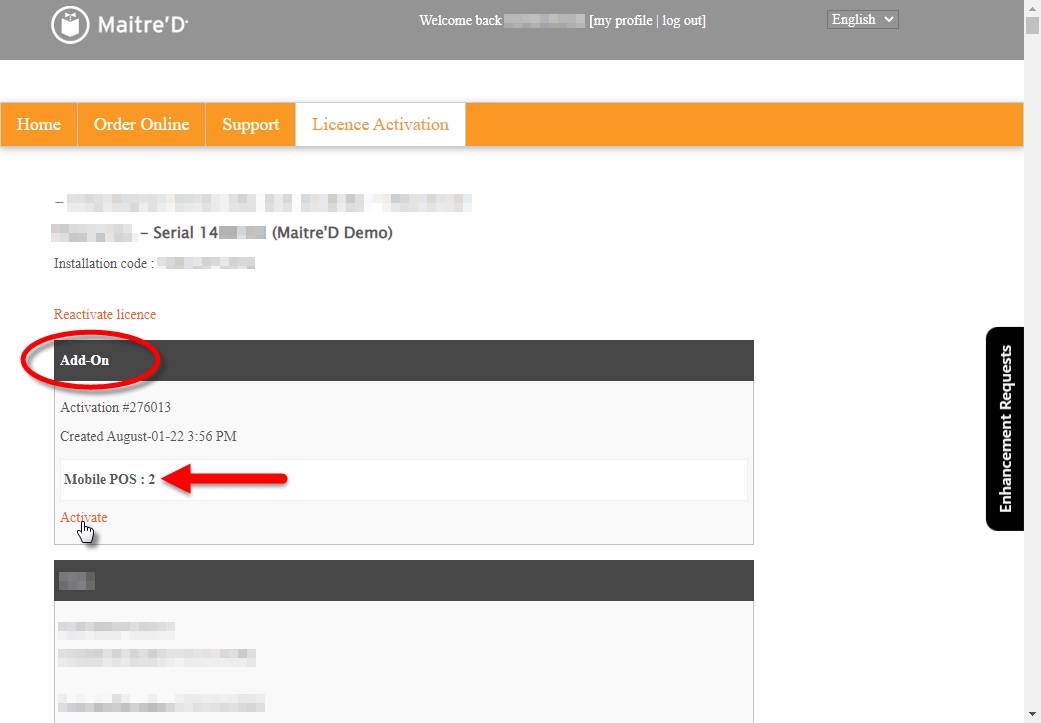
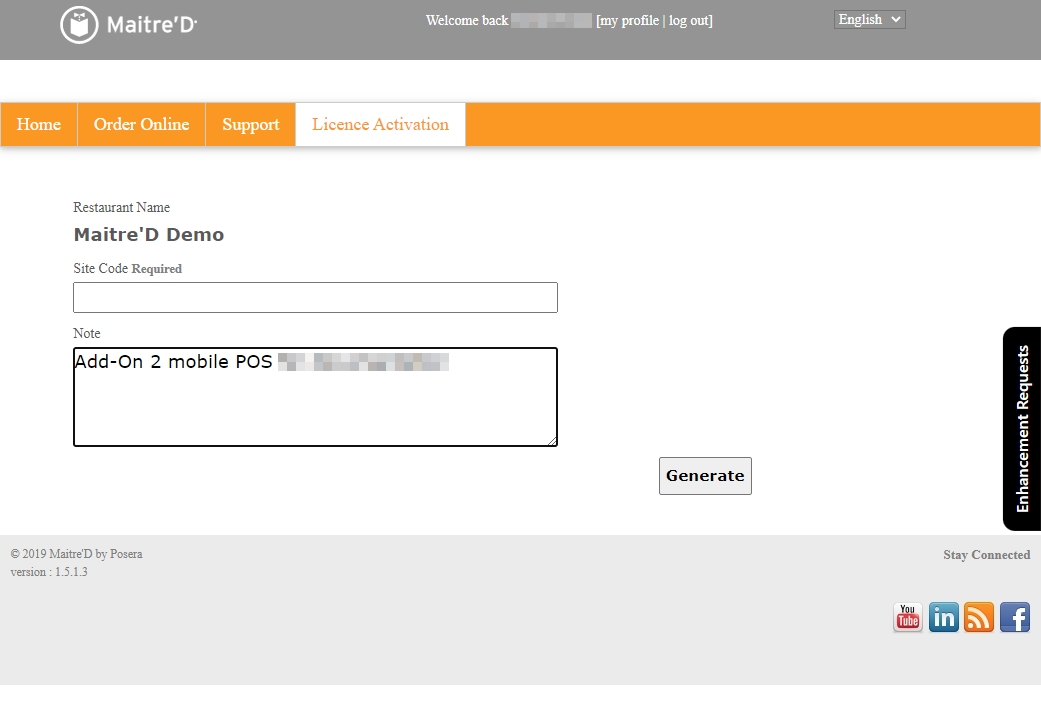
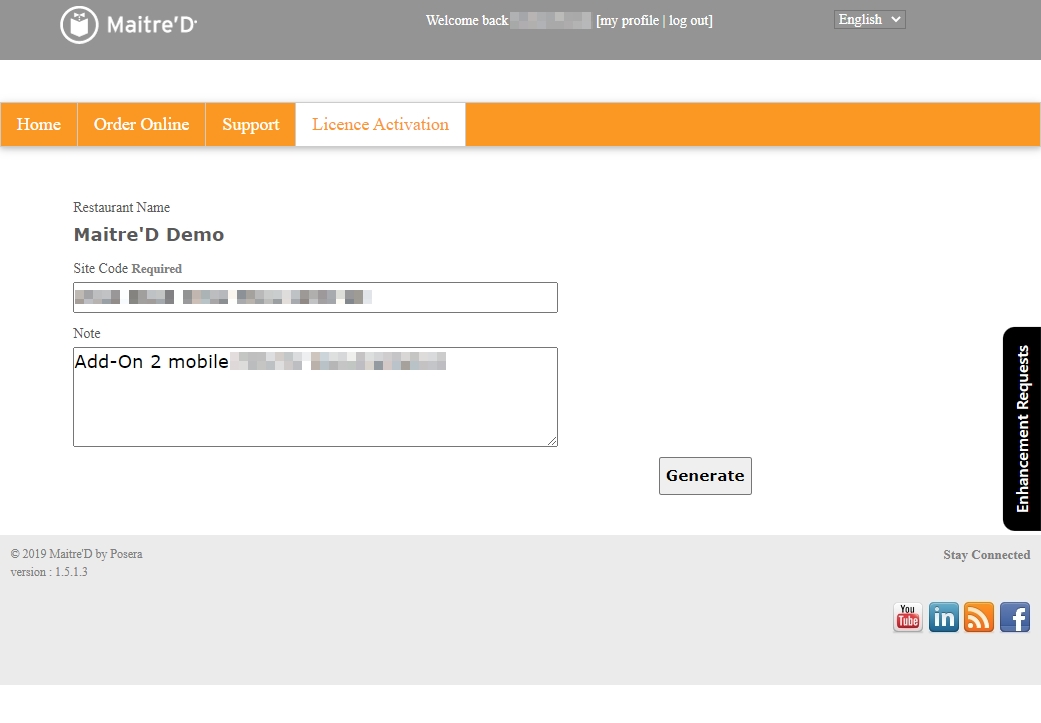
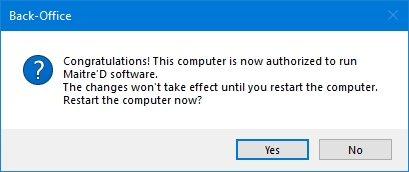


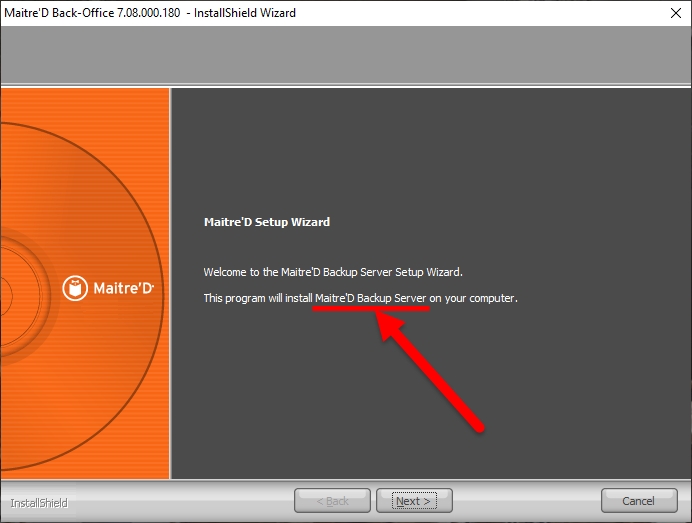


Multiple hardware configurations were tested in a controlled lab environment during the development of the HTML POS. These can be used as benchmarks to compare the hardware you already have or plan to buy.
The first system tested is an All-in-One POS with the lowest hardware specification that was tested in our labs. It is also the oldest, with a manufacture date of late 2008. Still, even at this age, the hardware is slightly above the minimum requirements for the Maitre'D Legacy POS.
This system is not adequate for HTML POS, however it works just fine with the Maitre'D Legacy POS. If you have older hardware available which can be upgraded to Windows 10 IoT Enterprise, it can still be put to good use for a budget POS system using the Legacy POS software.
This system is a Windows 10 Tablet PC, optimized for long battery life.
While HTML POS was usable on this system, it was a bit on the slow side. However, this is a very good wireless solution for the Legacy Maitre'D POS.
This system is a Windows 10 NUC form factor PC with a very small footprint. The enclosure of this device measures only 5 in x 5 in, with a thickness if about 1.25 in.
While HTML POS was also usable on this system, the performance gain from the slightly better CPU was marginal and could not be measured. This is a very good solution for the Legacy Maitre'D POS if you need a low cost and space-efficient solution.
This system is an All-in-One Windows 10 POS workstation.
While HTML POS was also usable on this system, the performance gain from the slightly better CPU was marginal and could not be measured. This hardware is more than adequate for the Maitre'D Legacy POS, however.
This system is a high-end, All-in-One Windows 10 POS workstation.
The Core i3 desktop CPU and 8Gb of RAM made all the difference with this system, doubling the HTML POS performance compared to previous systems tested. At 400 keystrokes per minute, this system now surpasses the capacity of even the most experienced typists.
This system is a standard desktop PC manufactured in 2011, which was upgraded to Windows 10.
While a full-sized desktop computer does not necessarily make sense to use as a POS, this hardware was included here as a point of comparison, and to show that old hardware can still be used very efficiently. Also, similar hardware is available in Small Form Factor (SFF), which has a much smaller footprint.
This system is a high-end, Small Form Factor (SFF) desktop PC, running Windows 10 pro and manufactured in 2018.
A SFF PC such as this one has a relatively small footprint. Coupled with a touch screen, this could effectively run the entire Maitre'D Back-Office suite along with HTML POS as a local workstation without any noticeable drop in performance.
To facilitate reading and interpretation of hardware requirements, they are broken down in 3 tiers:
The minimum requirement is the bare minimum that will allow the Maitre'D Advanced POS User Interface to operate adequately, without any consideration for possible expansion or "future-proofing".
The recommended hardware configuration should yield adequate performance in most situations and provide headroom for future expansion of the system.
The hardware configuration for large sites should yield adequate performance in restaurants using 20 or more POS workstations. This requirement also applies to restaurants with high volume of orders, where the number of POS workstations may not be as high as 20, but where the POS Workstations are in near-constant use.
In some cases, Windows 11 may have more stringent hardware requirements than Maitre'D. If you wish to use your POS system with Windows 11, these requirements need to be accounted for:
Maitre'D is designed for the Microsoft Windows environment and will operate on both 32-bit (x86) and 64-bit (x64) editions of current Windows operating systems. This makes Maitre'D "hardware-agnostic", which means it will work on any hardware that can run Microsoft Windows, as long as it meets the minimum performance requirements.
The table below lists all currently supported operating systems with their projected End-of-Life date issued by Microsoft.
IMPORTANT! Operating systems that have reached their End-of-Life are not listed here, as PayFacto cannot guarantee reliable operation with deprecated operating systems.
While some deprecated operating systems may still work with Maitre'D, they are no longer supported by Microsoft and therefore no longer receive security updates.
As such, deprecated operating systems represent a liability which may compromise the POS system's security.
In addition to the general End-of-Life date issued for Desktop operating systems, Microsoft also issues End-of-Life dates for specific patch levels. This is done by Microsoft to ensure that users keep their operating systems up-to-date.
While a POS, Backup Server or Auxiliary Back-Office would work perfectly on a server-oriented operating system, PayFacto does not recommend doing so, unless your operations specifically requires this.
* Microsoft lists this date as the end of "Mainstream support" for this Windows version. Mainstream support is typically followed by an extended support period, however it is not listed on the Microsoft Lifecycle site at this time.
Microsoft Windows 11 is the latest release of the Windows family of operating systems. It was released on October 5th, 2021. A full test suite has been run on PayFacto's POS products to ensure compatibility.
At this time, Microsoft has not issued official end-of-life (EOL) dates for the Windows 11 family of products. The only EOL dates available so far are for patch levels. These dates will be updated when Microsoft releases new feature updates for Windows 11.

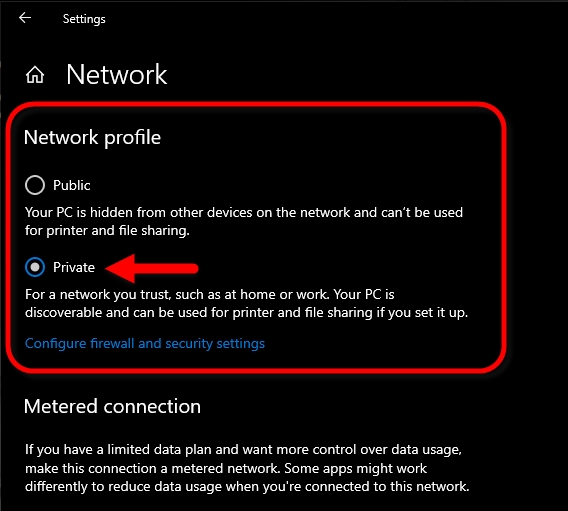

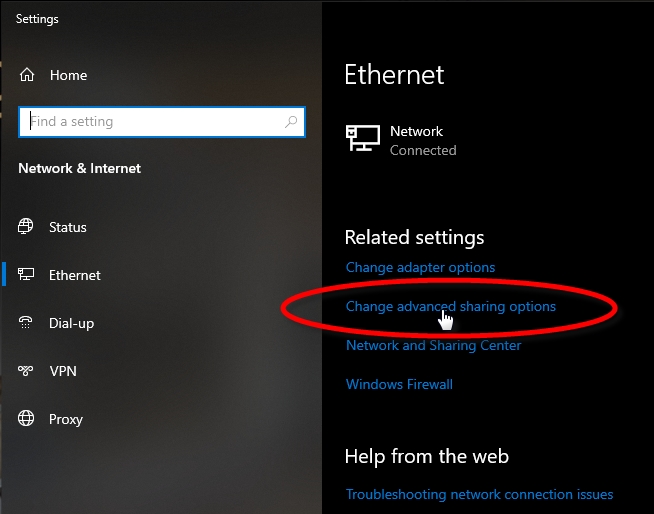
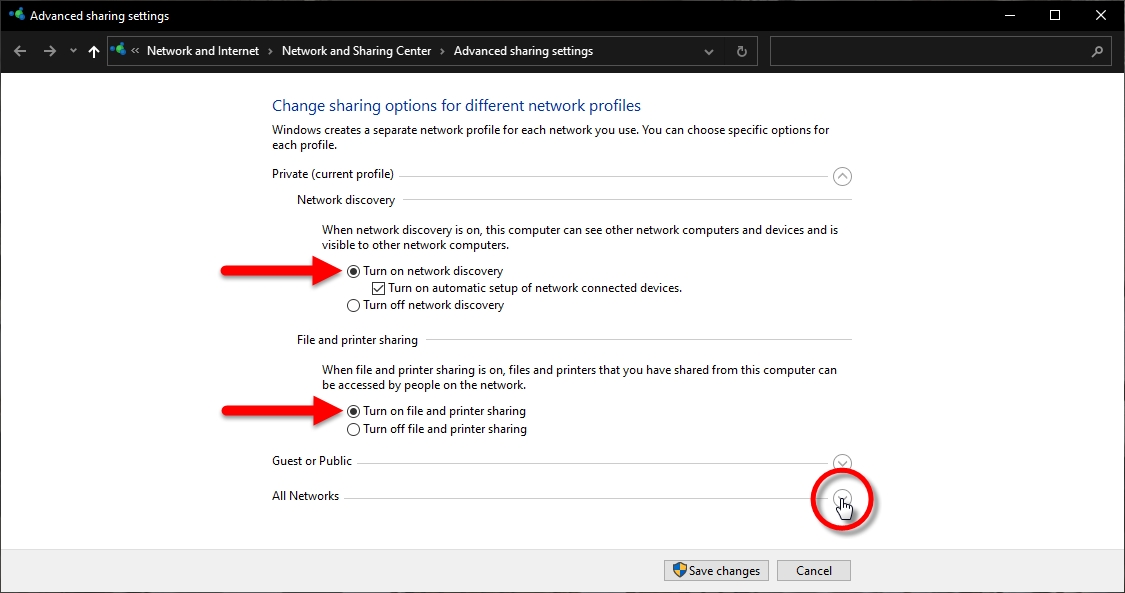
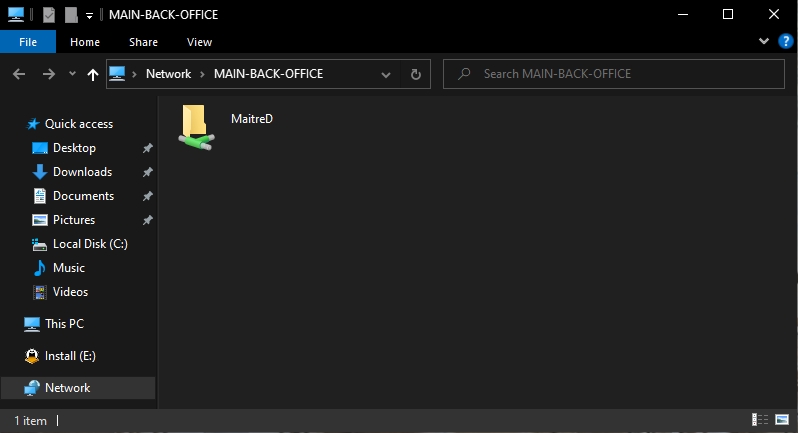


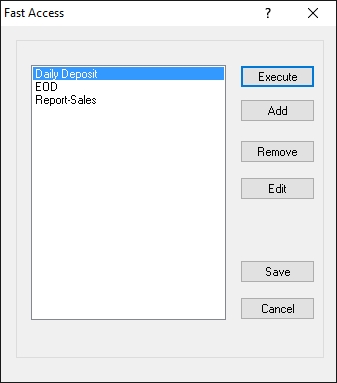
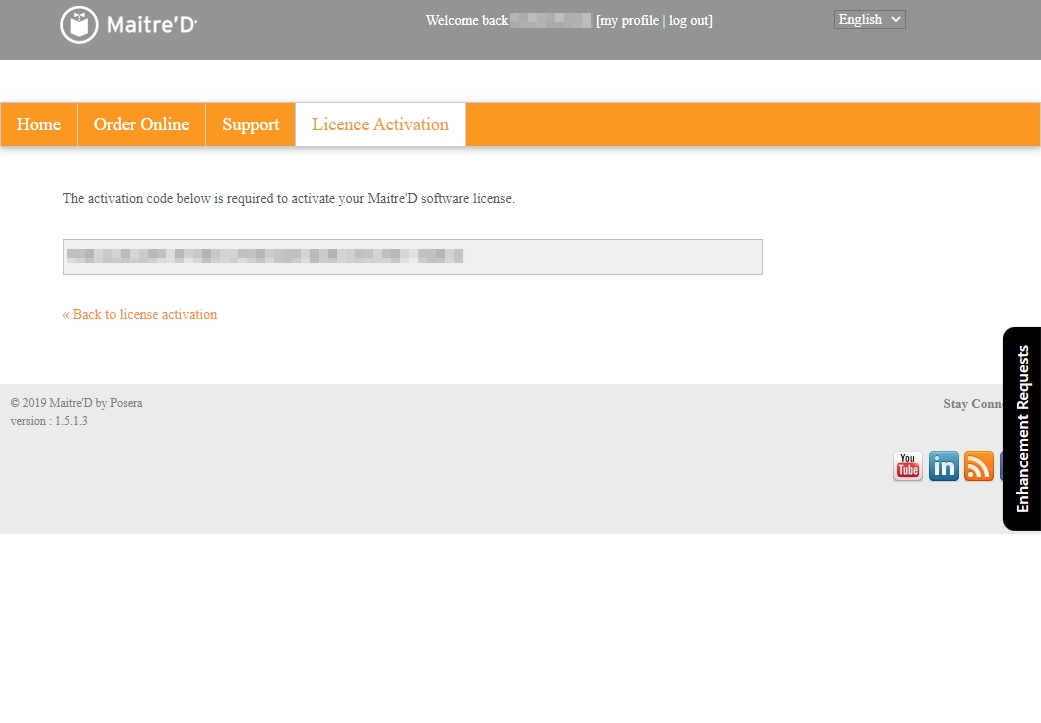


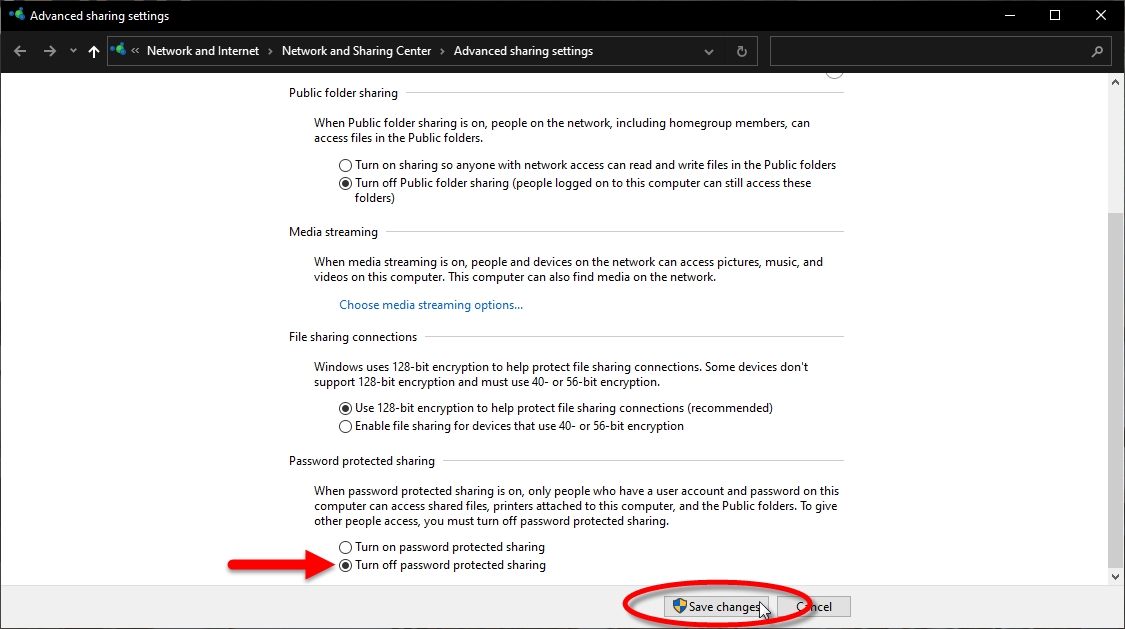
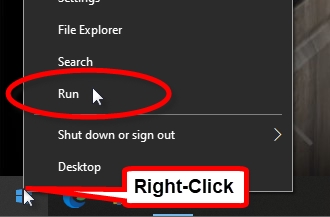
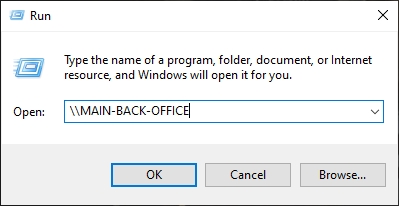
Network
100 Mbps
Pointing Device
Resistive touch screen
Performance Data (Advancec POS UI)
CPU Benchmark Score
269
Minimum Keystroke Delay
500 m/s
Maximum Keys per Second
2
Maximum Keys per Minute
120
Network
Gigabit (on dock) or 802.11n WiFi
Pointing Device
Multi-touch Projected Capacitive touch screen
Performance Data (Advancec POS UI)
CPU Benchmark Score
1079
Minimum Keystroke Delay
300 m/s
Maximum Keys per Second
3.33
Maximum Keys per Minute
200
Pointing Device
Mouse
Performance Data (Advancec POS UI)
CPU Benchmark Score
1273
Minimum Keystroke Delay
300 m/s
Maximum Keys per Second
3.33
Maximum Keys per Minute
200
Network
Gigabit
Pointing Device
Multi-touch Projected Capacitive touch screen
Performance Data (Advancec POS UI)
CPU Benchmark Score
1852
Minimum Keystroke Delay
300 m/s
Maximum Keys per Second
3.33
Maximum Keys per Minute
200
Network
Gigabit
Pointing Device
Multi-touch Projected Capacitive touch screen
Performance Data (Advancec POS UI)
CPU Benchmark Score
4015
Minimum Keystroke Delay
150 m/s
Maximum Keys per Second
6.67
Maximum Keys per Minute
400
Network
Gigabit
Pointing Device
Mouse
Performance Data (Advancec POS UI)
CPU Benchmark Score
8185
Minimum Keystroke Delay
100 m/s
Maximum Keys per Second
10
Maximum Keys per Minute
600
Network
Gigabit
Pointing Device
Mouse
Performance Data (Advancec POS UI)
CPU Benchmark Score
15140
Minimum Keystroke Delay
50 m/s
Maximum Keys per Second
20
Maximum Keys per Minute
1200
Operating System
Microsoft Windows 10 IoT Enterprise LTSC, Version 1809, 32-bit Edition
CPU
Intel Atom N270 (Single-Core @ 1.60Ghz, Mobile CPU, Released Q2-2008
RAM
1Gb
Storage
120Gb SATA-SSD
Graphics
Intel Integrated Graphics (DirectX 9 compatible)
Display
1024 x 768
Operating System
Microsoft Windows 10 IoT Enterprise LTSB, Version 1607, 64-bit Edition
CPU
Intel Atom Z3745 (Quad-Core @ 1.33Ghz, "Bay Trail" Mobile CPU, Released Q1-2014
RAM
4Gb
Storage
120Gb SATA-SSD
Graphics
Intel Integrated Graphics (DirectX 9 compatible)
Display
1280 x 800
CPU
Intel Atom x5-Z8350 (Quad-Core @ 1.44Ghz, "Cherry Trail" Mobile CPU, Released Q1-2016
RAM
4Gb
Storage
256Gb SD Card
Graphics
Intel Integrated Graphics (DirectX 9 compatible)
Display
1024 x 768
Network
Operating System
Microsoft Windows 10 IoT Enterprise LTSB, Version 1607, 64-bit Edition
CPU
Intel Celeron J1900 (Quad-Core @ 2.00Ghz, "Bay Trail" Mobile CPU, Released Q4-2013
RAM
4Gb
Storage
256Gb SATA SSD
Graphics
Intel Integrated Graphics (DirectX 9 compatible)
Display
1366 x 768
Operating System
Microsoft Windows 10 Pro, Version 1903, 64-bit Edition
CPU
Intel Core i3-2125 (Dual-Core @ 3.30Ghz, "Sandy Bridge" Desktop CPU, Released Q3-2011
RAM
8Gb
Storage
256Gb SATA SSD
Graphics
Intel Integrated Graphics (DirectX 9 compatible)
Display
1366 x 768
Operating System
Microsoft Windows 10 Pro, Version 1903, 64-bit Edition
CPU
Intel Core i7-2600 (Quad-Core @ 3.40Ghz, "Sandy Bridge" Desktop CPU, Released Q1-2011
RAM
8Gb
Storage
512Gb SATA SSD
Graphics
Intel Integrated Graphics (DirectX 9 compatible)
Display
1920 x 1080
Operating System
Microsoft Windows 10 Pro, Version 1903, 64-bit Edition
CPU
Intel Core i7-8700 (6-Core @ 3.20Ghz, "Coffee Lake" Desktop CPU, Released Q4-2017
RAM
32Gb
Storage
512Gb NVMe SSD
Graphics
Intel Integrated Graphics (DirectX 11 compatible)
Display
1920 x 1080
Gigabit
SATA SSD
5Gb (installation)
+
10Gb (storage)
NVMe SSD
5Gb (installation)
+
10Gb (storage)
Graphics
DirectX 9 compatible or later
DirectX 9 compatible or later
Display
1920 x 1080
1920 x 1080
Network
Gigabit
Gigabit or better
Pointing Device
Mouse or equivalent
Mouse or equivalent
Printer (optional)
Ink jet or laser,
US Letter or A4
Ink jet or laser,
US Letter or A4
RAM
4Gb
4Gb
4Gb
Storage (free space)
500Mb
500Mb
500Mb
Graphics
DirectX 9 compatible or later
DirectX 9 compatible or later
DirectX 9 compatible or later
Display
800 x 600
1024 x 768
1024 x 768 or better
Network
Gigabit
Gigabit
Gigabit or better
Pointing Device
Resistive touch screen
Projected Capacitive touch screen
Projected Capacitive touch screen
RAM
4Gb
8Gb
8Gb
Storage (free space)
1Gb
1Gb
1Gb
Graphics
DirectX 11 compatible or later
DirectX 11 compatible or later
DirectX 11 compatible or later
Display
1024 x 768
1024 x 768 or better
1024 x 768 or better
Network
Gigabit
Gigabit
Gigabit or better
Pointing Device
Resistive touch screen
Projected Capacitive touch screen
Projected Capacitive touch screen
32Gb or more
64Gb or more
Screen Size
10'' or more
10'' or more
Screen Resolution
1080 x 1920 or better
1200 x 2000 or better
32Gb or more
64Gb or more
Screen Size
10'' or more
10'' or more
Screen Resolution
1080 x 1920 or better
1200 x 2000 or better
Display
High definition (720p) display that is greater than 9'' diagonally, 8 bits per color channel.
Hardware
Recommended
Large sites
Operating System
CPU
Intel Core i5 2300 series
or better
Intel Core i7 2600 series
or better
RAM
8Gb
16Gb
Hardware
Minimum
Recommended
High Volume
Operating System
CPU
1 Ghz
Any Dual Core
Dual Core, 2 Ghz or better
Hardware
Minimum
Recommended
High Volume
Operating System
CPU
Intel Celeron J1900
or better
Intel Celeron J4105
or better
Intel Core i3 2100 series
or better
Hardware
Minimum
Recommended
Operating System
Android 10
Android 11 or later
CPU
Samsung Exynos 9611 or better
Qualcomm Snapdragon 662 or better
Unisoc Tiger T618 or better
Samsung Exynos 990 or better
Qualcomm Snapdragon 865 or better
RAM
4Gb or more
6Gb or more
Hardware
Minimum
Recommended
Operating System
iOS 14
iOS 14 or later
CPU
Apple A10X Fusion or better
Apple A12 Bionic or better
RAM
3Gb or more
3Gb or more
CPU
1 Gigahertz (GHZ) or faster, with 2 or more cores on a compatible 64-bit processor or System on a Chip (SoC).
RAM
4 gigabyte (GB) for POS workstations or 8 gigabyte (GB) for a back-office PC, auxiliary back-office, or backup server.
Storage
64 GB or larger.
System Firmware
UEFI, Secure Boot capable.
TPM
Trusted Platform Module (TPM) version 2.0.
Graphics Card
Compatible with DirectX 12 or later with WDDM 2.0 driver.
Storage
Storage
Storage
October 14, 2025
Microsoft Windows 10 Pro for Workstations
YES
YES
YES
Supported
October 14, 2025
Microsoft Windows 11 Pro
YES
YES
YES
Supported
N/A
Microsoft Windows 11 Pro for Workstations
YES
YES
YES
Supported
N/A
Supported
October 10, 2023
October 10, 2023
Microsoft Windows Server 2012 R2
YES
NO*
NO*
Supported
October 10, 2023
Microsoft Windows Server 2016
YES
NO*
NO*
Supported
January 12, 2027
Microsoft Windows Server 2019
YES
NO*
NO*
Supported
January 9, 2029
Microsoft Windows Server 2022
YES
NO*
NO*
Supported
October 14, 2031
October 13, 2025
Microsoft Windows 10 IoT Enterprise LTSB 2016
YES
YES
YES
Supported
October 12, 2026
Microsoft Windows 10 IoT Enterprise LTSC 2019
YES
YES
YES
Supported
January 8, 2029
Microsoft Windows 10 IoT Enterprise LTSC 2021
YES
YES
YES
Supported
January 12, 2032
Microsoft Windows 11 IoT Enterprise, version 21H2
YES
YES
YES
Supported
October 8, 2024
October 13, 2025
Microsoft Windows 10 Enterprise LTSB 2016
YES
YES
YES
Supported
October 12, 2026
Microsoft Windows 10 Enterprise LTSC 2019
YES
YES
YES
Supported
January 8, 2029
Microsoft Windows 10 Enterprise LTSC 2021
YES
YES
YES
Supported
January 12, 2027*
Microsoft Windows 11 Enterprise, version 21H2
YES
YES
YES
Supported
October 8, 2024
Name
Suitable for:
Support Status
(PayFacto)
End-of-Life
(Microsoft)
Back-Office
POS
Backup / Auxiliary
Microsoft Windows 10 Pro
YES
YES
YES
Name
Support Status
(PayFacto)
End-of-Life
(Microsoft)
Microsoft Windows 10 (Pro & Pro for Workstations), version 20H2
Supported
May 10, 2022
Microsoft Windows 10 (Pro & Pro for Workstations), version 21H1
Supported
December 13, 2022
Microsoft Windows 10 (Pro & Pro for Workstations), version 21H2
Supported
June 13, 2023
Name
Suitable for:
Support Status
(PayFacto)
End-of-Life
(Microsoft)
Back-Office
POS
Backup / Auxiliary
Microsoft Windows Server 2012
YES
NO*
NO*
Name
Suitable for:
Support Status
(PayFacto)
End-of-Life
(Microsoft)
Back-Office
POS
Backup / Auxiliary
Microsoft Windows 10 IoT Enterprise LTSB 2015
YES
YES
YES
Name
Suitable for:
Support Status
(PayFacto)
End-of-Life
(Microsoft)
Back-Office
POS
Backup / Auxiliary
Microsoft Windows 10 Enterprise LTSB 2015
YES
YES
YES
Supported
Microsoft Windows 11 (Pro & Pro for Workstations), version 21H2
Supported
Supported
Supported


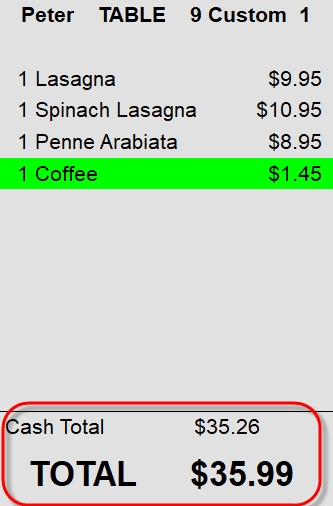
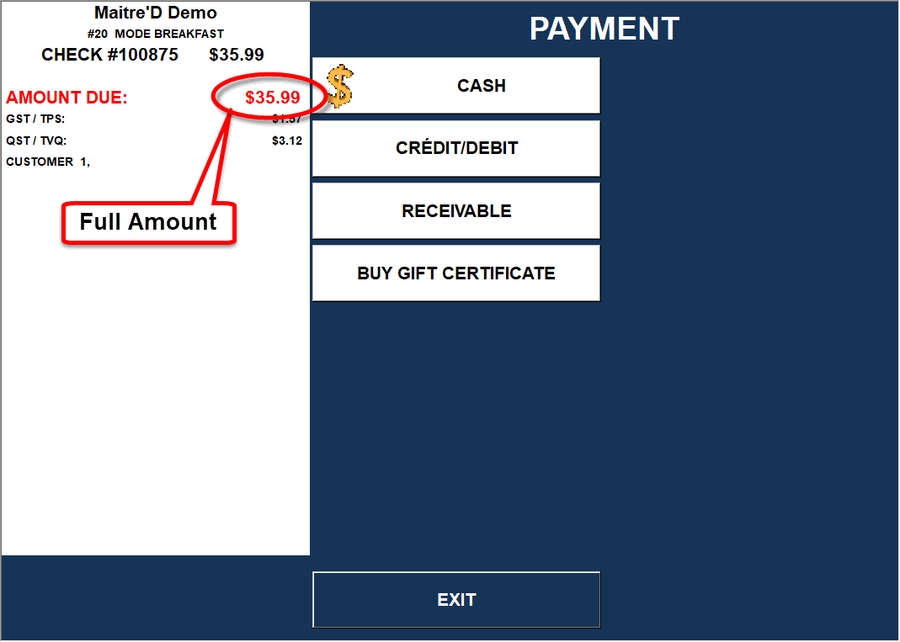
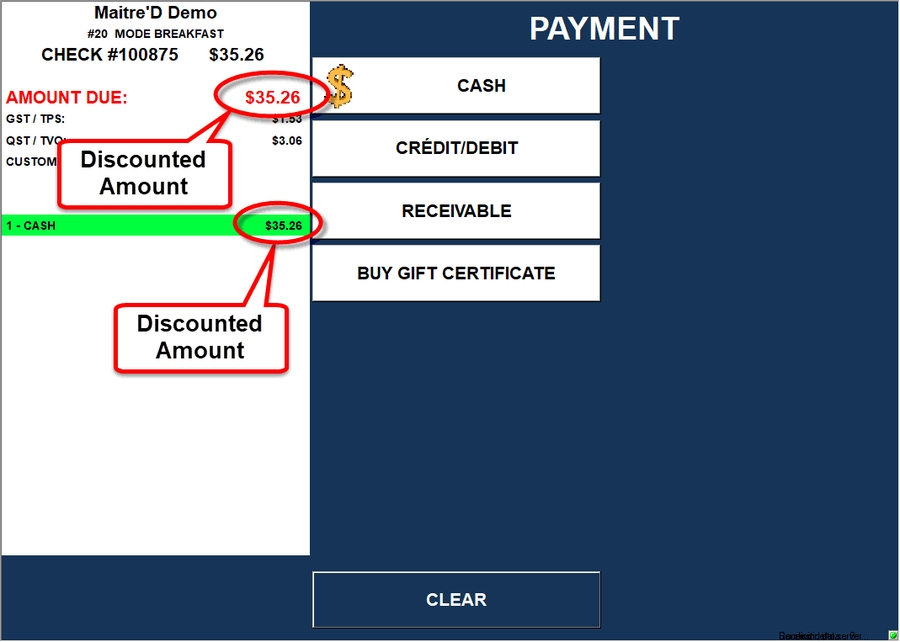
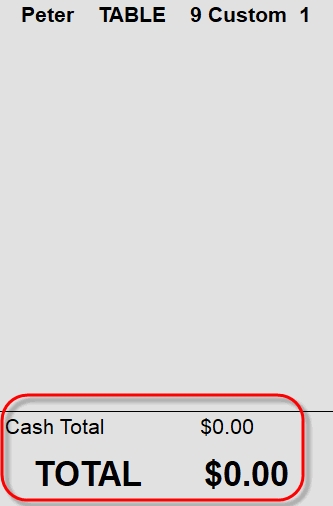
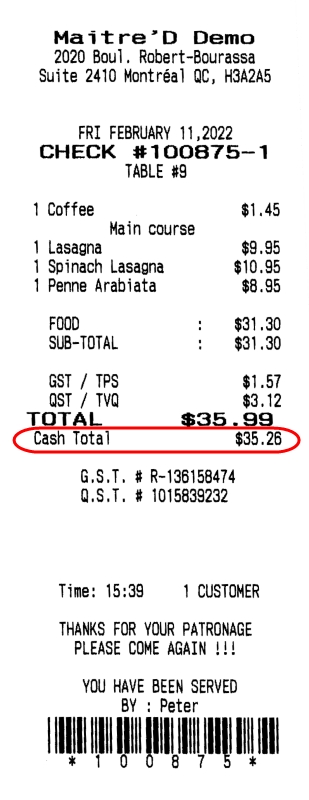
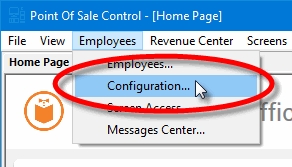
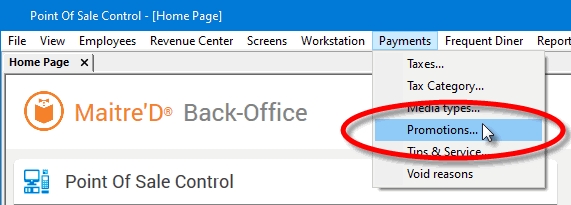

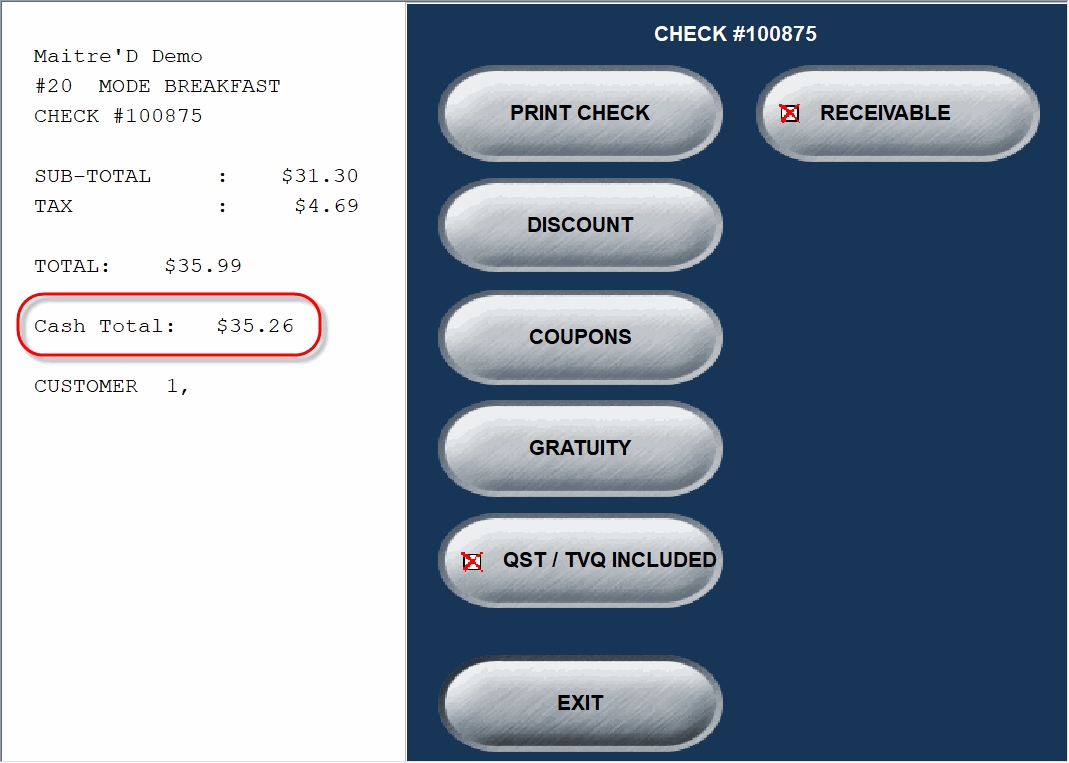
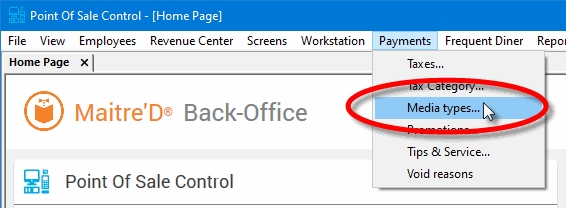
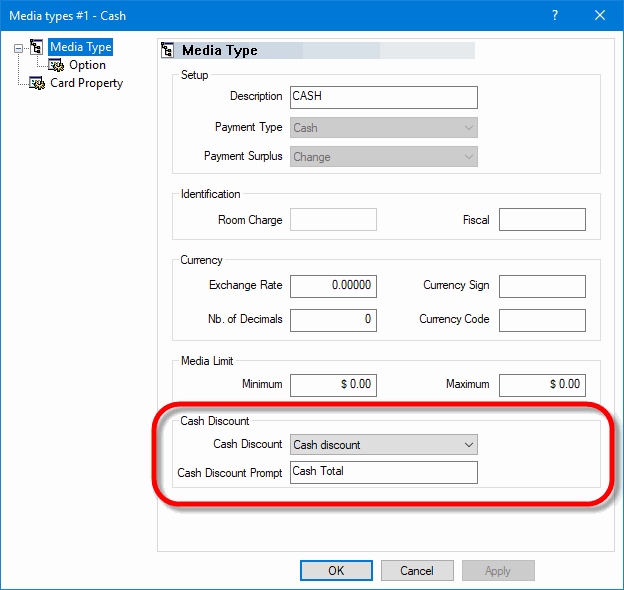
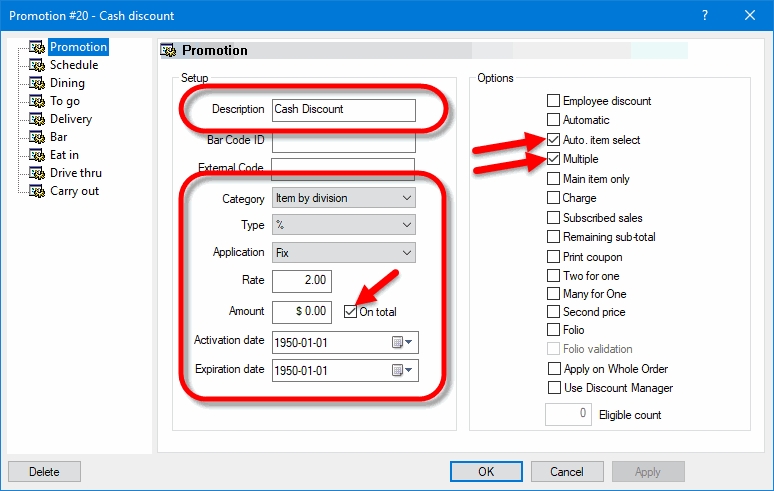

This option let you choose whether you want to see status bar (the line located at the bottom of your screen) or not. This selection toggles from enable and disable. When there is a check mark besides the option, the option is enabled and you will see the status bar.
First Day of the Week
This field displays the first day of the week, as configured in System Configuration / Tools / Date Control. This field cannot be modified.
Start of Year
This field displays the first day of the current fiscal year, as configured in System Configuration / Tools / Date Control. This field cannot be modified.
End of Year
This field displays the last day of your fiscal year, as configured in System Configuration / Tools / Date Control. This field cannot be modified.
Last Closing Date
This field displays the date of the last closed business day. This field cannot be modified.
Daily summary Number
This field displays the sequential daily summary report number. This field cannot be modified.
Configuration
Number of Revenue Centers
Set the number of revenue centers that will be used. The default number is 4. The minimum is 1 and the maximum is 32. Examples of common revenue centers include "Dining Room", "Take Out", "Bar", "Delivery", etc. Revenue centers are sometimes referred to as "profit centers".
Number of Modes
Select a multiple of 4 modes up to a maximum of 32. Modes can be used in many different ways. Typically, modes represent price points for sales items.
Number of Tables
This field refers to the number of tables, and the actual table numbers, used in the system. A maximum of 9,999 tables is available. If you intend to create sections, and assign numbers in each section, you could set up 500 tables and use 101, 102, 103 ... for section 1 and 201, 202, 203 ... for section 2. Order numbers begin with the next number after the number programmed here. (e.g. # of tables = 500 order # begin at 501).
Non Taxable
In this field, you may assign a tax type to "Non Taxable" tax for application by authorized servers at the time they print the guest checks.
Check #
This field cannot be modified. On a new installation or following a sales deletion, this value will be set to 100000. This value will increase by 1 every time a check is printed. In normal use, this field tells you what is the last check number that was printed by Maitre'D and gives a rough idea of how many checks were printed since the first day the system was used.
Language
Select the main language to be used at the point of sale workstations. This will be the default language that is used on the POS screens before the employee logs in. After login, the language used is defined in the POS employee record, under Point of Sale Control / Employees / Employees.
Second Language
Select an alternate language to be used by employees after they logon to the POS workstation.
For the second language to take effect, the Main Language option need to be disabled in the employee record, under Point of Sale Control / Employees / Employees.
Option
Permanent Meters
Enable this option to update Sales Units in real time and appear in the meter section on the server financial report. The servers can declare the value of the meters at the start and end of their shift. Otherwise, Permanent Meters will not be functional.
30 Minutes Meter Interval
The detailed meter report contains meters sold by 15 minutes intervals. Enable this option to have the report in 30 minutes intervals instead.
Bar Code with Price
If you leave this option disabled, the barcode will be used to find the programmed item and will use the programmed price for it. I you select this option, you can use the price encoded in the barcode. The first digit of the barcode must be 2 and the first seven digits are tested to find the corresponding items. Digits 8 through 11 are used as the item price. See the UPC guideline # 11 for more details on barcodes.
Manual Sales Item Cost
If you enable this option, you will have to manually enter the sales items cost for each item. Leave it disabled to use the inventory module calculated cost.
Daily Deposit
Enable this option if you want the daily deposit entered before starting the end of day. With this option, when the end of day is started, the daily deposit will be asked to the user. The amount entered will appear in the daybook reports with the daily balance.
PLU Mandatory
Enable this option to force the entry of a PLU code link every time a new sales item is created.
24 hours Operation
If you enable this option, you will be able to close the day with open tables / checks. The open tables / checks will be transferred on the next day operation.
European Operation
Enable this option to calculate an inclusive tax appropriately in the European market.
VAT Calculation
Enable this option to calculate the Value Added Tax on the invoice total instead of per item.
Meal Counting
Enable this option to count the number of meals on the activity report. For more information on counting the Number of Meals, refer to the Items Setup Options. Disable this option to display the customer count on the activity report. (Servers enter the number of customers when they enter orders.)
Table Assignment
If you enable this option, the Hostess function manages the sections of the restaurant, including table verification, floor plan, section assignment, smoking status, number of customers seated and seating availability. Otherwise, the Hostess function will work in the "Control Buffet" mode.
Alternate Discount Calculation
You can calculate Item/Division discounts with two inclusive taxes using the same method as in European Operation option. With this option enabled, the system extracts the inclusive taxes from the sales item price before the discount is calculated. With this option disabled, the system calculates the discount before extracting the inclusive taxes.
Multiple Fast Cash Key
Enable this option to allow the use of Fast Cash buttons lower then the check total multiple times. Every time a Fast Cash button is touched, if the button is not enough to close the invoice, this amount will be cumulated with the next Fast Cash button. Once the total cumulated amount is enough to cover the check total, the payment will be accepted.
Reactivate Temp. Withdrawn Items at the EOD
Activate this option to disable the Temporary Withdrawal option of all items for the next fiscal day so that they can be sold again from the External Order System (EOS) and the Points of Sales.
Auto close external orders at EOD
Activate this option to automatically close external (web) orders during the End-of-Day process. This will only affect orders which already have a payment applied. Unpaid orders will remain open.
POS
Update Button
Enable this option to display the Update button on the main screen of the workstation. This button allows to update the workstation after changes to the system from the Back-Office have been made. The Update button allows to update without having to open or access a guest check.
Items without Quantity
Enable this option to display the items separately. This option is useful if you setup an automatic item discount of type two for one or many for one. These discounts work only if the quantity stays at one. Leave it disabled to allow the items to have a modifiable quantity.
Enable Media Screen Calculator
Enable this option to allow the use of the plus (+) and multiply (*) buttons on the media amount entry screen to use multiple instances of the same media type. For example, if you have 2 gift certificates of different amounts, you can use the plus button to add them together and enter a total amount of gift certificates, instead of manually adding 2 amounts before entering their total at the workstation.
Release Confirmation
Enable this option for the system to prompt you with a confirmation message ("yes" or "no") when you manually attempt to release a table.
One Touch Login
Enable this option to quickly choose an employee from a list displayed on the workstation instead of entering the employee number every time.
NOTE: If the employee list is not displayed, press the ENTER button on the server number screen.
Cash Rounding
Enable this option to turn on rounding for Cash transactions only and eliminate the use of pennies. This is useful in locations where you want to avoid manipulation of the smallest coins. The rounding is displayed on the Amount Received and Change screens, and printed on the Check and Receipt.
Use Volume Modifier
Enable this option to enable the replacement of the Tare option by the Volume Modifier option for liquor control when setting an item's function as Price Rolled Up.
Automatically Upsize Modifier
Enable this option not to prompt for modifiers again when upsizing a main item with modifiers.
NOTE: If these modifiers are setup with their own upsizes, they will be used. If not, they will remain the same.
Open Price Auto Override
Enable this option to force item with the Open Price option to be ordered at their default price point without displaying the numeric keypad. This allows third-party interfaces to change prices for those items in the back-office without affecting items that have previously been ordered on checks or bar tabs that are still open.
Sort Discounts Alphabetically
Enable this option to sort the list of discounts alphabetically on the point of sale. If this option is left disabled, the discounts will be sorted by their internal ID number.
Use advanced POS UI
Enable this option to use the high-definition, HTML-Based user interface for point of sale workstations. Disable this option to keep using the legacy user interface.
Display Delay
Enter the number of seconds after the end of the transaction before the line display shows the promotion lines setup in Point of Sale Control / Revenue Center / Options / Messages.
Report Time-out
Enter the number of seconds after the request for an external custom Crystal Report on the workstation before displaying a Timeout During Report Generation prompt.
Service Speed Data
Enter the number of days that will be available for the service speed report, in the report center. Valid values are between 30 and 365, inclusively
Detailed Check
Enable this option so that the Print Check screen on the touchscreen workstation includes an option allowing servers to print the totals by customer.
Tax on Receipt
Enable this option to print taxes on the receipt.
Receipt Without Amount
Enable this option so that payment receipts do not contain any amounts pertaining to the total due or payment media used. Otherwise, the normal receipt is printed with the amount of the guest check.
Print Bar Code on Check
Enable this option to print the invoice number in a bar code format. The check can be recognized using a bar code scanner at the terminal.
Print When Discount is Applied
Enable this option to force the printout of a receipt every time a discount is applied to a check.
Print Inclusive Tax Total
Enable this option to show the total of the inclusive taxes above the check total.
Amount in Literal Format
Enable this option to spell out the total amount on every invoice, as required in Mexico.
NOTE: You also need to set the Language field to Second Language and the Second Language field to Espanol in Point of Sale Control / View / Options / Configuration.
Special Menu Printout
Enable this option to print main priced items separately from included components and regular sales items on the guest's check when Special Menu Settings are validated.
NOTE: The Use Special Menu option must also be enabled in Point of Sale Control / Employees / Configuration / Order / Special Menu. Also, Combos are not compatible with this option.
Closed Check Reprint
Enable this option to reprint a fully detailed duplicate of a closed check with the settlement information when touching the Print button on the Close screen, instead of only a receipt with the total and settlement.
No Invoice Printing
Enable this option to prevent guest checks from printing.
Printing
Automatic Redirection Table
Enable this option to use redirection table to direct the printing route of various logical printer per mode.
Redirection Table by Revenue Center
Enable this option to use automatic redirection table by revenue center instead of mode.
Separate Course
Enable this option to print the courses on separated chits on the shared printers. Disable it to print them on the same chit.
Alternate Printout
Enable this option to use a slightly different looking check printout.
Condensed Printout
Enable this option to remove any extraneous line feeds on checks and reduce the amount of paper used.
Re-Open Check Without Kitchen Printing
Enable this option to eliminate the printing of previously ordered items in the kitchen when reopening a closed check.
Media on Bartender Invoice
Enable this option to get the same check settlement information on checks and receipts generated by a Bartender as on those generated with the Fast-Food and Order functions, with the mandatory amount tender on a running bill opened with a customer name.
Special Menu Printout
Enable this option to print the control items indented under the included sales items on the kitchen coupon when Special Menu Settings are validated.
Modifier Exception Printing
Enable this option to allow modifiers attached to a main item to control how the item is printed on kitchen printers. For example, a revenue item could be configured not to print on any kitchen printers. However, if a modifier is ordered with that item and that the modifier is set to print to the kitchen, the main item would then be printed at the same printer as its modifier.
Print Revenue Items as Modifiers
Enable this option to ensure that revenue items ordered as modifiers are properly placed under the main item that called them on the kitchen chit.
Print Modifiers to All Printers
Enable this option to ensure that revenue items prints to all printers configured for that item, even if ordered as a modifier.
Mobile Printing
These options apply to print jobs coming from mobile devices such as smartphones and tablets.
Workstation
Select the workstation that is responsible for handling print jobs send by mobile devices such as tablets and smartphones.
Polling
Se the polling interval (in seconds) at which the workstation will check for print jobs from mobile devices.
EFR Server
These settings apply to systems using the EFSTA Fiscal Register to record sales data and print fiscal signatures on receipts.
Port
Type the TCP port number used by the EFR server. The default value is 5618. However, please verify the actual setting in your EFR server installation to be sure to use the correct value.
Print QR-Code
Enable this option to print a QR code containing the fiscal data on the receipt.
Unassigned Waiter Card
Enable this option to allow the use of pre-programmed card for employees. The Maitre'D will look for the password associated with that card instead of the server number and password. Make sure that you are using a card with a password that is not currently used by another valid server because the system will use the first employee that is using this password in the employee database.
Manager Takeover
Enable this option enable the Manager Takeover functionality. This gives the managers the possibility to momentarily take over a table already accessed by another employee without having to exit from the table and re-enter it.
Security Level
Enable this option to use up to 6 security levels. "6" is the highest and "1" is the lowest. These security levels control entry to the system's employee files.
Server Assignment
Enable this option to assign servers to a specific Point of Sales. If you assign an employee to a workstation, he will only be able to work from that Point of Sales. The employees that are not assigned will be able to use all workstations. The selected Point of Sales an employee is allowed to work on is saved in the Workstation field of Point of Sale Control / Employees / Employees... / POS Operation.
Use Security Algorithm
Enable this option to print on every guest's check a Security Algorithm number required for fiscal verification.
Force Employee Card Swipe
Enable this option to force employees to use their magnetic cards, and disable their passwords.
Generate Text File
Click this button to create a security file in Belgium.
Biometric
Biometric Log on Only
Enable this option to force employees to use the biometrics device, and disable their passwords.
Biometric T&A Punch Only
Enable this option to force employees to use the biometrics device when they punch in, and disable the server's passwords, even if the employee record is linked to a server number and that server number does not need the biometrics device to order.
Biometric as Validation Device
Enable this option to use the biometrics device only to validate an employee's identity instead of a password. The employee will still have to enter his server number on the workstation to identify himself, but when the password is required, he will touch the biometrics device instead of entering his password. The same will apply when punching in or out with the Time & Attendance module.
Display Acquired Fingerprint
Enable this option to show on screen the real fingerprint scanned instead of a default generic image during the biometrics capture.
Time Out Delay
POS Inactivity
Enter the inactivity delay, in minutes, before the workstation will exit any table screen a server has left open for a long period of time, and comes back to the server Login screen. If there are items selected but yet to be ordered, or if the screen is currently displaying the hostess' floor plan, the workstation will not go back to the Login screen. Setting this field to 0 will disable this feature.
Drawer Warning
Enter the inactivity delay, in second, before the workstation will start beeping if the employee has left the cash drawer open for a long period of time. Setting this field to 0 will disable this feature.
Gratuity Distribution
Enable this option to print the percentages of tips owed to other employees on the server's reading.
Assistant
Enter the percentage used to calculate the amount owed to the buss people. This percentage is applied on the Net Sales.
Host
Enter the percentage used to calculate the amount owed to the employees seating guests. This percentage is applied on the Net Sales.
Transfer
Enter the percentage used to calculate the amount owed to other employees in the same section. This percentage is applied on sales transferred from any other employee.
Division
Enter the percentage used to calculate the amount owed to Bartenders. This percentage is applied on divisions where the Gratuity Distribution option is enabled.
Calculation Type
Select the type of sales figures to use as a base for the calculation of the gratuity distribution.
Net Sales
Select Net Sales if the gratuity distribution should be calculated based on the sales without taxes.
Gross Sales
Select Gross Sales if the gratuity distribution should be calculated based on the sales including taxes.
Use Default
If you enable this option, the Maitre'D default home page for the Point Of Sale Control module will be used.
Address
Enter the URL of your head-office's intranet or your complete URL on the Maitre'D Databoard server that will be used instead of the default local home page for the Point Of Sale Control module.
Maitre'D Databoard Identification
User name
Enter the user name to access the Maitre'D Databoard server.
Password
Enter the password to access the Maitre'D Databoard server.
Confirm Password
Confirm the password to access the Maitre'D Databoard server.
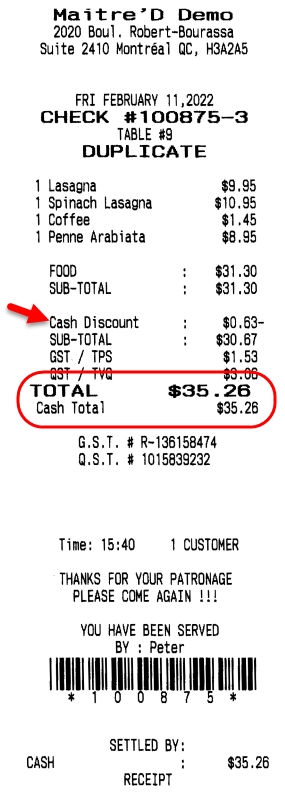
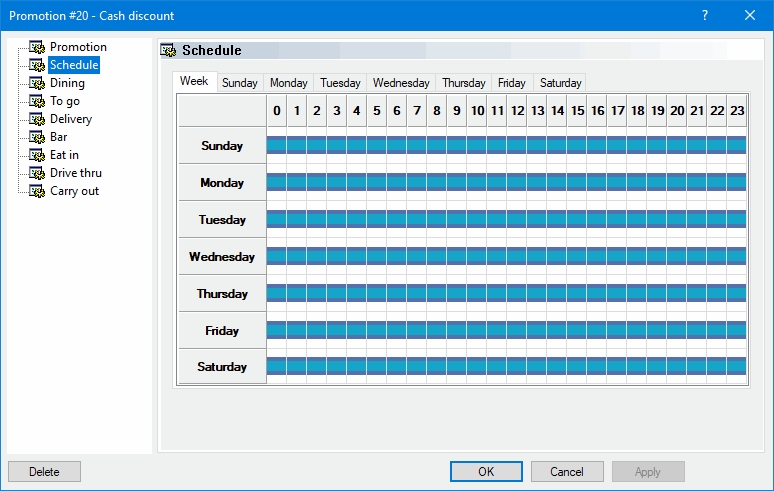

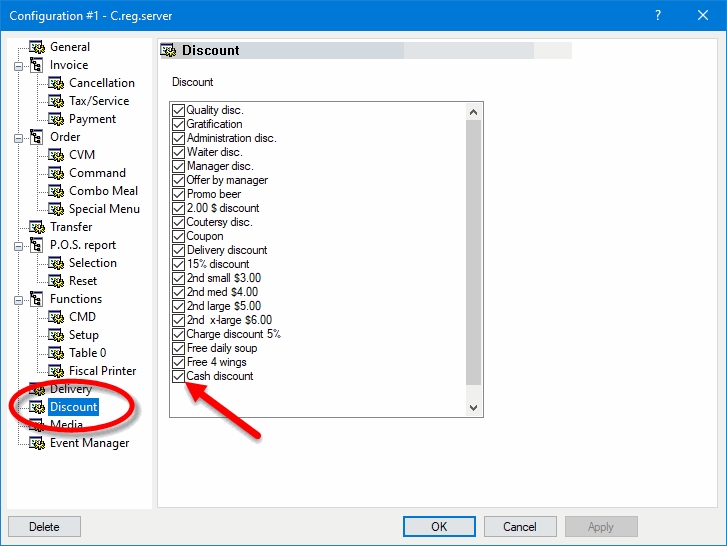
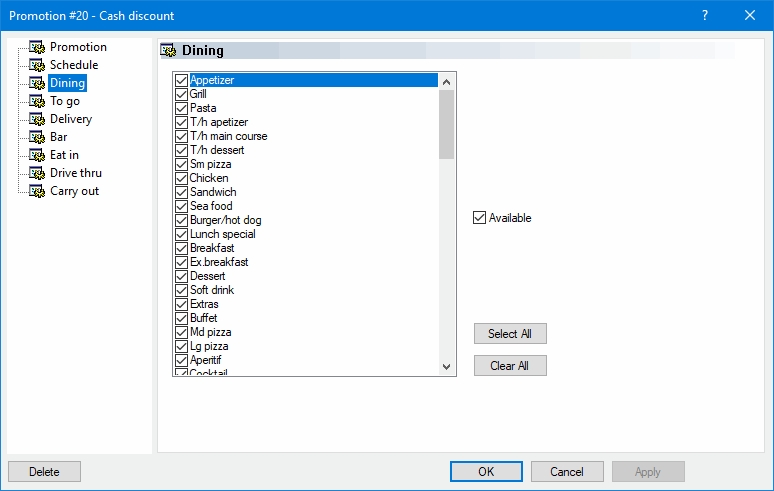


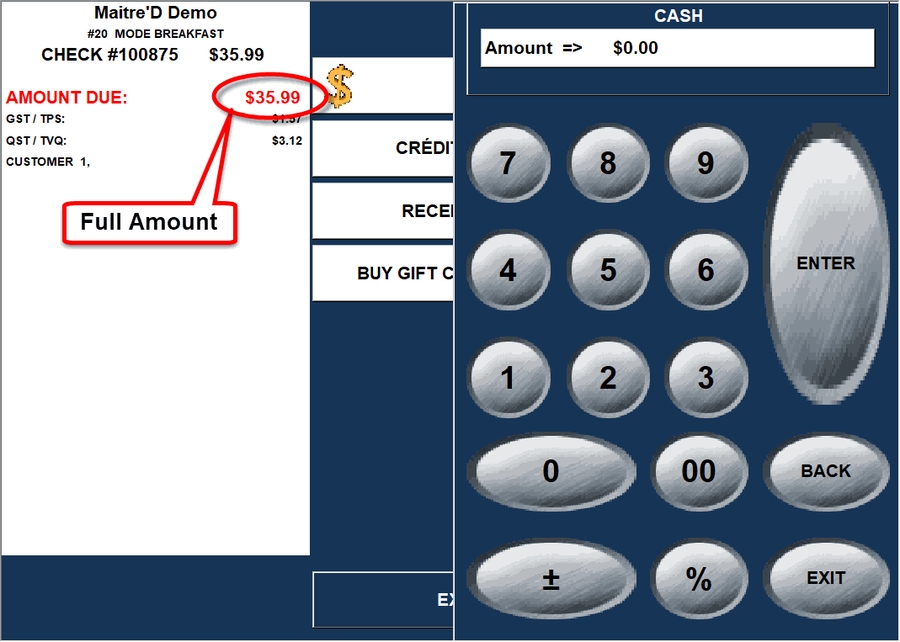
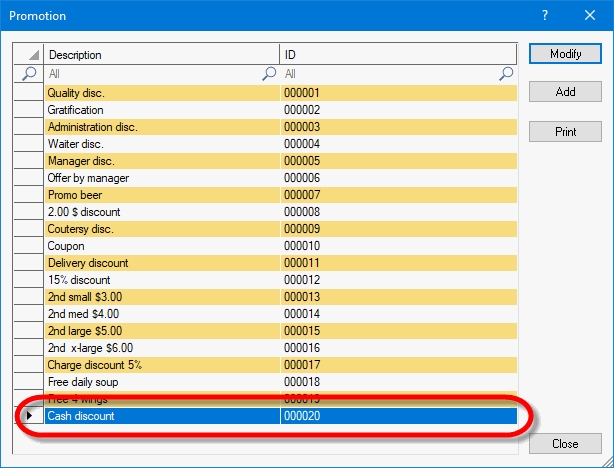
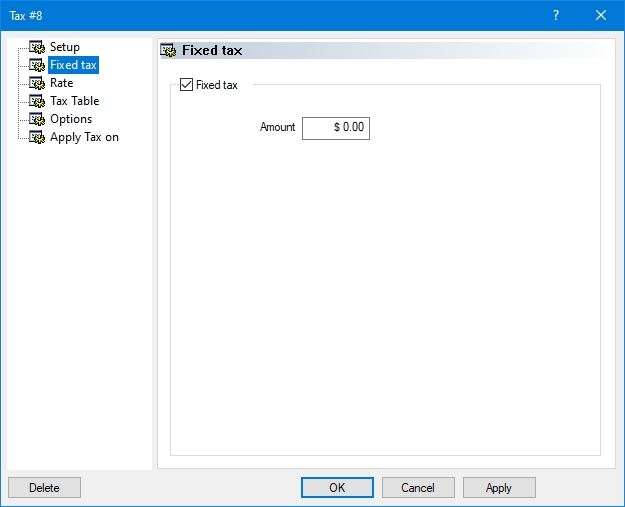
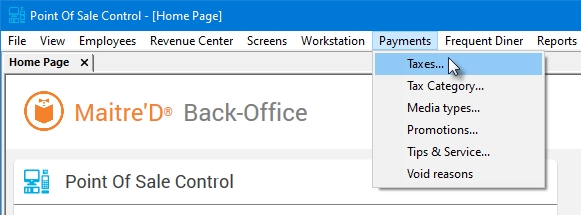
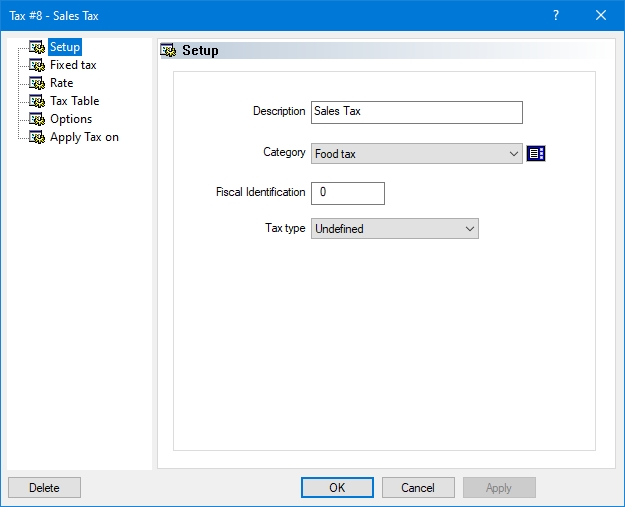
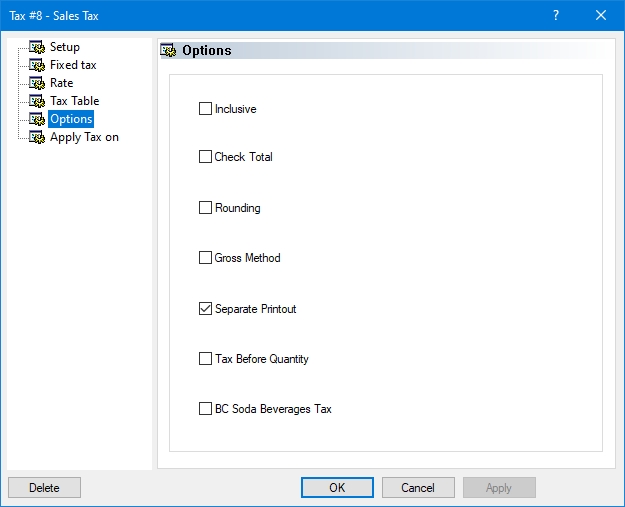
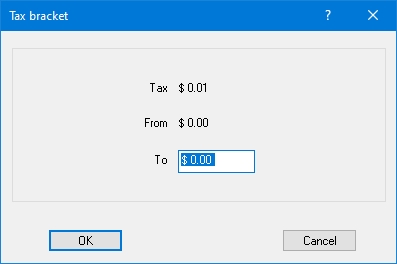
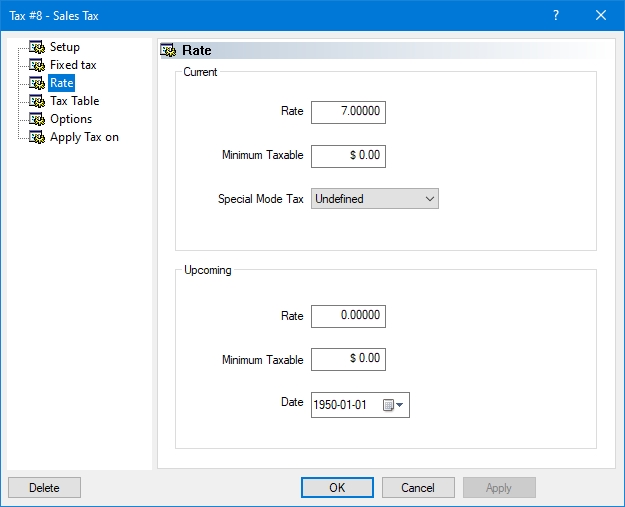
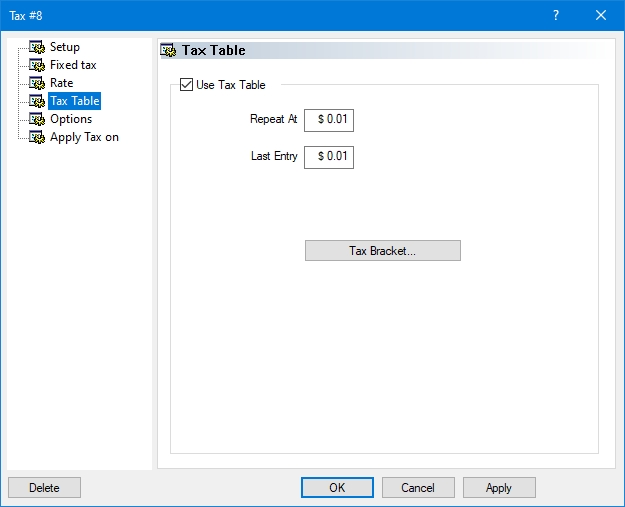
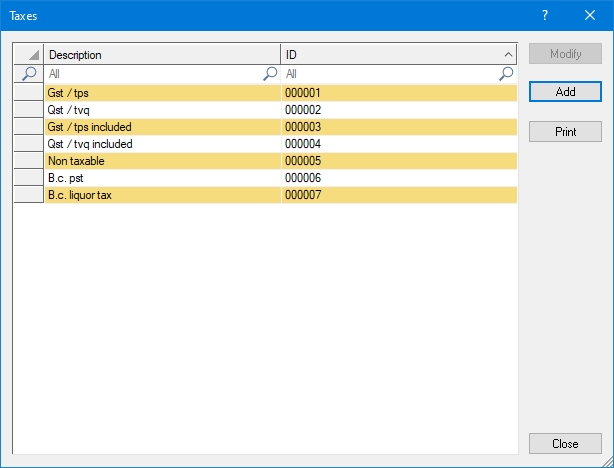
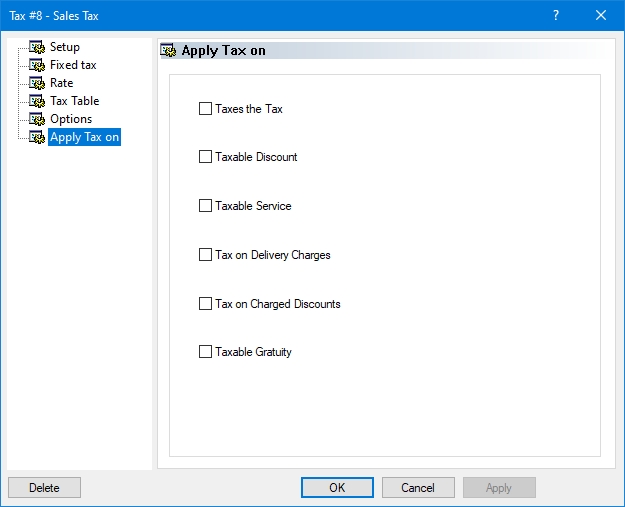
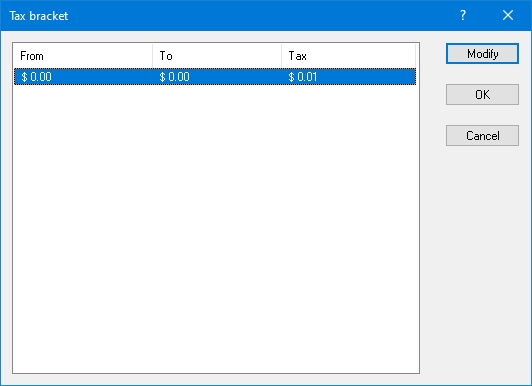
The Items Setup selection list is divided into a Tree & Branches layout.
Enable a sales item's root to open up the item's main setup.
Enable a sales item's branch to open up the item's configuration by revenue center & mode.
Sort
You can sort sales items based on the Item Description, PLU, Division or Function columns.
Search
You can search for sales items by Item Description, PLU, Division, Function, Revenue Center and Mode.
Group By
You can group the display of sales items, so that they are easier to locate, based on the Items Description, Division or Function
Filter
You can filter the display of sales items to only a portion of all available items, based on the Revenue Center, Division and/or Function.
This button allows to modify information on a Sales Item's record. Select a sales item's Root and click on the MODIFY button to modify an item's main setup. Select a sales item's Branch and click on the MODIFY button to modify an item's configuration by revenue center & mode. The record will display and you will be allowed to change any field.
This button allows to setup a new Sales Item.
This button allows to delete a Sales Item's record. Select a sales item's Root and click on the REMOVE button to remove the whole item. Select a sales item's Branch and click on the REMOVE button to remove this item's configuration by revenue center & mode. A warning message will prompt you for a confirmation to delete that record. Click on YES to delete this record.
This button allows to duplicate an Item's record. Select a sales item's Root and click on the DUPLICATE button to create a copy of that source item to a new sales item. The resulting item will have the same prices in all existing revenue centers and modes, and the same name, except for the characters _2 added at the end. You can then rename that new item, and adjust its prices if need be. This is useful, for example, to create all appetizers one after the other, after setting up your first appetizer.
Item
Description
Regular:
Type in a description (up to 20 characters) of the actual menu item, such as cheeseburger or chocolate shake. The workstation prints the item description on guest checks, shared printers and displays on the order screen.
Alternate:
Type an alternate description (up to 20 characters), perhaps abbreviated for the menu item you entered in the previous " Regular " field. For example, cheeseburger could be abbreviated to ChzBurg. The abbreviated description may be displayed on the order screen, and may print on checks or remote printouts. These options are enabled in the POS Control/Menu/Options section.
Function
Function:
Left click the Drop-down arrow to view a list of functions. Select the appropriate function. A description of each function follows
Sales item with no price. This item is not printed on the guest check. Example: Included items such as a free beverage.
Same as a Free item but printed on the guest check.
Set an item as a modifier and/or condiment. The system prints a modifier on the kitchen coupon preceded by the revenue item, which it is modifying. The system does not print the modifier on the guest check unless there is a charge associated with it. Modifiers are usually free but may be priced. The most common modifier items describe how a customer wants an item cooked such as a rare or medium rare or to specify an accompanying vegetable or dressing.
Free frequent diner Points Item, available when the Points Mode option is enabled in Server Control / View / Options / Frequent Diner.
Use to set an item as a priced modifier. On the guest check the price of this item is automatically included in the price of the main item.
Example: Whisky with soda. If you apply Price Rolled Up function to soda, its price will be included in the price of whisky.
Sales item which generates cash flow.
Set an item to scale if you are using the scale option. This tells the workstation to wait for a weight and the price of the item will be calculated according to the weight of the item.
Sales item sold by the minute.
Division:
Press Drop-down to select the appropriate division.
CVM Color:
Enable the item color for kitchen video monitor (KVM). For standard color, select Use Default, otherwise select another color (Color #8 Color #12 always for special use).
Item Class:
Press Drop-down to select the appropriate item class.
Main combo item:
Enable this option to make this sales item available to the Combo Meal's Item drop-down list.
Open Description:
Enable this option define a sales item as an Open Description item. The employees must type in a description every time they select that item. This description will show on the Order Screen when you order and when you come back to the table later, as well as when performing a Check Inquiry.
Open Price:
Enable this option define a sales item as an Open Price item. The employees must key in a price every time they select that item.
Options
In Report
If you enable this option, the Back-Office compiles sales statistics for this item and it will be included in the " Sales Item Report ". Otherwise, the Back-Office does not compile sales statistics for this item.
Available
If you enable this option, the item is available for ordering. Otherwise, the item is not available for ordering. If disabled, an item is temporarily out of stock.
Evaluation Sheet
This field is used to overwrite the Evaluation Sheet. If this option is enabled, an evaluation sheet will be print each time this item is ordered no matter which percentage is set up in the Configuration Evaluation Sheet. This can be useful when you want to get some feedback on a new product. Otherwise, the percentage programmed will prevail.
Others
Tare / Volume Modifier
Tare: Enter the weight of the container that will be deducted from the scale item.
Volume Modifier: Enter the ratio used to modify the main item's price when setting the item's Function as Price Rolled Up, for liquor control. That value can be smaller or greater than 100%.
CVM Item Count
Enter the Item Count to be sent to a Posera CVM TCP/IP or TCP/IP CE kitchen monitor.
No. Meals
Type in how many meals this item represents to count the number of meals sold. Each time a customer orders the item, the Back-Office increases the number of meals. For example, 0 for a coffee, 1 for a steak, or 2 for a large pizza.
Display Priority
This field is used if you choose By Priority in the Sort Type field of P.O.S. Control / Screens / Variable List Setup and/or P.O.S. Control / Revenue Center / Item Class. This is useful to group similar items within a broader list. For example, in a dessert list, you can group pies, cakes, donuts, ice cream and others by assigning different priorities to these items according to the different dessert types.
Portion Count
Enter the number of portions yielded by an item that can be ordered either as a whole or by portions, such as a bottle of wine which can be ordered whole or by the glass.
Buffet
This option is used in family dining establishments where buffets are common. Servers whose function is Hostess control the buffets. That function allows the hostess, at any time, to view the number of buffets served, currently being served, etc. The financial report of the waiter will also indicate the number of buffets assigned by the hostess, the number of buffets ordered, and the difference if there is any. The buffet names are defined in the P.O.S. Control / Revenue Center / Buffets section and you are allowed to have up to 10 different buffets. If you are not using the buffet option, select Undefined.
PLU Number
The PLU (Price Look Up) number in the sales items file can have two different functions.
It can be used to associate a different number from the one given by the system automatically (that's the ITEM # that you see in the top left corner of your screen when you program the item). This PLU number will appear in the ASCII export file that could be sent to a corporate office to match their existing PLU's. To use this option the "Use PLU number" field in System Configuration / View / Options must be enabled.
You can use the PLU number to track certain sales items across different revenue centers. For example, you might sell coffee in three different revenue centers but at the end of the week, you might want to know your total sales for this item. You will need to create a PLU for your coffee and attach it to the different coffee sales item. PLU numbers are defined under the P.O.S. Control / Revenue Center / PLU section. If you are not using this option, select Undefined.
Bar Code Id
Enter the bar code value that corresponds to this item. A workstation equipped with a bar code reader will be able to take orders using the bar code.
External Code
This code is used to keep the item match constant between the Maitre'D database and an external application, such as a kiosk or web ordering system, after the Main ID is changed by a Broadcast from the Corporate Office.
Upsize
#1 to #10
Click the ID line of the Upsize button that will replace this base sales item by another individual Items or a choice from a Variable List.
Modify
Click this button to configure this item's upsize items or variable lists.
Remove
Select an upsize and click the Remove button to delete it.
Item
Enable this option to set this button as an individual item.
Item
Choose in the drop-down menu the Item to display when the Substitution or Upsize button are touched on the Point Of Sales.
Variable List
Enable this option to offer a Variable List as Upsizes.
Variable List
Choose in the drop-down menu the Variable List to display when the Substitution or Upsize button are touched on the Point Of Sales.
Counter
Countdown
Enable this option to link the quantity entered in the Value field below to the availability of each sales item.
Value
Enter the quantity of this item currently available. This value shows besides the item description on the Order Screen, just as the decreasing permanent meter used to.
Reset At End Of Day
Enable this field to reset the quantity entered in the Value field above to zero (0) for this sales item during the End Of Day process.
Sales Unit 1 to Sales Unit 10
The Sales Units can have 2 different functions in the Maitre'D system. They can be used to:
1. Keep count of items used. (Ex: number of pieces of chicken in a bucket)
2. Be compared to an electronic bar system meter (for bar employees)
In both cases, you will need to program your sales unit first (refer to the Sales Units section). Select the appropriate sales unit to be linked to this sales item. You can program up to ten different sales unit counters per sales item.
Multiplier
You can use a multiplier for your sales unit counter. For example, if you want to track the pieces sold in a bucket of chicken that contains 9 pieces (such as 3 breasts, 3 legs and 3 wings), you will have to create 3 sales units called breast, leg and wing. Each one of those 3 counters will get a value of 3 in the multiplier field.
The Items Setup Configuration is divided into a selection list.
Enable a sales item's revenue center and mode to open up the item's configuration.
Revenue Center
This column shows the item's existing revenue centers.
Mode
This column shows the item's existing modes.
Price
This column shows the item's sales price in all existing revenue centers and modes.
Add
This button allows to setup a new Sales Item's revenue center and mode.
Modify
This button allows to modify information on a Sales Item's revenue center and mode. Select a sales item's existing revenue center and mode and click on the MODIFY button to modify an item's configuration. The record will display and you will be allowed to change any field.
Delete
This button allows to remove a Sales Item's record. Select a sales item's revenue center and mode, and then click on the DELETE button to remove this item's configuration. A warning message will prompt you for a confirmation to remove that record. Click on YES to delete this record.
Copy Fields
This button allows to access the "Copy Fields" screen. Select a sales item's existing revenue center and mode configuration and click on the COPY FIELDS button to copy an item's Text Recipe without affecting all other fields. You will be allowed to copy that Text Recipe to any other configuration.
Select the existing configurations where data will be copied.
All
Enable this option to automatically select all available configurations.
Text Recipe
Enable this option to copy the text recipe from the source configuration to all selected configurations.
Price
Enable this option to copy the Sales Item Price from the source configuration to all selected configurations.
Special Mode
Enable this option to copy the Special Mode Ratio from the source configuration to all selected configurations.
Surcharge
Enable this option to copy the Surcharge from the source configuration to all selected configurations.
Point Value
Enable this option to copy the Point Value from the source configuration to all selected configurations.
All
Enable this option to automatically select all available fields.
OK
Click the OK button to copy selected fields from the source configuration to the selected configurations.
Copy
This button allows to access the "Copy To" screen. Select a sales item's existing revenue center and mode and click on the COPY button to copy all fields of an item's configuration. You will be allowed to copy that configuration to any other revenue center and mode.
Revenue Centers
Choose the revenue center(s) where you want the previously selected configuration to be copied.
All
Enable this option to copy the previously selected configuration to all revenue centers.
Modes
Choose the mode(s) where you want the previously selected configuration to be copied.
All
Enable this option to copy the previously selected configuration to all modes.
Replace Existing
Enable this option to overwrite any existing revenue center(s) and mode(s) with the previously selected configuration in addition to creating new configurations for empty revenue center(s) and mode(s).
OK
Click the OK button to start the copy of the selected configuration towards the chosen revenue center(s) and mode(s).
Price and Cost
You can check your selling price or costing for each mode of your revenue center. If you enter a selling price in the format XX.XX in the "Price" field, the computer will update automatically the "% Cost" field. If you enter a two digits number in the "% Cost" field, the computer will calculate a selling price so that your cost is the percentage that you want.
Revenue Center
This field displays the revenue center's description.
Mode
This field displays the mode's description.
Price
This field displays the price of the item for each mode.
Cost
This field displays, for each mode, the cost calculated based on the item recipe as well as on the inventory setting included in each sales item.
% Cost
This field displays the cost percentage calculated based on the item cost versus the item price for each mode.
Profit
This field displays the difference between the item cost and item price for each mode.
Special Mode
If you have a special mode, like Happy Hour, input the ratios so that the system knows by how much it will have to decrease the inventory.
Example: For regular portion, enter 1.
For half the normal portion, enter 0.5.
For twice the normal portion, enter 2.
Surcharge
Enter in this field the amount to add to a Combo price when upsizing a modifier component.
Extra Points
Enter in this field bonus points to add to the Frequent Diner guest regardless of promotion rules.
Point Value
Enter the number of points earned required to get this frequent diner Points Item for free, if the Points Mode option is enabled in Server Control / View / Options / Frequent Diner.
Option
Available
Enable this option to make this item available in that particular Revenue Center and Mode.
Temporary Withdrawal
Enable this option to make this item temporarily unavailable for sale from the External Order System (EOS) and the Points Of Sales. When the Temporary Withdrawal status of an item is modified, au update of the information on this item is sent to the EOS in real-time. All Temporary Withdrawal will be made available again for the next fiscal day if the Reactivate Temp. Withdrawn Items at the EOD option is enabled in P.O.S. Control / View / Option / Configuration / Option
Remote Display Only
This option allows to display items to the Remote Order Confirmation Screen (AccuView) screen without having to print them to the KVM monitor.
Exclude From Savings
Enable this option to exclude this item configuration from the savings calculation that can be configured for each Revenue Center.
Included Item
Enable from the list of free items the one that is included when this sales item is ordered.
Weight
Represents the maximum weight of the Weighted Modifier. If it is greater then the Free option set in the Screen/ Weighted modifier, the modifier's price will no longer be zero. The default value is 1.
Printing
Printout #1 to #9
Enable the shared printer where you want this item to print. You may send the order to five different printers at the same time.
Enlarged
If this option is enabled, this item's description will be printed in bold character at the Printout#1 to Printout #9.
In Red
Enable this option in Printout#1 to Printout #9 to print items other then modifiers in red characters as well. For example, this is useful for items with the Free function, but used as modifiers.
Priority
This field is used to prioritize the order in which items print out, so that it follows the specific order in which the cooks prepare them. For example, even if a server enters the modifiers for a pizza as: Mushrooms, Cheese, Pepperoni and Light sauce, the system could print them as: Light sauce, Pepperoni, Mushrooms and Cheese. Items with 0 have the lowest priority, and will print after all other items.
Regular Modifier
Enable this to use regular modifiers to obtain the modifier lists for a given sales item. Use these fields to cause 1 or 2 specific modifiers screen to appear when a server orders a certain sales item. For example, if a server orders a steak, a screen will appear on the touchscreen offering the choice of temperature for the steak, followed by a second screen offering a choice for starches.
Modifier #1, Modifier #2
From the drop-down menu, select the variable list of modifiers you want to link to the sales item.
Weight Modifier
Enable this to use the weight modifier to obtain the modifier lists for a sales item. Use the Weighted Modifier option instead of Regular Modifier for advanced flexibility. Here is an example of how you might use the weighted modifier. Suppose that there is a choice of 2 free condiments out of 3 available with a Pizza:
Pepperoni, worth $1.00, has a weight of 1.
Green pepper, worth $1.00, has a weight of 1.
Shrimp, worth $2.00, has a weight of 2 because it is worth twice as much as the other two condiments.
In this situation, 1 shrimp has the same value as 1 pepperoni + 1 green pepper, therefore, the customer has a choice between pepperoni and green pepper or shrimp only. If he wants more, he has to pay extra. As you can see, the weighted modifier allows to compare food items that have different values and to mix and match them accordingly.
Weight. Mod.
Click on the drop-down arrow to select the weighted modifier if you want it to be linked to this sales item.
Level Modifiers
Level Mod
Enable the level modifier you want to use. A level modifier is used for example when you are creating sales items such as pizzas, and the items that you will select could have different prices depending on the quantity selected. EX: A basic pizza will go for 9.95 $ with a choice of 3 toppings. Toppings 4 and 5 will go for 2.00 $ whatever you select 4 or 5 toppings, and topping 6 and 7 will go for 1.50 $ each. 1) You will need to program your basic pizza 2) You will need to program a weight modifier for those toppings 3) You will need to create a Level modifier for this pizza. In your basic pizza item you will select your pizza weight modifier, and your pizza level modifier. The pizza level modifier will be programmed such as: Select the Use price fields 1 to 7 Price #1: 0.00 $ Price #2: 0.00 $ Price #3: 0.00 $ Price #4: 2.00 $ Price #5: 0.00 $ Price #6: 1.50 $ Price #7: 1.50 $
Recipe on Terminal
Should this option be enabled, Maitre'D will be able to display the sales item recipe on the touch screen whenever a server requires it. If a bar recipe (text recipe) is linked to the item, then that recipe will be used, otherwise, it is the inventory system recipe will be used instead (however, the Inventory Management module must be installed). This option is useful when teaching employees to prepare certain sales items, like cocktails. By enabling this option, you can access the Recipe editor.
Text Recipe
This option allows to link a text recipe to a sales item. From the drop down menu, select the text recipe that you want to link to the sale item.
Use this icon to create or modify text recipes displayed on the workstation.
Recipe To Use
Enable to use an Item Recipe or an Inventory Recipe.
Recipe
This field displays the total cost of the ingredients included in the item recipe branch.
With Settings
Enable this to include the cost of a setting associated with an item (butter, bread, napkins, etc.). To program the price using this option, go to the Maitre'D Inventory module in the View/Option section.
With Vegetable
Enable this option if the meal comes with vegetables that are not included in the recipe. To program the price using this option, go to the Maitre'D Inventory module in the View/Option section.
Extras
If you do not want to enter every item in a recipe, use this option to enter an approximate cost for minor items. They can be left out of the recipe programming.
Calories
This field displays the total calories of a given item based on the ingredients included in the item recipe branch.
The Recipe sub-branch only becomes available only if the Inventory Management Module is available and that the Recipe to Use field is set to either Item Recipe or Inventory Recipe.
Inventory Recipe
Enable the inventory recipe that belongs to this sales item.
Quantity
The quantity of inventory items used in a recipe.
Units
The inventory items used in a recipe in an inventory usage format.
Description
The inventory item description of the ingredients used in a recipe.
Unit Cost
The inventory item cost per usage format.
Cost
The ingredient cost (quantity multiplied by unit cost).
Calories
The total calories of an inventory item used in a recipe.
Ratio
This field is only used by the Automatic Conversion option, and show the percentage of the buying cost applied to this item.
Item
Enable the inventory item that belongs to this sales item.
Quantity
Type in the quantity of the inventory item that is used in your recipe.
Quantity Modifier
At each level, type in the quantity of the inventory item that is used in your recipe. The item has to be a MODIFIER. The higher the level (the more modifiers chosen) the smaller the quantity. If the quantity is more than zero, then the quantity above will be ignored.
Example:
Level 1/Quantity = 10 g
If 1 modifier is chosen then the quantity of this modifier will be 10 g.
Level 2/Quantity = 9 g
If 2 modifiers are chosen then the quantity of this modifier will be 9 g.
Level 10/Quantity = 1g
If 10 modifiers are chosen then the quantity of this modifier will be 1g.
Look at the list below to learn more about all the commands that are available for Preferential Screen or Screen Layout buttons.
Add | Reorder
The ADD button increases the quantity of a sales item. You have to first highlight the sales item in the Customer Order area, and then select the ADD button. If you highlight a sales item that was ordered previously, the REORDER button allows to reorder the same sales item.
Alternate | Regular
This command button allows to switch between the regular and compiled Order screen. This is useful to verify a compiled order before sending it to the kitchen.
Touch the Regular button to display the items on separate lines, in the same sequence they were chosen.
Touch the Alternate button to compile identical items on the same line.
The Alternate Order Screen option must be enabled in Point of Sale Control / Employees / Configuration / Order
.
.
AR Customer Name On Kitchen Chit
This command button allows selecting an Account Receivable from the A/R list, to display the Customer Name on the Order Screen and kitchen chit.
Assign Name To Table
This command button allows an employee to assign a name to an already opened table.
Balance The Bar Interface
This command button allows the servers to balance the bar interface reading with Maitre'D. At the end of the shift, the bartender can ask to balance the bar interface. Maitre'D verifies what has been ordered and what has been poured from the bar dispenser, and enters on the Order Screen the difference between both applications. Then it is just a matter of closing that check to have the Maitre'D and the Bar Device balanced.
Bar Tab
This command button allows the employee to open a bar tab.
This functionality requires an EFT solution which supports this feature.
Break-In
This command button allows the servers to push On The Fly orders to the first column of the CVM. For example, an employee can use this button if a drive-through customer decides to add a dessert when being handed the original order at the window, or if a customer broke into the line and didn't order at the order station.
Cash Payment
This command button allows to enter the amount of the preset cash button. Ex. $10, $20 etc.
Check Redistribution
This command button allows the employee to redistribute the check amounts among customers within a table.
This button does not appear unless the check has been printed once.
Clear Fast Order
This Command button allows to remove an entry from the Quantity Keyboard.
Client Adjustment
This command button allows the employees to adjust the total count of their customers.
This manual modification is only reflected on the employee readings on the workstation and the Sales Consolidated report in the report center.
Close
This command is used to close a check, an order, a table or a bar tab. This will bring up the payment screen, which allows the selection of a media type to settle the check. Newly ordered items will also be sent to kitchen printers, and the check will be printed if it has not already been printed.
Close All Trays
This command button allows cafeteria fast-food employees to display a compiled screen with the detail of more than one customer, and settle all current trays to Cash simply by pressing the OK button.
Combo Screen Suggestion
This command displays the different possible combo detected with the sales items selected so far in an order.
You also need to enable both the Use Combo and Use Suggestion Screen options in Employees / Configuration / Order / Combo Meal.
Command List
This command button allows displaying the special commands list screen.
Compiled
This command button allows displaying the current order in compilation mode. This speeds up fast-food service, giving the food runner a summary of current orders to prepare.
Count Customer
This command button allows including or excluding a guest from the client count in the reports. This is useful when a customer comes back to order a dessert, for example.
The No Customer Count option of Point of Sale Control / Employees / Configuration / Order disables this button for Table Zero (0).
Count Item
This command area displays the number of items ordered by the current customer.
Course
This command button allows to specify the course of the meal the sales items are associated with. The course number entered prints at the top of the kitchen chit followed by the items ordered. For example, a customer could choose to have an appetizer before the main entree arrives or with the main entree.
This option is available only if the Compilation option is enabled in Point of Sale Control > Revenue Center > Options > Options > Kitchen.
Credit Card Number Entry
This command button allows the employee to store a credit card number. This function is used to start tabs, for example, without actually authorizing the credit card for a specific dollar amount through the Credit Card Authorization function.
Delivery | Pickup List
This command button allows employees with a first regular Delivery function With Driver and a second one with Pick Up Mode to switch an order from one function to the other after it has been sent.
You should add this button to the screen of a third function.
Delivery | Pickup Switch
This command button allows employees with a first regular Delivery function and a second one with Pick Up Mode to switch a current order from one function to the other before sending it.
You should add this button on the screen of both functions.
Delivery Credit
This command button allows to give customers a credit that may be applied on their next delivery. The credit applied to a customer will be treated as a discount for the next time the customer calls to place an order. The Delivery module must be installed on the system to use this option, and you must define a Credit promotion in Point of Sale Control / Payments / Promotion.
Delivery Customer Selection
This command button allows to go back to the Delivery customer information screen from the Order Screen. The Delivery module must be installed on the system to use it.
Delivery History
This command button allows access to the delivery time of the last five orders of the customers. The Delivery module must be installed on the system to use this command. The historical field and the With Driver option in the Delivery / View / Option must be enabled.
Delivery Last Order Recall
This command button allows to recall the details of the last order that the customer has placed for the restaurant. The Delivery module must be installed on the system to use this command, and the Last Order option in the Delivery / View / Options must be enabled.
Delivery Order Time
This displays the current order time on which the delivery guaranty applies to.
Delivery Pre-Order Recall
This command button allows to manually recall a pre-order already entered for this customer. The Delivery module must be installed on the system to use this command.
Delivery Warranty
This displays the time in minutes given for the delivery warranty.
Discount
This command button links a discount that uses Gross Sales as discount categories.
Display Customer Count
This command displays how many guests were included in the order to help employees verify they did not forget any member of a group.
Display Recipe
This command button allows to display and print recipes of sales items that have been selected on the touchscreen. New bartenders can use this option to help them prepare drinks.
Display The Current Time
This displays the current time.
Do Combo
This command button allows to find all available combos and give the best possible deal once all items have been selected and the customer is ready to pay.
If you refuse the detected combo the first time, you can use this button again. You also need to enable both the Use Combo and Multiple Combo Choice options in Point of Sale Control / Employees / Configuration / Order / Combo Meal.
Employee Function
This command button allows to access the employees Function Screen directly from the order screen.
Exit | Clear
This command button allows employees to exit from the Order Screen if no new sales items have been entered on the order. The CLEAR button allows employees to cancel all newly punched sales items on the order.
External Command
This command button allows employees to start an external application.
By default, while the other application is running, the workstation is disabled and can not send orders to shared printers.
Fire
This command button allows employees to manually override the Hold countdown and send the order to the kitchen immediately.
Food Runner
This command button brings up the food runner screen right away without waiting for the default delay.
If a value between 1 and 3 is entered in the usage field, the button also becomes a display area to show the last, second to last or third to last order.
Frequent Diner Selection
This command button allows to associate a frequent diner customer with an order at anytime during the transaction.
General Message
This command displays the same 5 lines message as seen on the workstation's Login screen.
Go Client
This command button allows to go directly to another client on the same table faster then touching the Next or Previous button multiple times.
Hold
This command button allows to manually apply a Hold time before the order is fired to the kitchen. When you exit the table, the countdown will start and when it reaches 0, it will fire the order.
Item
This command button links preset buttons for specific items.
Item Availability
This command button allows to make selected items available or not.
Item Class
This command button allows to link an item class. Item Classes are groups of items that can be displayed in any order.
If an Item Class is already defined within a Screen, when you link a new Sales Item to that Item Class, this Sales Item is automatically included in this button.
Item Property
This command button allows to change the prices or description of sales items. If the item has its own button on the preferential screen, you can also change the button description. Or the item the button points to.
Item Recipes
This command button allows to select a sales item to display and print its recipe.
Item Waste
This command button allows to declare the loss of a sales item.
Less | Void
The LESS button decreases the quantity of a sales item about to be ordered if you have more then 1 item on the same line, or cancels the item if only 1 is on that line. You have to first highlight the sales item in the Customer Order area, and then select the LESS button. If you highlight sales items that were ordered previously, the VOID button allows to remove the sales items.
You might not have access to these functions with your access level.
Manual Bar Code
This command button allows the employees to manually enter bar codes.
Media Select
This command button allows to select one of your frequently used payment media types.
Mode
This command button allows to change the current mode on your workstation. After touching this button, you are prompted to select the mode you wish to use. After selecting the mode, the preferential screen for that mode displays, prompting to select an order entry sales item for the mode selected.
Mode Description
This command displays the mode currently in effect for that order.
Next Client
This command button allows to move the customer indicator forward one number from the currently displayed customer.
Next Dollar
This command button works the same as the close button but allows to enter the next closest dollar amount when settling checks. Ex. Next $1 could be used if the check total is $5.39 and the guest tenders $6.00. MaitreD, will calculate the change as .61 cents.
Next Preferential Screen
This command button allows to see the next section of your preferential screen, depending of your configuration.
No Sale
This command button allows to open the cash drawer without a sale.
Ord by Bar Controller | Ord by POS
This command is used to toggle between Order on pour mode and regular order mode. To be used only with bar controller devices.
Order Time | Price
This command button has 2 functions:
The ORDER TIME button allows the servers to display the time the order was sent to the kitchen.
The PRICE button reverts back to displaying the price of the items"
Park Table
This command button allows dining room employees to keep items currently selected but yet to be ordered so that they can leave the workstation and come back later without having to re-enter all those selections again. When that employee then accesses any Point Of Sales, the parked table is automatically offered, and the kept items are displayed, as if the employee had not left the workstation. New items can then be added and ordered at the same time as the kept items.
Also enable the Park Table option in Point of Sale Control / Employees / Configuration / Order. On the Floor Plan and Table Verification screens, a parked table will be noted with an "H", for Held. An employee can only park one table at a time.
PLU (Order By PLU Number)
This command button allows servers to order sales items by the item numbers. This number is not the PLU number, but the sales item number. The sales item number is displayed as the ITEM # in the top of the screen in Revenue Center / Sales Items / Items Setup. The sales item number may be different from the PLU number.
Preferential Screen
This command button calls another screen. For example, the BAR screens. As soon as the server will make a selection on this screen, the original screen will be brought back.
Preferential Screen Description
This command displays the name of the preferential screen currently in effect.
Preferential Screen Selection
This command button allows to select other preferential screens.
Previous Client
This command button allows to move the customer indicator back one number from the current displayed customer number.
Previous Preferential Screen
This command button allows to go back to the previous section of your preferential screen, depending of your configuration.
Price Override
This command button allows the servers to change the price of the item(s) being ordered. (The price change will affect the current order only).
This command button allows to print the customer check, with of without discounts. If needed, it also orders newly entered sales items.
Print Current Customer
Select this command button to print the check for a single guest without going through the check distribution process and pressing the Next button for all guests who are not ready to leave.
Also enable the Print Current Customer option in Point of Sale Control / Employees / Configuration / Invoice
Print Last Check
Enable this command button to print the last Table # check. You must use the SEND button on the touchscreen to send the order to shared printers. If you have printed the check, you will not be able to print the check again using the PRINT LAST CHECK button.
Punch Clock
This command button allows to access the employees Punch Clock Functions directly from the order screen.
Quantity Selection
This command button allows to enter multiple quantities of the same sales items.
Reading
This command button allows accessing the employees Reading directly from the order screen.
Remark On Request
This command button allows the servers to enter Remarks. In Configurations by revenue centers Options you can program the number of lines for remarks, fill the Number of Lines field.
If you do not want remarks to be printed on the guest check, clear the On Check field. You can choose whether or not remarks should print on the guest check, but if you are using remarks they will be printed in the kitchen.
Remarks are useful for advising the kitchen that the customer is in a hurry or to personalize a message on the guest check, such as " Happy Birthday Joe! ".
Re-Order Last Round
This command button allows the employees to reorder items that have been already ordered. For example, the customers at a table X ordered 1 order of Nachos and 2 Bud Lights. Suppose that 30 minutes later, the customers at that same table wanted another order of Nachos and 2 Bud Lights. The ROUND button would allow an employee to order these same items again with fewer button strokes. To enable this option, the Round option under the Revenue Centers / Options, must be enabled.
Revenue Center Description
This command displays the name of the revenue center currently in effect.
Revenue Center Selection
This command button allows to change the revenue center for the current order. After touching this button, you are prompted to select the revenue center you wish to use. After selecting the revenue center, the preferential screen for that revenue center displays, prompting to select an order entry sales item for the revenue center selected.
Revenue Center Switch
This command button allows to change the revenue center for the current order, even for items already ordered.
Enable the Show Selection option in Point of Sale Control / Employees / Employees / Access and give access to at least two revenue centers. Also enable the Change Revenue Center option in Point of Sale Control / Employees / Configuration / Order / Command.
Scroll Order Down
This command button allows to scroll down to the next screen of items if you have more than a full Customer Order screen.
Scroll Order Up
This command button allows to scroll up to the previous screen of items if you have more than a full Customer Order screen.
Send
This command button sends the order to kitchen / requisition printer(s).
Set Number Of Customers
This command button allows employees to enter the number of customers at each table. This option allows to change the number of customers originally entered. For example you originally have 1 customer at a table, and a second guest decides to join the table.
Skip Order Detail On Check
If you enable this option, you will be able to enter a description that will replace the detail of the check when printing it.
Split Check
This command button allows the employees to split previously printed check into many separate checks with amounts that is specified.
Split Item
This button allows to divide the cost of sales items that have already been sent to the kitchen between two or more customers.
Status
This command button allows to display the status screen, which offers tools to transfer sales items from one customer to another.
Substitution List
This command button allows to display the different upsizes available for the sales items selected. The employee can then touch a particular upsize to select it.
Table
This command button allows to go directly to another table to place an order. As soon as the order is entered and the button is selected, the system will display a button pad and ask for your other table number.
Takeover | Release
This command button has 2 functions.
The TAKEOVER button allows a manager to quickly takeover another employee's table.
The RELEASE button returns the table to the original employee.
Transaction Timer
This displays how long it has been since this table was opened in table side service, or since the first item was selected in fast-food.
Undo Combo
This command button allows to remove the currently selected combo and replace it with the components at full price. The Do Combo command button can then be used to apply another one and give the best possible deal once all items have been selected and the customer is ready to pay.
Upsize
This command button allows to Upsize sales items in up to 10 different formats. On the preferential screen, setup a button for the base sales item. In Point of Sale Control / Revenue Center / Item Setup / Links, in the base sales item, select other upsized sales items to replace it when selected in combination with the upsize buttons.
If the Special Menu Printout options are also both enabled in Point of Sale Control / View / Options / Check and Printing, one can upsize an item ordered previously. The original item is voided, and the upsized item is ordered, without reporting this void anywhere, and even if the employee is not allowed to perform voids, so be careful not to supply any Upsize that is in fact a Downsize, as this could open the door to fraud.
Variable List
This command button allows you to link a variable list.
Void Check
This button allows the employees to void checks after the orders have been sent or to the kitchen, but before they have closed the checks. Employees can use the VOID CHECK button to void all items off the check. It is much easier than using the VOID button, which only voids specific highlighted items.
Void Order
This command button allows employees to create negative checks. Employees use negative checks to perform refund on a closed check. You are not actually voiding a specific check, but creating a new check number that has the items to be voided (entered negatively). This check offsets the check that was ring incorrectly.
Waiter
This command button (bar server interrupt) allows to switch from one bar server Order Screen to another during the order process.
Waste Sale Item
This button allows employees to remove a sales item that will appear on a waste item report for sites that do not use the inventory module. This is useful to differentiate voided items that were put back in stock or never taken from stock from wasted items that were thrown out.
The original item is voided, without reporting this void anywhere, and even if the employee is not allowed to perform voids, so be careful to reserve this function to the manager's screen access only.
This article is intended for all Maitre'D users, resellers and support technicians, doing business or providing technical support for users in the province of British Columbia (BC), Canada.
Maitre'D 7.08.00.340 or later
Effective April 1, 2021, soda beverages will no longer qualify for the exemption for food products for human consumption. PST will apply to all retail sales of soda beverages at a rate of 7%.
If you sell soda beverages and are not already registered as a PST collector, you must register to collect and remit PST. Ensure your point of sale systems are updated to charge PST on soda beverages effective April 1, 2021.
Soda beverages are carbonated or effervescent beverages that have bubbles and fizz and contain any of the following:
Sugar
Natural occurring sweeteners
Added natural sweeteners (such as honey, molasses, maple syrup, fruit juice, stevia, etc.)
Artificial sweeteners (such as aspartame, sucralose, saccharin, etc.)
Carbonation or effervescence may be either naturally occurring in drinks (as in the case of fermented non-alcoholic beverages, such as kombucha) or injected after the beverage has been manufactured (e.g. with carbon dioxide or nitrogen).
Soft drinks and soda pop
Sparkling fruit juices
Carbonated or nitrogenized energy drinks
Kombucha
Frozen sweetened beverages, such as Slurpees or Frosters, that have been carbonated or have other gases added to them, and
Sweetened effervescent beverages that have any of the following added to them:
frozen desserts, such as ice cream (e.g. ice cream floats)
fruit or fruit flavouring
This article explains the Maitre'D configuration required to comply with British Columbia's Provincial Sales Tax Act.
IMPORTANT! This article assumes that your Maitre'D POS system is already configured and fully functional. Use the information from this article to update your existing Maitre'D POS system to the new regulation.
Create / Configure Tax Categories as explained in the article.
Create / Configure Taxes as explained in the articles. You may also refer to the tables below for specific settings.
Assign taxes to divisions as explained in the article.
Assign all sales items that are defined as "Sodas" to taxable divisions.
British Columbia has two tiers of sales taxes. The first tier is managed at the provincial level, which includes the provincial sales taxes and liquor taxes. The second tier is managed at the federal level, which includes the Goods & Services Tax (GST). Therefore, it is suggested to use two Tax Categories for Maitre'D:
Provincial Taxes
Federal Tax
Provincial Sales Tax (PST) - 7%
Provincial Sales tax (PST) for liquor - 10%
Goods and Services Tax (GST) - 5%
The following tables list all the options and settings for each tax. Refer to the article to learn how to create a new tax, and refer to the tables below for each individual setting.
The provincial Sales Tax at a rate of 7% applies to sodas as explained in the article. However, if you also sell miscellaneous goods, such as clothing, bottle openers and souvenirs (e.g. souvenir glasses or pens with your company name on them), you also need to apply the 7% PST on these items. The PST may be used as an add-on tax or an inclusive tax.
Maitre'D Tax Settings for 7% PST configured as add-on tax
Maitre'D Tax Settings for 7% PST configured as inclusive tax
The provincial Sales Tax at a rate of 10% applies to all alcoholic beverages containing more than 1% of alcohol per volume, such as beer, spirits and liqueurs, wine, mixed drinks, etc.
Settings for 10% PST configured as add-on tax
Maitre'D Tax Settings for 10% PST configured as inclusive tax
The federal Goods and Service Tax (GST) at a rate of 5% applies on all goods and services, including food, beverages, alcohol, clothing, souvenirs, etc. The GST may be used as an add-on tax or an inclusive tax.
Maitre'D Tax Settings for 5% GST configured as add-on tax
Maitre'D Tax Settings for 5% GST configured as inclusive tax
The settings explained in this article only applies to businesses located in the Canadian province of British Columbia.
The aim of this article is to explain how to setup Maitre'D divisions to comply with the British Columbia Provincial Sales Tax Act. These setings will ensure that sodas are taxed according to which came into effect on April 1st 2021. At the same time, this configuration will ensure compliance with all other provisions of the Provincial Sales Tax Act pertaining to the restaurant and bar industry, as defined in .
Make sure that all required taxes are created and properly configured. See .
To learn how to access tax settings for each division and read definitions for each setting, see .
For definitions of what is considered a "Soda Beverage", see .
The divisions used for sodas are taxable by both the GST (5%) and PST (7%). Here are the required settings:
Tax #1
Select GST (5%) from the drop-down list.
Tax #2
Select PST (7%) from the drop-down list.
BC Soda Beverages Tax
This section becomes available because the BC Soda Beverage Tax option is enabled in the PST (7%) tax settings.
Maximum Amount
Set this value to $3.00.
Maximum Percentage
Set this value to 50.
The divisions used for alcohol products are taxable by both the GST (5%) and PST Liquor (10%). Here are the required settings:
Tax #1
Select GST (5%) from the drop-down list.
Tax #2
Select PST Liquor (10%) from the drop-down list.
BC Soda Beverages Tax
This section is not available because the BC Soda Beverage Tax option is disabled in both the PST Liquor (10%) and GST (5%) tax settings.
Maximum Amount
Unavailable.
Maximum Percentage
Unavailable.
The divisions used for non-food items are taxable by both the GST (5%) and PST (7%). Here are the required settings:
Tax #1
Select GST (5%) from the drop-down list.
Tax #2
Select PST (7%) from the drop-down list.
BC Soda Beverages Tax
This section becomes available because the BC Soda Beverage Tax option is enabled in the PST (7%) tax settings. However, these settings must be left at zero for "non-soda" divisions.
Maximum Amount
Set this value to $0.00.
Maximum Percentage
Set this value to 0.
The divisions containing food items are taxable only by the GST (5%). Here are the required settings:
Tax #1
Select GST (5%) from the drop-down list.
Tax #2
Select Undefined from the drop-down list.
BC Soda Beverages Tax
This section is not available because the BC Soda Beverage Tax option is disabled in the GST (5%) tax settings.
Maximum Amount
Unavailable.
Maximum Percentage
Unavailable.
This article will cover some common scenarios that can be encountered when the PST is applied to soda beverages in British Columbia, and a brief overview of the required configuration.
Here is a quick recap of British Columbia's Provincial Sales Tax (PST) rules which applies to soda beverages. For complete and up-to-date documentation regarding taxes, please consult the official British Columbia government site at .
PST applies to all retail sales of soda beverages at a rate of 7%.
If you offer the beverage for sale without the food or other good, you charge PST on the lesser of:
the ordinary purchase price of that beverage, and;
the total purchase price of the other good and beverage together.
Or
If you offer the beverage for sale only with the food or other good, the lesser of:
50% of the total purchase price of the food or other good and beverage together, and;
$3
Also, don't forget that almost all items sold in restaurants, including soft drinks, are also taxable by the federal Goods and Services Tax (GST) at a rate of 5%.
IMPORTANT! While the new regulations are often referred to as "B.C. Soda Tax", it is important to understand that the government of British Columbia did not create a new tax specifically for sodas. Instead, the updated law simply extends the reach of the existing Provincial Sales Tax to soda beverages.
For your POS system, this means that you should not have a separate tax for sodas. You should use the PST at a rate of 7%.
You offer an all-you-can-eat buffet with access to a soda fountain for $30.00. Access to the soda fountain is not sold separately and it is not listed on the menu, therefore it does not have its own price. The $3.00 / 50% rule applies: Since $3.00 is lesser than 50% of $30.00 ($15.00), the PST will be calculated on $3.00.
Configure a revenue item called "Buffet - Adult" with a price of $30.00. Make this item part of a food division.
Configure a free item called "Soda Fountain". Make this item part of a Soda/Soft Drink division.
Link the Buffet - Adult item to the Soda Fountain item through a Weight Modifier and a variable list.
You offer an all-you-can-eat buffet for $28.00. You offer access to a soda fountain for an additional $2.00. Because access to the soda fountain is listed separately on the menu, the PST is calculated on the sale price of $2.00 for this item.
Configure a Revenue item called "Buffet - Adult" with a price of $28.00. Make this item part of a food division.
Configure a Modifier item called "Soda Fountain" with a price of $2.00. Make this item part of a Soda/Soft Drink division.
Configure a Modifier item called "Water" with a price of $0.00. Make this item part of a "non-soda beverages" division.
Link the Buffet - Adult item to the Soda Fountain and water items through a Weight Modifier and a variable list.
You sell a hot-dog and large soda combo for $5.00. The soda is not listed on the menu and not sold on its own. The $3.00 / 50% rule applies: Because 50% of $5.00 ($2.50) is lesser than $3.00, the PST will be calculated on $2.50.
Configure a revenue item called "Hot-Dog Combo" with a price of $5.00. Make this item part of a food division.
Configure a free item called "Soda - Included". Make this item part of a Soda/Soft Drink division.
Link the Hot-Dog Combo item to the Soda - Included item through a Weight Modifier and a variable list.
You sell a hot-dog and large soda combo for $5.00. The Hot-Dog on its own is $3.25 and the drink on its own is $2.25, which are both listed on the menu. In this instance, the PST will be calculated on the ordinary sale price of the soda, which is $2.25.
Configure a revenue item called "Hot-Dog Combo" with a price of $5.00. Make this item part of a food division and enable the Main Combo Item option for this item.
Configure a revenue item called "Hot-Dog" with a price of $3.25. Make this item part of a food division.
Configure a revenue item called "Large Soda" with a price of $2.25. Make this item part of a Soda/Soft Drink division.
Create and configure a combo meal which will include the hot-dog and a soft drink.
You sell a hot-dog and large soda combo for $5.00. The Hot-Dog on its own is $3.25 and the drink is $2.25, which are both listed on the menu. You have a special promotion which gives 75% off hot-dog combos that day, which brings the total price of the combo down to $1.25. In this instance, the PST will be calculated on the total price of the combo, which is now $1.25.
Use the same configuration as Example #4.
Create a 75% Off promotion which will apply on the Hot-Dog combo.
Sparkling, sweetened water
candy, chocolate or another type of confection
Read the Provincial Sales Tax Act:
Specific guidelines for the restaurant and bar industry:
Fixed Tax
Fixed Tax
OFF
Amount
$0.00
Rate
Rate
7.00000
Minimum Taxable
$0.00
Special Mode Tax
UNDEFINED
Tax Table
Use Tax Table
OFF
Options
Inclusive
OFF
Check Total
OFF
Rounding
ON
Gross Method
OFF
Separate Printout
ON
Tax Before Quantity
OFF
BC Soda Beverages Tax
ON
Apply Tax On
Taxes the Tax
OFF
Taxable Discount
OFF
Taxable Service
OFF
Tax on Delivery Charges
OFF
Tax on Charged Discounts
OFF
Taxable Gratuity
OFF
Fixed Tax
Fixed Tax
OFF
Amount
$0.00
Rate
Rate
7.00000
Minimum Taxable
$0.00
Special Mode Tax
UNDEFINED
Tax Table
Use Tax Table
OFF
Options
Inclusive
ON
Check Total
OFF
Rounding
ON
Gross Method
OFF
Separate Printout
ON
Tax Before Quantity
ON
BC Soda Beverages Tax
ON
Apply Tax On
Taxes the Tax
OFF
Taxable Discount
OFF
Taxable Service
OFF
Tax on Delivery Charges
OFF
Tax on Charged Discounts
OFF
Taxable Gratuity
OFF
Fixed Tax
Fixed Tax
OFF
Amount
$0.00
Rate
Rate
10.00000
Minimum Taxable
$0.00
Special Mode Tax
UNDEFINED
Tax Table
Use Tax Table
OFF
Options
Inclusive
OFF
Check Total
OFF
Rounding
ON
Gross Method
OFF
Separate Printout
ON
Tax Before Quantity
OFF
BC Soda Beverages Tax
OFF
Apply Tax On
Taxes the Tax
OFF
Taxable Discount
OFF
Taxable Service
OFF
Tax on Delivery Charges
OFF
Tax on Charged Discounts
OFF
Taxable Gratuity
OFF
Fixed Tax
Fixed Tax
OFF
Amount
$0.00
Rate
Rate
10.00000
Minimum Taxable
$0.00
Special Mode Tax
UNDEFINED
Tax Table
Use Tax Table
OFF
Options
Inclusive
ON
Check Total
OFF
Rounding
ON
Gross Method
OFF
Separate Printout
ON
Tax Before Quantity
ON
BC Soda Beverages Tax
OFF
Apply Tax On
Taxes the Tax
OFF
Taxable Discount
OFF
Taxable Service
OFF
Tax on Delivery Charges
OFF
Tax on Charged Discounts
OFF
Taxable Gratuity
OFF
Fixed Tax
Fixed Tax
OFF
Amount
$0.00
Rate
Rate
5.00000
Minimum Taxable
$0.00
Special Mode Tax
UNDEFINED
Tax Table
Use Tax Table
OFF
Options
Inclusive
OFF
Check Total
OFF
Rounding
ON
Gross Method
OFF
Separate Printout
ON
Tax Before Quantity
OFF
BC Soda Beverages Tax
OFF
Apply Tax On
Taxes the Tax
OFF
Taxable Discount
OFF
Taxable Service
ON
Tax on Delivery Charges
ON
Tax on Charged Discounts
ON
Taxable Gratuity
OFF
Fixed Tax
Fixed Tax
OFF
Amount
$0.00
Rate
Rate
5.00000
Minimum Taxable
$0.00
Special Mode Tax
UNDEFINED
Tax Table
Use Tax Table
OFF
Options
Inclusive
ON
Check Total
OFF
Rounding
ON
Gross Method
OFF
Separate Printout
ON
Tax Before Quantity
ON
BC Soda Beverages Tax
OFF
Apply Tax On
Taxes the Tax
OFF
Taxable Discount
OFF
Taxable Service
ON
Tax on Delivery Charges
ON
Tax on Charged Discounts
ON
Taxable Gratuity
OFF
This will allow the server to select between "Soda Fountain" (pst-taxable) and "Water" (non-pst-taxable).
To order this combo, you can rely on combo detection or create variable lists and Weighted Modifiers.
Setup
Description
PST (7%)
Category
Provincial Taxes
Provincial Taxes
Fiscal Identification
0
Tax Type
UNDEFINED
Setup
Description
PST Incl. (7%)
Category
Provincial Taxes
Fiscal Identification
0
Tax Type
UNDEFINED
Setup
Description
PST Liquor (10%)
Category
Provincial Taxes
Fiscal Identification
0
Tax Type
UNDEFINED
Setup
Description
PST Liq. Incl. (10%)
Category
Provincial Taxes
Fiscal Identification
0
Tax Type
UNDEFINED
Setup
Description
GST (5%)
Category
Federal Tax
Fiscal Identification
0
Tax Type
UNDEFINED
Setup
Description
GST Incl. (5%)
Category
Federal Tax
Fiscal Identification
0
Tax Type
UNDEFINED
An employee configuration is a set of options and settings that can be used for a group of employees. The employee configuration will determine if an employee is allowed to carry out specific tasks or not, like voids, check cancellation, price changes, inventory adjustments, etc. These options can also impact the behaviour of the POS, as you can determine whether or not a check will print, how modes are accessed, how screens are navigated, etc.
Typically, one distinct employee configuration should exist for each job title in the establishment. For instance, it is common to see distinct employee configurations for Managers, head servers, servers, bartenders, order takers, hostess, clerks, etc.
Up to 50 different employee configurations can be created in the Maitre'D database. Once a configuration is created, it can be assigned to an employee from Point of Sale Control / Employees / Employees / [Employee Name] / Function. All available configurations will be selectable from the Configuration drop-down list.
Description
Type in the configuration description. This description appears on the Employees Function page.
Redirection Table
Select the redirection table used for this configuration. This redirection table field overrides the normal redirection specified for each workstation.
Inactivity Override
Enable this option to override the inactivity timeout delay specified in Point of Sale Control / View / Options / Security.
POS Inactivity
Enter the inactivity delay, in seconds, after which the workstation will timeout and return to the server login screen. Setting this field to 0 (zero) prevents workstation timeout.
Check Access
Enable this option to allow employees to access checks closed by other employees, using the last four digits of the check. If this option is disabled, the employees can only access their own checks.
Add on Printed Check
Enable this option to allow employees to add items to a table for which the check has already been printed. If this option is disabled, servers will not be able to add items to a table after the check has been printed.
Reprint Checks
If you enable this option, and an employee has already printed a check, the workstation can reprint a check when the employee presses the PRINT button. If you disable this option, and an employee has already printed a check, the workstation does not allow that employee to print the check again. The one exception to this printing restriction is that any time sales items are added to the check, the server can print the check again regardless of how this option is set.
Bartender/Order Status
If the Reprint Checks option above is enabled, but the Bartender/Order Status option is disabled, the Bartender or Order server will not be able to reprint multiple copies of the same check using the Status Screen.
Split Check
If you enable this option, the employees can split previously printed check into 2 separate checks with amounts that they specify. In this situation, first the server prints 1 check with the sales items. Then to split the check, the server creates 2 new check numbers with the appropriate amounts. Details of sales items do not appear on split checks. A split check displays one line saying " Misc. Split Check " and the amount. The split check is normally used in a situation where customers want to split one check into several checks regardless of what they had ordered.
Redistribution
If you enable this option, servers can redistribute the check amounts among customers at their tables. They can perform this function by pressing the REDISTRIBUTION button on the CMD screen at the touchscreen. For example, if a check was originally printed with all customers on one check, and the customers decide to split the check, the server is able to print as many checks as the table requests. The REDISTRIBUTION button does not appear unless the check has been printed once.
Void Check
Enabling this option will allow employees to void checks that have already been sent to the kitchen, but before they were closed. Employees can use the VOID CHECK button to void all items on a check instead of using the VOID button, which only voids highlighted items.
Print Last Check
Check on Table #0 must be set to "No". You must use the SEND button on the touch screen to send the order to shared printers. If the check has been printed, it is not possible to print the check again using the PRINT LAST CHECK button. The purpose of this option is to print checks that have been sent but not printed without reentering the check.
Skip Check Detail
If you enable this option, you will be able to enter a description that will replace the detail of the check when printing it.
Modifiers on Check
If you enable this option, the modifiers will print on the customer's guest check. For example, in fast-food, you would see the condiments. When ordering a hot dog with relish and mustard, all 3 items will be printed on the check.
Customer Tracking
If this option is enabled, after selecting the media type for a check, the server will be asked to enter a customer "account" or choose from a list of customers.
From order screen only
This option becomes available only if the Customer Tracking option above is enabled. Enable this option to disable the customer tracking prompt that normally appears after payment is applied. This option still allows for a loyalty account to be attached to a transaction from the order screen.
Division Category on check
Enable this option to print a summary by division categories on the guest check. As well, under P.O.S. Control / Revenue Center / Divisions Category, the Printed On The Check option must be enabled.
Print empty categories
When the Division Category On Check option is activated, enable this option to even print categories in which no sales were done on the guest check. As well, under P.O.S. Control / Revenue Center / Divisions Category, the Printed On The Check option must be enabled.
Sorting by meal types
Enable this option to print the guest check by meal course types, as you have set under P.O.S. Control / Revenue Center / Divisions.
Media on check with receipt
Select this option to print the Media distribution portion on the guest check as well as on the receipt for Fast-Food employees.
Coupon Rewards
Enable this option to allow this employee to generate "Buy $10.00 get a Free Item Next Visit" type Rewards Coupons to encourage guests to return.
Print Current Customer
Enable this option to allow to print the check for a single guest without going through the check distribution process and pressing the Next button for all guests who are not ready to leave.
Loyalty Program
Enable this option to allow employees to record loyalty program information on guest checks by using a preferential screen button or a button on the PRINT CHECK screen.
Cancellation
Void Item
If you enable this option, the void option will be enabled but only for authorized employees such as managers. This option allows an employee to void items already sent to a shared printer.
Re-Open Check
Enable this option to allow managers to Re-Open Checks that were previously closed. With this option, the manager needs to type the last 4 digits of the check number to be re-opened. After the check number is entered, the system modifies its payment to Cash, creates a negative order equivalent to the original check, automatically closes it to Cash, and then recreates a positive third order equivalent to the original check.
Cancel Check
Enable this option to allow managers to Cancel Checks that were previously closed. The Cancel Closed Check function creates a negative order equivalent to the original check, and prompts for the media type for the negative check, because some payments do not accept negative amounts.
Cancel / Re-Open Check
Enable this option to allow managers to Re-Open Checks that were previously closed. The Cancel / Re-Open Check allows a manager to see a list of all closed checks with their number and value. Once a check is selected, the system modifies its payment to Cash, creates a negative order equivalent to the original check, automatically closes it to Cash, and then recreates a positive third order equivalent to the original check.
Reason Selection
Enable this option to prompt for a Void Reason when performing a Cancel or Re-Open Check.
Validate Amount
Enable this option to perform a validation when processing a Cancel Check to limit the amount refunded so that it is not higher than the total of the original check.
Service
Enabling this option will cause Maitre'D to add a service charge to the check. The service rate can be configured under Point of Sale Control / Payment / Tips & Service. When printing each check that involves service charges, the WITHOUT SERVICE button appears on the Print Check screen at the workstation, allowing the server to cancel the service charge if necessary. If the employee's function is delivery, the service rate is the delivery charge.
Disable Service Removal
Enable this option to hide the WITHOUT SERVICE button on the print check screen of invoices that involve a service charge. This forbids these employees to cancel a service charge.
Service Override
If this option is enabled, the server will be able to change the service charge rate for the current check.
Special Tax Mode
If this option is enabled, this employee may gain access to the Special Tax Mode regardless of the workstation tax mode. The special tax button is located on the PRINT CHECK screen at the workstation. If you disable this option, the employee will work according to the tax mode of the workstation. The special tax applies to the whole check and is used instead of the tax for each division. The special tax is configured in Point of Sale Control / Payment / Taxes.
Auto Special Tax
If this option is enabled, the employee will always work using the special tax mode and does not have access to the Special Tax button on the Print Check screen. If you disable this option, the employee will work according to the tax mode of the workstation.
Non Taxable
If this option is enabled, a server may access the Non-Taxable button and close a check with no tax on it. The server must apply the Non -Taxable function to the entire check, not just part of it.
Individual Tax
If this option is enabled, the server will be able to choose the applicable tax(es) on the check.
Auto Non Taxable
If this option is enabled, the check selected by this server will be printed with no tax by default, unless override by pressing the TAXABLE button at the Print Check screen. The Non- Taxable option must be enabled to use this option.
Print Tip on EFT receipt
Enable this to print the tip and total lines on the EFT credit card voucher.
No tax on check
With this option enabled, the taxes will not be printed on the guest check, unless the employee touches the "Tax on check" button at the Print Check screen. However, taxes are still calculated and added to the check total as usual, and also appears in all the reports where taxes are calculated.
Gratuity
Gratuity
Enable this option to add the gratuity on bill for the employee. The gratuity on bill must also be configured properly in Point of Sale Control / Payments / Tips & Service. A manager with this option will be able to add gratuity to a bill even if the number of customers or sales amount does not meet the configured thresholds.
On Request
Enable this option to allow employees to add gratuity to a bill manually and on the fly, even if the number of customers or sales amount does not meet the configured thresholds.
Removal
Enable this option to display a WITHOUT GRATUITY button on the print check screen of invoices that involve gratuities. This allows employees to manually cancel a gratuity at the workstation.
Payment
The Maitre'D fine dining system offers the two standard banking methods.
In a server banking application, each server sends, prints and closes his/her own checks.
In a cashier banking application, each server sends and prints his/her own checks and the cashier closes all checks. The cashier uses the last four digits of the check number to recall the check. Upon recall, the cashier may add to the check, apply discounts and/or tender to a media.
In a cashier banking environment, the amount of the sale will show as a sales transfer on the server financial report and as a sales transfer and media on the cashier financial report. To allow an employee to close any check (including his own), the employee must be configured with both a server function and a cashier function.
The designation of server or cashier banking is made by enabling or disabling the With Cashier option in Point of Sale Control / Employee / Configuration / Invoice / Payments.
The designation of sales responsibility is made by enabling or disabling the Separated Sales option in Point of Sale Control / Revenue Center / Options / Payment. If Separated Sales is enabled, when a guest check is transferred to another server, the existing amount of sales remain with the server who ordered those items. If Separated Sales is disabled, when a check is transferred, sales credit belongs to the server who closed the guest check.
With Cashier
This option allows employees to print but not to close guest checks. Only the cashier can then close the guest checks. Do not enable this option if you want your employees to be able to close their own checks.
Amount Tender
This option allows employees to enter an amount greater than the check amount. Maitre'D will automatically calculate the change or tip.
Mandatory Amount
Enable this option to force the employee to enter the amount tendered, which can be equal or greater than the check total. If the option is disabled, the employee can simply press Enter when the amount tendered is equal to the check total.
Bar tab pre-auth
Enable this option to allow the employee to open a bar tab using a credit card and request a pre-authorization to cover a running tab.
Detail receipt
Enable this option for cashiers to print all sales items with the media types used on the receipt after settling a check.
EFT reprint
Enable this option to allow the employee to print duplicate EFT vouchers.
Tray Total
Enable this option to allow settling with other media types than Cash with the Close All Trays function.
Disable Negative Payment
This option disables the "+/-" button on the Cash screen, unless the invoice itself is negative.
Payment Confirmation
Enable this option to allow these employees to accept reserved media types with the Mandatory Confirmation option enabled in Point of Sale Control / Payments / Media Type / Option. When an employee with this option disabled chooses such a payment type, a keypad appears for another employee with this option enabled to Login and confirm the media and amount.
Print Receipt Without Confirmation
Enable this option for the workstation to print the receipt automatically without prompting for a confirmation as soon as the payment is completed for all media type that offer a receipt.
Account Payment
Receivable Account
This option enables the RECEIVABLE button in the SPECIAL MENU and allows employees to accept payments of receivable accounts from the workstation.
Discount on Card Only
Enable this option to force to use of an Account Receivable card to apply an A/R Discount.
Display Balance
Enable this option to display the Accounts Receivable balance on the Order screen once an account has been associated to a table. The Accounts Receivable balance also appears at the bottom of the Print screen.
Deposit
Employee Deposit
Enable this option to grant access to the Employee Deposit payment in the Special Menu on the workstation. This function allows employees to deposit cash from their assigned cash drawer. The system keeps in record the employee number and the cash deposited to reflect this on the employee's financial reading.
Employee Deposit Before Reading
Enable this option to force the employees to perform an employee deposit before they can print a reading.
Current / Previous Shift
Enable this option to allow the employees to determine whether the employee deposit that they are doing is for the current or previous shift.
Force deposit
Enable this option to force employees to perform a deposit when the threshold amount is reached in their assigned cash drawer. The cash threshold amount is configured in the Cash Limit field below.
Cash Limit
This field becomes available only if the Force Deposit option is enabled. Enter the cash amount threshold after which the employee will be forced to perform an employee deposit.
Order Functions
Use Modifier
Enable this option to allow employees to order modifiers at the POS workstation. If this option is disabled, items that are configured with modifiers will be ordered without modifiers by these employees.
Replace Modifier
This option only becomes available if the Use Modifier option is enabled. Enable this option to allow employees to replace a modifier by a different one using the LESS function key.
Print On Next Client
Enable this option to send the items selected for the current customer to the kitchen when using the Next Customer button in Fast-Food operations.
No Customer Count
Enable this option to skip Table Zero (0) guests from the customer count in the reports for Bartender, Fast Food & Order employees. This is useful to avoid double count of a client who orders a drink in the lounge until a dinning room table is ready, for example.
Enhanced Mandatory Divisions
Enable this option to prompt for the mandatory divisions when the Send button is touched. This is especially useful for Drive-Thru operations.
Qty Keyboard
If you enable this option, a numeric pad is available, allowing the employee to specify quantities without using the Quantity button under the CMD screen.
Alternate Order Screen
Enable this option to compile the chosen items in real-time on the Order screen. As you choose items, if some identical ones have already been selected, they will be displayed on the same line instead of being displayed each on their own line. This is useful when ordering for multiple guests on the same customer screen.
Park Table
Enable this option to allow dining room employees to keep items currently selected but yet to be ordered so that they can leave the workstation and come back later without having to re-enter all those selections again. When that employee then accesses any Point Of Sales, the parked table is automatically offered, and the kept items are displayed, as if the employee had not left the workstation. New items can then be added and ordered at the same time as the kept items.
Hold and Fire
Fire
Enable this option to allow employees to manually Fire held items to kitchen printers. This allows employees to override the time delay on held items.
Hold
Enable this option to allow employees to manually set a Hold on items during the ordering process, so they are not fired to the kitchen printers when the order is sent. When a hold is set on an item, the employee is asked for a time delay, in minutes, before the item is automatically fired to kitchen printers. The countdown starts as soon as the order is sent using the Maitre’D Send command. The time delay can always be overridden by manually firing the item(s) or printing the guest check.
Auto-Hold
Enable this option to automatically hold items using the predefined time delay set in the item’s division. Affected items will display the countdown clock as soon as they are ordered and behave the same way as manually held items. The countdown starts as soon as the order is sent using the Maitre’D Send command. The time delay of automatically held items can be overridden by using the manual Fire command or by printing the guest check. This option can also be used in conjunction with the No Time Delay option.
Course Confirmation
Enable this option to prompt for an "All Clients" confirmation when putting a Course on Hold for one client on a table where multiple clients have items separated by courses.
No Time Delay
Enable this option so that all held items are held indefinitely. With this option enabled, Maitre’D will no longer ask for a time delay when holding items. This option also affects auto-hold items by causing them to be also held indefinitely. Held items can then only be fired by using the manual Fire command or by printing the guest check.
Status Screen Operation
Enable this option to use Hold & Fire management from the Status Screen. With this option enabled, traditional Hold & Fire management from the order screen remains available.
Conditional Printing
Use Conditional Printing
Enable this option to activate the conditional printing option setup in P.O.S. Control / Revenue Center / Divisions / Conditional Printing.
Print Modifier
Enable this option for the conditional printing chit to include the modifiers associated with the sales item(s) from the second division.
Use Compilation
Enable this option to group identical items together in the conditional printing portion of the order chit with the sales item(s) from the second division.
CVM
CVM Functions
On the Fly Printing
If this option is enabled, the order will be printed at the same time it is entered.
Remote Display
If this option is enabled, customer can see his order on a remote display.
Display at the Bottom
Enable this option to display orders on the bottom half of CVM when this one operates in split mode.
Other Screen KEYS
Send
If this option is enabled, the SEND button appears on the workstation for these employees. The SEND button is used for sending orders to the shared printers only. If Table #0 Check option is enabled, the SEND button also prints a guest check. If Table #0 Payment option is enabled, the SEND button closes the check.
If this option is enabled, the PRINT button appears on the workstation for these employees. The PRINT button is used to print a check for the guest. If the order has just been entered, the PRINT button prints the guest check and sends the order to the kitchen in one step without using the SEND button.
Close
Servers use the CLOSE button to select a method of payment for the check. If servers have not used the SEND or PRINT buttons for an order, the CLOSE button sends items to the kitchen, prints a check, and closes the check to the selected media type. This CLOSE button appears on the order entry screen next to the PRINT button. In a server-banking environment, the CLOSE button should always be enabled.
Change Mode
If this option is enabled, the MODE button is available on the order entry screen at the workstation, and employees have the ability to change modes for any transaction. This option allows employees to order items from different modes.
Change Revenue Center
If this option is enabled, the REVENUE CENTER button is available on the order entry screen at the workstation, and employees have the ability to change revenue center for any transaction. This option can allow employees to order items from different revenue center on the same check.
Can Exit POS
If this option is enabled, these employees have access to the function CLOSE POS in the SYSTEM FUNCTIONS at the workstation to stop running the program any time.
Confirm for LESS & CLEAR
Enable this security option to restrict the use of the LESS and CLEAR buttons. With this restriction, the workstation requests a password when trying to use the LESS or the CLEAR buttons during the ordering process and only removes the items if the password belongs to a manager. Also, with this option, the number of Items corrected as well as their value will be printed on the server financial report.
Track Item Correct Detail
Enable this option to track all Clear/Less operations, even for employees allowed to perform these functions. You can only disable this option if you disable the "Confirm for LESS & CLEAR" option above it as well. Maitre'D also includes details on all of the removed sales items within those traces, whether these operations are restricted or not.
Send on Positive Total Only
Enable this option in the Fast-Food Configuration to force a manager Takeover for transactions where the total is brought back down to $ 0.00 or negative before it can be closed with the Send, Print or Close buttons.
Revenue Center Switch
This selection allows employees to switch revenue centers. By default the employees cannot switch the revenue center, the selected value is Unavailable and the touch that represents this function will not be available at the workstation. The other choices are Before Order, After Order or Anytime.
Mode Switch
This selection allows fast-food employees to switch modes. By default these employees cannot switch the mode, the selected value is Unavailable and the button that represents this function will not be available at the workstation. The other choices are Before Order, After Order or Anytime.
Order on Pour
Order on pour is a special ordering mode where a bar dispenser device takes control over the ordering process. While in this mode, the POS workstation automatically orders all items poured from the bar dispenser. By default, the workstation is always in standard ordering mode and the Order on Pour mode has to be toggled manually via a preferential screen or screen layout button.
Automatic Order on Pour
Enable this option to force employees into Order on Pour mode as they login to the POS workstation. Employees can still use the Order on Pour toggle button to go back to regular ordering mode, but will always default back to Order on Pour on every new order.
Other Items Available
Enable this option to allow employees to order items that are not tied to the bar dispenser device via a PLU.
Use Combo
Enable this option to activate the detection of combos by comparing the ordered items with the combo templates setup in Point of Sale Control / Revenue Center / Combo Meals. If they correspond to a combo, the employee can apply that combo so that the customer gets the special price.
Auto Apply Combo
Enable this option to apply detected combos automatically, without asking for a confirmation.
Multiple Combo Choice
Enable this option to suggest more than one combo when multiple combo options are detected from ordered items.
Auto Combo Suggestion
Enable this option to detect a combo as soon as a sales item flagged with the Combo Meal’s Main option is ordered.
Use Suggestion Screen
Enable this option to display the possible combos in an area of the Order Screen. You can touch this area to select the appropriate combo.
Use Ordered Items
Enable this option in a table-side service restaurant to activate the detection of combos by comparing the items ordered in current and previous operations with combo meals.
Detect Combo on Print
Enable this option to activate the detection of combos by comparing all the items with combo meals when the check is printed, instead of detecting them automatically as the items are selected. This allows to give the best possible deal once all items have been ordered and the customer is ready to pay. The only possibility for regular employees will be to apply combos. Managers and Head Servers will have the choice to apply them or not. If checks are reprinted, because of added items and/or for a redistribution, only managers or head servers can apply new combos.
Print Combo Details
Enable this option to print combo components on the guest check. This option may be mandatory in regions where printing a detailed check is governed by law.
Replace Surcharge
This option applies to upsizes. With this option disabled, surcharges are cumulative, meaning that the surcharge for the upsized item will be added to the surcharge of the original item. With the option enabled, the surcharge of the upsized item will replace the surcharge of the original item.
Apply Surcharge on Weight Modifier
Enable this option to apply the surcharge amount that is set in Modifier items ordered through Weight Modifiers. Note that for the surcharge to apply, the corresponding Weight Modifier needs to be set with a “free” value of at least 1.
Use Best Deal
When multiple items from the same group could be used to assemble a combo, enable this option to force the combo engine to always give the best possible deal to the customer. With this option enabled, the combo engine will always use the most expensive items when assembling a combo, which automatically gives the best possible combo discount for the customer. Surcharges are also taken into account when making the calculations. For instance, if a customer orders two desserts with a combo, a $3.00 apple pie and a $5.00 cake, Maitre’D will automatically make the $5.00 cake part of the combo, which saves the customer $2.00 more than the apple pie.
If this option is disabled, the combo engine will scan items in the order they were ordered and use the first item on the list that matches the combo requirements.
Special Menu
Use Special Menu
Enable this option to validate the ordered items using the Special Menu Settings when the Print or Close buttons are touched.
Return to Order
Enable this option to order forgotten items before printing the check and returning to the Order screen.
Auto Send
Enable this option to order forgotten items before printing the check and exiting to the Login screen.
Payment
If you enable this option, employees can transfer amounts between 2 different media types. This feature allows to correct "Cash Due" on the server reading after checks have been closed.
Server
If you enable this option, employees can transfer tables from one server to another. Use this option if servers take over tables from other servers. If an employee's function is manager or head server, the workstation requests the number of the table involved in the transfer. The managers or head server have the option to move the table to a specific server. If the employees are not head servers or managers, they can only enter the table numbers of the tables they are accepting.
Table
If you enable this option, employees can change a table number to a different table number in the server's section. This option is helpful if a server enters the wrong table number or the customers move to a different table.
All Tables
Enable this option to allow employees to transfer all open tables from another employee. Managers using this option can transfer tables to and from any server. Regular employees can transfer tables from any server to themselves only.
Customer
If you enable this option, employee can transfer one customer from a table to another table if both tables belong to the employee.
Item
Enabling this option allows employees to transfer items from one customer to another sitting at the same table. If you need to transfer items to a customer at another table, the customer transfer option must also be enabled; this function is located on the Status screen. Managers or head-servers can transfer items from one to another.
Tips
If you enable this option, a server can transfer a portion of tips from another employee. Servers cannot transfer their tips to other employees.
Order
If you enable this option, any employee with the ORDER function will be allowed to access any table opened in order mode. Otherwise, the employee will only be able to access his own table.
POS Report
Available Reports
Personal Reading
If you enable this option, Maitre'D allows the employees to print their server financial report. Otherwise, employees cannot print their server financial reports. An authorized employee must print the report such as a manager.
Global Reading
If you enable this option, Maitre'D allows employees to print a main reading. You must also select the Personal Reading field and manager functions. The Main Reading button appears on the Manager menu.
Divisions Report
If you enable this option, the server financial report includes the total amount and the total items sold in this division.
Categories Report
If you enable this option, the server financial report includes a summary of sales by categories.
Checks Report
If you enable this option, Maitre'D includes a list of checks closed by the employee in the server financial report.
Counters Report
If you enable this option, Maitre'D includes a list of counters (sales units or meters) in the server financial report.
Activity Report
If you enable this option, Maitre'D allows the employees to print the activity report at the workstation. You may generate the activity report for the full day or a range of hours in the day in order to compile labor and sales statistics for the restaurant.
Open Table Report
If you enable this option, Maitre'D allows employees to view all open tables. Otherwise, Maitre'D does not allow the employees to view open tables other than their own. It is possible to view or print a list of open tables for a particular server or all servers from the workstation.
Workstation Report
If you enable this option, Maitre'D allow the employees to access the reports about the workstation.
Current Shift Report
If you enable this option, Maitre'D allow the employees to access the reports of the current shift.
Previous Shift Report
If this option is enabled, Maitre'D allow the employees to access the reports of the previous shift.
EFT Consolidated
Enable this option to print the Electronic Funds Transfer Total, including all Credit and Debit Cards, on the Server Reading.
Report Selection
If you enable this option, Maitre'D allows the employee to access the pre-defined reports at the workstations. When selecting this option, you will have access to the Detailed report frame in order to select which reports you want to give access to this employee's configuration.
Divisions
When enabled, this option makes the Divisions report available from the Special menu on the POS under the Detailed report menu. This report will give you sales total by revenue centers and modes. The sales figures are before taxes and discounts.
Today's Meters
When enabled, this option makes the Today's Meters Report available from the Special menu on the POS under the Detailed report menu. This report will give you the quantity of sales unit by revenue center sold during the day. It gives you an average of each sales unit sold by period of time, based on daily sales units sold for the week.
Yesterday's Meters
When enabled, the Yesterday's meters report can be found in the Special menu on the POS under the Detailed report menu. This reports gives the quantity of sales unit by revenue center sold on the last day closed. It gives you an average of each sales unit sold by period of time based on daily sales units sold for the week.
Current Meters
When enabled, the Current Meters Report can be found in the Special menu on the POS under the Detailed Report Menu. This report provides the quantity of sales unit sold for each week of the current period; it sorts the information by revenue center and gives you an average of each sales unit sold weekly during the period.
Passed Meters
When enabled, the Passed meters report can be found in the Special menu on the POS under the Detailed Report Menu. This report gives you the quantity of each sales unit sold for each week of the previous period; it sorts the information by revenue center and gives you an average for each sales unit sold weekly during the period.
Activity 15 Min
When enabled, the Activity 15 Min report can be found in the Special menu on the POS under the Detailed Report Menu. This report gives real time information on sales and labor cost for each period requested. In addition to the regular activity report, this report provides labor cost per employee task and per department information.
Activity 30 Min
When enabled, the Activity 30 Min report can be found in the Special menu on the POS under the Detailed Report Menu. This report gives real time information on sales and labor cost for each period requested. In addition to the regular activity report, this report provides labor cost per employee task and per department information.
Activity 60 Min
When enabled, the Activity 60 Min report can be found in the Special menu on the POS under the Detailed report menu. This report gives real time information on sales and labor cost for each period requested. In addition to the regular activity report, this report provides labor cost per employee task and per department information.
Activity Summary
When enabled, the Activity Summary report can be found in the Special menu on the POS under the Detailed report menu. This report gives real time information on sales and labor cost for each period requested. In addition to the regular activity report, this report provides labor cost per employee task and per department.
Preorder Report (Today)
When enabled, the Pre-order report (today) can be found in the Special menu on the POS under the Detailed report menu. Pre-orders are orders given to you several days in advance. This report gives you the list of Pre-Orders for the current day.
Preorder Report (30 Days)
When enabled, the Preorder report (30 days) can be found in the Special menu on the POS under the Detailed report menu. Pre-orders are orders given to you several days in advance. This report gives you the list of Pre-Orders for the next 30 days.
Global Dispatch
When enabled, the Global Dispatch report can be found in the Special menu on the POS under the Detailed Report Menu. This report shows information such as delivery orders assigned to each delivery driver, customer waiting time, and the times at which the driver left and returned to the restaurant. It can also show total amounts received and any discount or credit granted to a customer.
Driver Dispatch
When enabled, the Dispatch driver report can be found in the Special menu on the POS under the Detailed report menu. This report shows information such as delivery orders assigned, customer waiting time, and the times at which the driver left and returned to the restaurant. It also shows total amounts received as well as any discount or credit given to a customer.
Reading By Revenue Center
When enabled, the Reading By Revenue Center report can be found in the Special menu on the POS under the Detailed report menu. This report gives you sales information on a specific revenue center or combined sales information for all revenue centers.
Bar order
When enabled, the Bar Order report can be found in the Special menu on the POS under the Detailed Report menu. This report shows what alcohol is currently ordered in Maitre'D but still not poured by the Berg bar dispenser device.
Report Reset
Reset Report
If you enable this option, employees can reset their own reports to zero after printing. This is useful in the case of split shifts. You would then have separate cash and sales totals for each shift. It is possible to obtain a report showing cumulative totals for the entire day from the Back-Office. You must select the Reading field discussed above for this option to work.
Auto Reset Report
If you enable this option and the Reset Report option isalso enabled, the Server Financial Report (SFR) will automatically reset after printing. Otherwise, the server will have the choice to reset or not the SFR.
Manager Reset Report
If you select this option, the Manager will have access to 2 functions to reset employees reports without having to print them. The Reset Report function allows to reset the reading of a single employee at a time. The Multiple Reset Report function allows to reset many employees' financial reports at ounce. On the resulting server number screen, you can touch the ALL button to reset every employees' readings, or select any employee's name to add them to the list of financial reports being reset, and touch the EXIT button, followed by the OK button to confirm the operation.
Reset when Punch In
If you enable this option, Maitre'D automatically resets a server's financial report at punch-in (every time the server clocks in). All sales totals start at 0, but Maitre'D does not erase the check detail at the bottom of the server financial report.
Reset when Switch Skill
If you enable this option, this server's financial report is reset when an employee switches a job skill (such as from bartender to server). Otherwise, it is not reset when an employee switches a job skill. This field only applies if you are using the Time & Attendance module.
Punch Out Reading
If you enable this option, after the employee punches out, a financial report for this employee will print.
Availability
Enable this option for managers to allows them to toggle the availability of items per Revenue Center and Mode through the Manager Menu on the Point Of Sales. They can choose between the permanent Availability or the Temporary Withdrawal option. Managers can also generate an availability reading, that prints all unavailable or temporarily withdrawn items of the selected revenue centers and modes. The report includes the following information:
Revenue Center
Mode
Items
(P) Permanent availability
Manager Functions
Enabling this option, employees can perform functions usually reserved for managers. All of the following functions at the workstation are available to employees if enabled.
System Function
Servers Report
Closing Function
Void a Table
If disabled, employees cannot perform these manager functions.
System Function
If you enable this option, the employee will be able to delete the following files from the workstation: DATA.DAT , *. DAT , SETUP.DAT , Printer Test. If you disable this option, the employee does not have access to this function.
End of Day
If you enable this option and all the tables and checks are closed, this option allows the employees to close out the day from the workstation. If you disable this option, employees cannot close the day.
Remark
If you are sending the order to a shared printer and printing the guest check at the same time, the remark shows up on both the kitchen chit and the guest check.
Void Table
If you enable this option, employees can void open tables. If you do not enable this option, employees cannot void open tables.
No Sale
By enabling this option, the NO SALE button will appear as a programmed button in the screen layout or under CMD. Employees will be able to ring a No Sale on the workstation and open the cash drawer. If not, the NO SALE button will not appear therefore they will not be able to open the cash drawer this way. Employees usually use the NO SALE button to make change, as well as to perform other related tasks. MaitreD records the number of No Sale transactions on the servers financial report for security reasons.
Split Sales
If you enable this option, a server will be able to split the sales of a server.
Waste Table
By enabling this option, a WASTE TABLE button will appear listed under the FUNCTIONS button. The purpose of this function is void transactions, but, if you are using the Inventory Management module, it will not return the items to the inventory.
Waste Item
By enabling this option, a WASTE ITEM button will appear listed under the FUNCTIONS button. The purpose of this function is void single items, but, if you are using the Inventory Management module, it will not return the item to the inventory.
Close the Shift
If you enable this option, the employee will have access to a CLOSE SHIFT button under the FUNCTIONS button.
Generate Shift Report
Enable this option to print a shift report when closing the shift at the workstation.
Unlock PATT Tables
Enable this option to allow employees to unlock tables that are locked by Pay-At-The-Table (PATT) remote payment devices.
Initialize Pin Pad
If you enable this option, these employees have access to the INITIALIZE POSPAD function in the Special Menu at the workstation.
Bar dispenser override
Enable this option to enable the bar dispenser override function, under the manager menu, which allows to pour drinks without the need to send an order from Maitre'D first. For example, a drink might have been dropped, and this function allows to pour it again without having to order it again on the workstation. This function must be used on the workstation unto which the bar dispenser device is physically connected and defined.
EFT refund
Enable this option to allow these employees to perform credit cards refunds at the workstation.
Inventory adjustment
Enable this option to allow inventory adjustments from a handheld workstation using the pocket PCs bar code reader.
Display theoretical quantity
Enable this option to display the theoretical quantity of items when entering inventory adjustments from a handheld workstation.
Merchandise Reception
Enable this option to allow an employee to perform Merchandise Reception from a workstation, such as a handheld.
Cash Card Operation
Enable this option to allow a manager to do special transactions on cash card, such as refill the card with more money.
Recipe
Enabling the option will have Maitre'D display recipes for sales items selected on the touch screen. Example, a new bartender might use this option if he/she forgets or does not know how to prepare a drink.
Access Other Bar Server Table
Enable this option to allow Bar Servers to access other Bar Servers' tables when using the Table function on the Order screen, similarly to head-servers that can access other server's tables, but without the Previous, Next and Status functionalities.
Shift Deposit
Enable this option to allow a cashier to declare a deposit from the cash drawer at the end of a shift.
Bag Deposit
Enable this option to allow a manager to declare a bag drop at the bank.
Meal Plan
Enable this option to give employees access to the Meal Plan functions.
UseMealPlan=True
MealPlanIP=xxx.xxx.xxx.xxx (IP Address of the Meal Plan Server)
MealPlanTimeOut=xx ( Timeout in seconds. Default is 5 sec.)
For the workstations to send a unique ID in a Meal Plan request to ITC instead of their POS number, also add the following configuration key & value:
MealPlanID=xxxx (ID provided by ITC)
Reprint External Check
Enable this option to allow these employees to access through the Function button a screen with all external checks coming from a 3rd party application, such as a kiosk or a web site. These checks are displayed from the most recent to the oldest, and touching one of these buttons reprints that check.
CMD
Command
PLU Number
If this option is enabled, employees can order sales items by the item numbers. This number is not the PLU number, but the sales item number. The sales item number is displayed as the ITEM # in the top of the screen in Revenue Center / Items Setup. The sales item number may be different from the PLU number. The Sales Item number can be displayed at the workstation if you enable the Item Reference option in Configurations by revenue centers Options.
Order Real PLU number
Enable this option so that employees can order sales items using the PLU number linked to the sales item. This option is especially useful when PLU numbers are already pre-printed on the sales items by the manufacturer.
Miscellaneous
Enable this option to allow the use of items with the Open Price option enabled in P.O.S. Control / Revenue Center / Items Setup / Function
Quantity:
If you enable this option, employees can use the QUANTITY button to enter multiple orders of the same sales items.
Course:
Enabling this option will give employees access to the COURSE button which allows them to specify what items ordered correspond with which course of the meal. For example, a customer may choose to have their appetizer served before or along with the main entree. If you disable this option, employees do not have access to the COURSE button.
Auto Add Course:
If you enable this option, when you add a course to a customer order, then go to the next customer on the table, the course will be automatically added to this customer. When this option is disabled, you have to add the course to each customer if needed.
Credit Card Number:
When activated, that option enables Maitre'D to memorize credit card numbers by using the Credit Card Number button. For example, this function can be used to start a tab without actually authorizing the credit card transaction for a specific dollar amount. If you disable this option, employees do not have access to the Credit Card Number button.
Remark on Request:
If you enable this option, the REMARK button appears on the CMD screen and allows servers to enter Remarks whenever they want. In Configurations by revenue centers Options you can program the following features with regard to remarks:
To set the number of lines for remarks, fill the Number of Lines field.
To define when the Remarks screen appears, change the Input field.
If you wish no remarks to print on the guest check, disable the On Check option. You can choose whether or not remarks print on the guest check, but if you are using remarks they always print in the kitchen. There is no option to turn off remarks on the shared printer.
Remarks are useful for telling the kitchen the customer is in a hurry or to personalize message on the guest check, such as "Happy Birthday Joe!".
Number of Clients:
This option allows employees to enter the number of customers at each table using the Number Of Clients button. The original number of customers entered could be updated as people either join or leave the table. Re-enter the check and change the number of customers. If this option is disabled, these employees can not modify the number of customers at a table.
Round:
The ROUND button allows employees to reorder items already ordered by customers at a table. Example, a customer ordered 1 order of Nacho and 2 Bud Lights. Suppose that a half an hour later the same customer wanted another order of Nacho and 2 Bud Lights. The ROUND button would allow an employee to order these same items again with fewer keystrokes. If enabling this option, the ROUND button is available to employees. To enable this option, the Round option under the Revenue centers/Options must also be enabled.
Client Adjustment:
If you enable this option, the employees will be allowed to adjust their total count of customers.
Price Override:
Enable this option for employees to enter a value for an items with the Open Price option enabled in P.O.S. Control / Revenue Center / Items Setup / Function. This option is helpful when customers order items that are not on the menu, specials, or new items that have not been programmed.
Manual Bar Code:
Enabling this option will enable the employee to enter bar codes manually.
View Order Time:
Enable this option to see on screen the time the order was sent to the kitchen. When enabled, the server can select the Order Time option under the CMD screen to display the time the order was sent. The time will be displayed for each item over the price location.
Assignment Override
Enable this option so that when using the floor plan, it is possible to assign tables to an employee that are not assigned to the section of that server. Also, when these employees touch the Table button without entering a table number, the floor plan is displayed, and they can simply touch the table they want to open.
Change Floor Plan
Enable this option to allow employees to change floor plans on the workstation.
Open Description
Enable this option to allow the use of items with the Open Description option enabled in Point of Sale Control / Revenue Center / Items Setup / Function.
Negative Price Disabled
Enable this option to prevent employees from entering a negative price when ordering an open price item.
Setup
Setup Functions
Table Assignment
Enable this option for Hostess employees to select Floor Plans and Cancel or Modify Clients on the Waiting List in Floor Management mode or to assign tables to sections in Control Buffet mode.
Section Assignment
Enable this option to allow Hostess employees to assign employees to sections.
Discount Availability
The Discount Availability button, which appears on the Manager menu, allows employees to turn discounts on or off at the workstation. If you enable that option, Maitre'D will allow employees access to discount availability. If you disable this option, the employee cannot access discount availability.
Privilege Credit
Enable this option if you want the employee to be able to apply a credit to a privilege customer account.
Permanent Meter
If you enable this option, the server, when accessing Table 0, will be prompt with the list of meters and will be able to declare a new value for the meters. This value will be used to generate sales and record adjustments for this waiter. This feature is usually programmed for BARTENDER or BAR SERVER employees.
Meter Adjustment:
If you enable this option, employees are allowed to change the value of the permanent meters on the workstation. If you disable this option, changes to the permanent meters must be done in the Back-Office.
Currency Setup
If you enable this option, employees can change the Exchange Rate at the workstation. If you disable this option, the Exchange Rate can only be change from the Back-Office.
Price Change
If you enable this option, employees can change the prices of sales items in any mode from the workstation.
Screen Setup
Enable this option to allow these employees to modify the descriptions and items assigned to buttons on preferential screens from the workstation. If this option is disabled, these employees can only modify the prices of the items assigned to these buttons.
Mode Setup
Enabling this option will enable employees to change the workstation mode. If you disable this option, employees will not be able to change the mode and the workstation will work in the mode selected in the Workstation Mode configuration. This option can be used for bars that offer a happy hour special. For example, suppose that the happy hour finishes at 7:00 P.M., but that, given an unusually busy night, some customers did not get the chance to be served by that time, then the manager can decide to extend the happy hour by changing the mode.
Assign Waiter
If you enable this option, these employees have access to the function SERVER ASSIGNMENT in the MANAGER MENU at the workstation. The selected Point Of Sales this employee is allowed to work on is saved in the Workstation field of Point of Sale Control / Employee / Employee / POS Operation.
Redirect Printer
You can enable this option to have access in changing the shared printer output at the workstation.
Variable list
You can enable this option to have access to the variable lists programmed in Point of Sale Control / Screens.
Access Setup
If this option is enabled, the manager will be able to register employee fingerprints or assign magnetic employee cards. This operation is only available to employees that have the manager function.
Drawer Setup
Enable this option to allow a manager to assign cash drawers to employees from the workstation.
Disable Password Change
Enable this option to prevent employees from changing their passwords at the POS workstation.
Table 0
Table 0 Functions
Access
Table 0 access allows an employee to place orders quickly and in rapid succession by eliminating the table # and manually closing all transactions to cash. For example, this is helpful in a busy bar environment. The system returns to the order entry screen automatically. If this option is enabled, this employee has access to table #0. Otherwise, this employee is not able to work on table #0.
Check
If you enable this option, the workstation prints a guest check automatically for each transaction when you use the SEND button. Otherwise, the employee must command the workstation to print a check on Table #0 by using the PRINT button. The Table #0 access option must also be enabled to use this option.
Payment
This option offers you a choice of payment by displaying the media type screen after an order on Table #0 on. If the option is disabled, however, Maitre'D assumes the media type is cash and closes the check to cash. Disabling this option gives faster operation because the check automatically closes to cash. However, if the check is closed to cash by mistake, you can always modify the payment by using the last four digits of the check. The Table #0 access option must also be enabled for this option to work properly.
Drawer on Total
If you enable this option, the cash drawer will open when the workstation displays the total during table #0 operation. Otherwise, the cash drawer will only open after the media type is selected. Usually, this option is enabled for faster operation.
Void
If this option is enabled, employees can create negative checks. Employees use negative checks to perform refund on closed checks. This option does not produce a button on the CMD screen. You are not voiding a specific check, but creating a new check number that has the items to be voided entered negatively. This check offsets the check that was ring incorrectly.
Bar server interrupt
Enable this option to be able to switch from one bar server order screen to another, during the ordering process. When enabled, a SERVER button will let you switch from the current bar server order screen, to a new bar server order screen. For example, if Bar Servers are entering an order in the system but another employee comes along who needs to place an order urgently, they can select the Server Interrupt button and enters their server number and process the order. The original servers are then able to go back to the first order screen; Maitre'D will simply take them back to where the order was left off.
Filtered Customer List
Enable this option so that bartenders can filter only the tabs he has opened himself from all running bills.
CCard Use Name for Bar Table
Enable this option so that a bartender can read a guests name from a credit card magnetic strip after login on, and use it as the table name.
Reverse First and Last Name
Enable this option to invert the sequence in which the first and last names are displayed on the order screen when allowing bartenders to read these names from a credit card magnetic strip to assign it to a table.
Confirm CCard Name
Enable this option so that a bartender is prompted for a confirmation of the name on the credit card before assigning it to a table.
Food Runner
Delay
Enter the delay in second, to wait before the last three orders are displayed. By default, the delay is set to 0 and the orders do not display.
Consolidate orders
Enable this option to compile the ordered items on the Food runner screen.
Sort items by category
Enable this option to group items by division category on the Food runner screen.
Fiscal Printer
Fiscal Printer Functions
XClose
Enable this option for the manager configuration so that they can print the current Fiscal Report of the printer on each workstation individually in Russia.
End Of Day (2 Close)
Enable this option for the manager configuration so that they can print the final Fiscal Report and Close the fiscal day of the printer on each workstation individually in Russia.
Delivery
Historical
If you enable this option, employees will have access to the delivery time of the last five orders of the customers. The Delivery module must be installed on your system to use this option, and the historical field and the With Driver option in the Delivery/View/Option must be enabled.
Credit
If you enable this option, employees can give a customer a credit that may be applied on their next delivery. The credit applied to a customer will be treated as a discount the next time this customer calls to place an order. The Delivery module must be installed on your system to use this option, and you must define a Credit promotion in P.O.S. Control/Payments/Promotion.
Last Order
If you enable this option, employees can recall the details of the last order that the customer has placed to the restaurant by using the LAST ORDER button in the CMD screen. The Delivery module must be installed on your system to use this option, and the Last Order option in the Delivery/View/Options must be enabled.
Drive Thru
This option is only available for employees with the Order function. This option is designed especially for a restaurant with a drive-thru service. The system uses the FIFO (First in First Out) method to recall the customers in the queue. A drive-thru employee should be set with two Order Functions and use different configurations for each function. The first function is used to take customers orders. In this configuration, the Drive Thru field must not be enabled. The system will then assign a new order number. The second function is used to recall and close customer orders. In this configuration, the Drive Thru option must be enabled. The system will then give access to the oldest unclosed order. For a restaurant with two drive-thru windows, you can create two different employee numbers. One will be use to take customer orders and one to close them. In this set up, you only need one function per employee.
Order Re-enter Table
Enable this option to speed up service by automatically reentering the Order Screen when using the Order Function, to quickly start a new transaction, like the Fast-Food Function.
Print Invoice After Payment
Enable this option to print Drive-Thru Invoices after the payment and show settlement information.
Order Only
Enable this option to disable the manual entry of an order number on the Order function button. This makes sure the system always generates the next available order number.
Driver Manager
If you enable this option, the driver will be able to assign and recall delivery orders for other drivers through a Driver Dispatch screen.
Pick Up Mode
Enabling this option will allow the server to use the Carry Out function-a new function designed to do carry outs. A carry out is an order that is taken by phone from the employee, just like a normal delivery, but that is picked up at the restaurant by the customer instead of being delivered to the customer's home.
In order to enable that function, you must create a Carry out Configuration like a basic delivery configuration, but you must also select the Pick up mode option under P.O.S. Control / Employees / Configuration / Delivery. When enabled, this option allows to obtain a CARRY OUT function, therefore, all the carry out orders will not appear in the dispatch screen. You will need to create 2 functions for employees taking telephone orders. One is called DELIVERY, for orders to be delivered, and the other one is CARRY OUT for customers that will pick up their orders. For DELIVERY, use the delivery configuration that has no Pick up mode option enabled, and for CARRY OUT use the one that does have the Pick up mode option enabled.
From the server ID screen, enter your server code then press ENTER; this will give you access to a selection screen.
Touch the CARRY OUT button to make the customer information screen appear.
Enter the customer information then touch ORDER.
Place your order and hit the SEND button. This way, the order will not be sent to the drivers' dispatch screen.
Use Print Dispatcher
Enable this option to display the print dispatcher screen by default to driver managers when accessing the dispatch function. A button allows switching between the Print Dispatch and the Driver Dispatch screens. This function can be enabled or disabled through the managers' Special Menu.
External Zone Configuration
Enable this option to allow these Employees to modify the Additional Delays and Statuses of an External Order System zones from the Points Of Sales.
Discount
Discount
Select the discounts the employee can apply on the customer check. Only a manager or a head server can apply the non-selected discounts for this employee.
Media
Payment
Select the payments you want to grant to employees.
Event Manager
Event Manager
Enable this option to allow employees to use the Event Manager functionality.
Add Depot
Enable this option to allow employees to apply a deposit towards an event.
Remove Depot
Enable this option to allow employees to cancel or refund a deposit previously made for an event.
Start Event
Enable this option to allow employees to start an event.
Employee Deposit
Variable Lists Set Up
Activity Report
Open Tables Report
Currency Set Up
Mode Set Up
Discount Availability
