Screen Layout Editor - Advanced User Interface
To use Maitre'D POS workstations, at least one screen layout must be created. However, most restaurants will use more than one. The total number of screen layouts will depend on many factors, like the number of revenue centers, the number of modes and the various employee roles that are available.

Description
Type a meaningful description for this screen layout. The description should provide a clear indication as to what this screen layout is used for, like "Takeout Counter", "Managers" or "Dining Room" for instance. This field supports up to 20 characters.
Save

As soon as the description is filled, click the Save button to save this new screen layout. Also, be sure to use the save button often to save your changes.
IMPORTANT! Be sure to click the save button before closing the screen layout editor. Otherwise, all changes will be lost.
Also, if the inactivity timeout kicks in (after 15 minutes), the Point of Sale Control window will be closed and any unsaved changes will be lost.
Single Buttons
To add a single button to the screen layout, simply click on the button outline you wish to configure. The button will become highlighted and this will give you access to the Button properties toolbar on the right-hand side of the Screen layout editor.

To learn more on Button Properties, please see the dedicated topic on this matter:
Dual or Quad Buttons
Buttons can be expanded to take up to two slots wide by two slots high.
To expand a button, hover the mouse cursor over the bottom-right corner of the selected button. The cursor will change to a resize arrow.
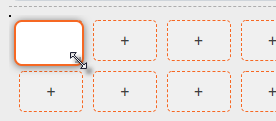
Click and drag the button's border to the desired width and height. Selected buttons will be highlighted in light red.
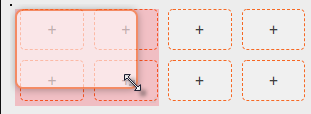
Release the mouse button to apply the new button size.
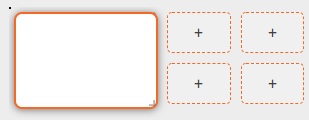
Using this method, you can create:
Dual-width buttons (1 x 2)
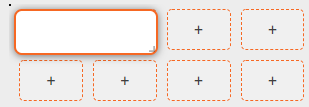
Dual-height button (2 x 1)
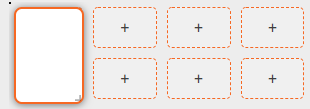
Quad button (2 x 2)

NOTE: Buttons cannot be wider than 2 slots, and they cannot be higher than 2 slots either.
Copy buttons
To copy an existing button, simply click the button once to select it. The button will become highlighted with an orange outline. Then, press CTRL + C on your keyboard. You may also right-click the button and select the Copy option from the contextual menu. The button and all of its settings will be copied to the clipboard.
Cut buttons
To cut an existing button, simply click the button once to select it. The button will become highlighted with an orange outline. Then, press CTRL + X on your keyboard. You may also right-click the button and select the Cut option from the contextual menu. The button will disappear from the screen, and all of its settings will be copied to the clipboard.
Paste buttons
To paste a button that was just copied or cut to the clipboard, click on an empty button or a button which you would like to have replaced, and press CTRL + V on your keyboard. You may also right-click the location where the new button should go and select the Paste option from the contextual menu. The button will be pasted in the selected location.
Delete buttons
To delete a button, simply click the button you wish to delete, so that it becomes highlighted with an orange outline. Then, press the DEL key on your keyboard. ou may also right-click the button and select the Remove option from the contextual menu.
Multi-Select + Delete
You can select multiple buttons and delete them all in one operation. To do so, press and hold the CTRL key on your keyboard. While holding down the CTRL key, click each button to be deleted. Each button will become highlighted with an orange outline. Then, press the DEL key on your keyboard.
Move buttons
To move a button, hover the mouse cursor on the button until the cursor changes to a cross with arrows. Then, click and drag the button. Release the mouse button over the location where you want the button to be.
Last updated
Was this helpful?

