> For the complete documentation index, see [llms.txt](https://docs.maitredpos.com/llms.txt). Markdown versions of documentation pages are available by appending `.md` to page URLs; this page is available as [Markdown](https://docs.maitredpos.com/maitred/maitred-advanced-pos-user-interface-html-pos/troubleshooting/locate-and-repair-expanded-buttons.md).
# Locate and repair expanded buttons
When preferential screens are created and later modified, it is possible to accidentally have buttons that expand beyond the screen boundaries. This wasn't much of an issue with the Legacy POS User Interface, but this can lead to random crashes or even the POS not starting at all with the Advanced POS UI.
***
### Open a preferential screen
1. Logon to the Maitre’D Back-Office with appropriate credentials. (Distributor or System Owner)
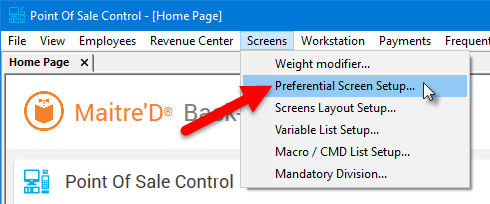
2. Start the Point of Sale Control module.

3. Click on the Screens menu and select Preferential Screen setup...
4. The list of available Preferential Screens is displayed.
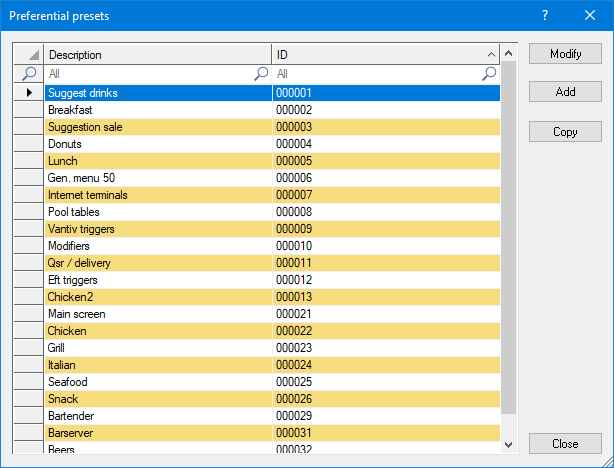

Select an existing preferential screen and click the Modify button to edit its properties.
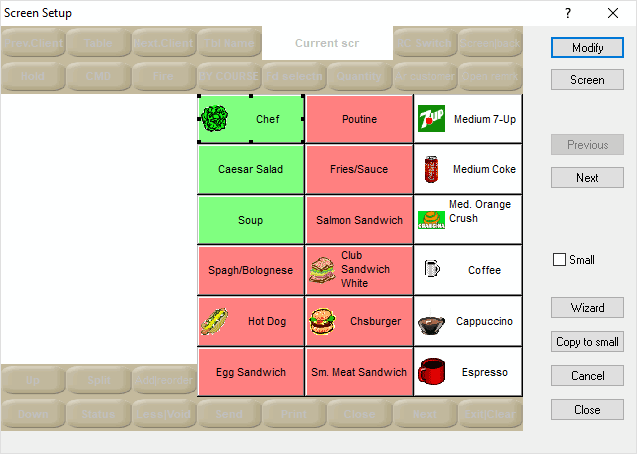
5. The Preferential Screen Editor will appear (Legacy UI mode).
***
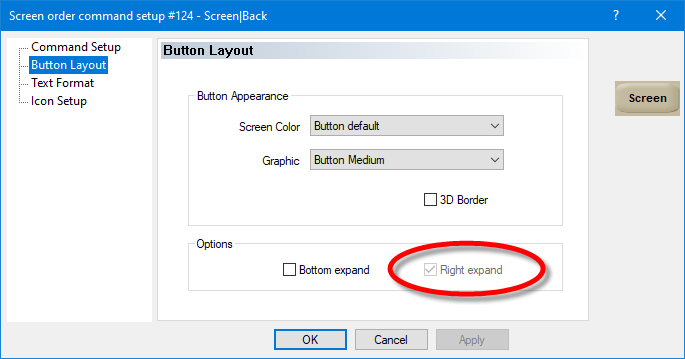
### Locating problematic buttons
On some occasions, it is possible to have buttons where the Right Expand or Bottom Expand options are enabled but grayed out because the button is on the edge of the screen.
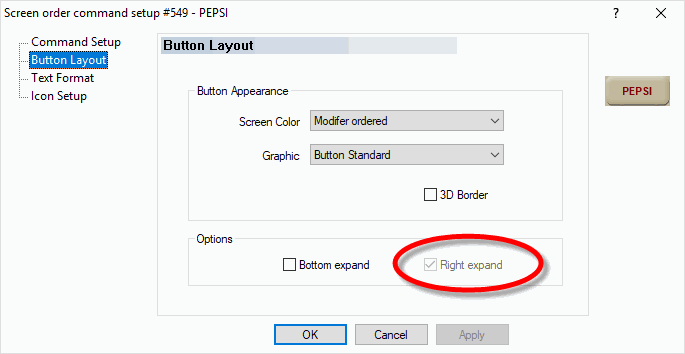
This happens when copying or moving an already “expanded” button to the right or bottom edges of the screen. It can also happen if the screen's properties were changed. Here are a few tricks that can help in identifying problematic buttons:
***
### Screens with less than 50 buttons
If the screen has fewer than 50 buttons, increase the screen size to quickly spot expanded buttons and fix them before reverting to the original screen size.
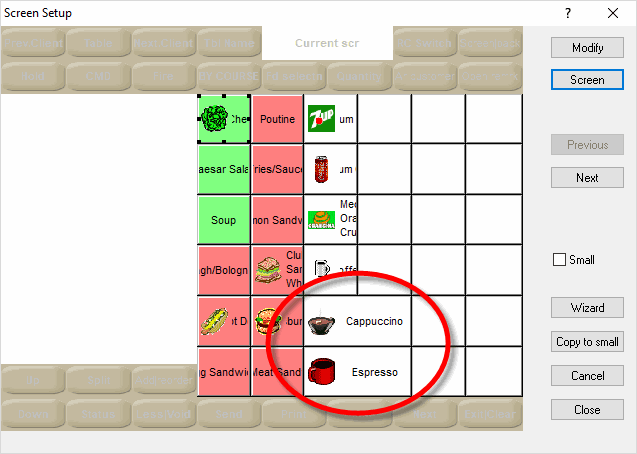
Here is an example with “Screen 18” where everything looks normal:

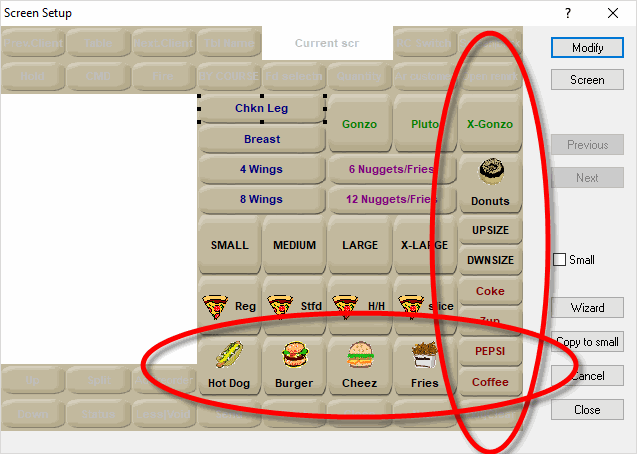
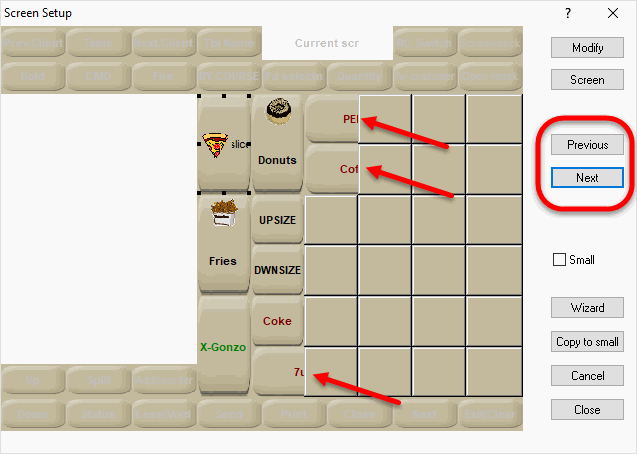
Increasing the number of buttons by switching to “Screen 36” shows that some expanded buttons were actually hiding on the edge of the screen:
***
### Screens with 50 buttons
50 is the maximum number of buttons that can fit on one screen. To quickly spot problematic buttons in this case:
1. Make a mental note of the buttons that are on the rightmost column and on the bottom row.
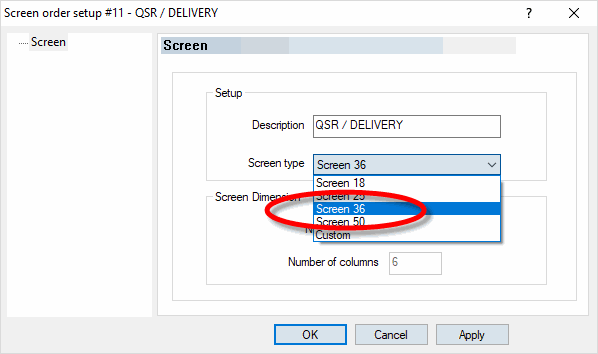
2. Click on the Screen button and change the screen to a smaller button count, for instance “Screen 36”.
3. Use the Previous and Next buttons to navigate across multiple pages of buttons. Look for any button that looks awkward. The text and graphics on problematic buttons will appear truncated or strangely formatted.
4. Fix the buttons by disabling the appropriate expanded options.
5. Revert the screen to its original size. Click the Close button to save changes.
***
### Screen Layouts
The same issue can occur on Screen Layouts. However, there are no fancy tricks to detect out-of-bounds buttons.
1. Logon to the Maitre’D Back-Office with appropriate credentials. (Distributor or System Owner)

2. Start the Point of Sale Control module.

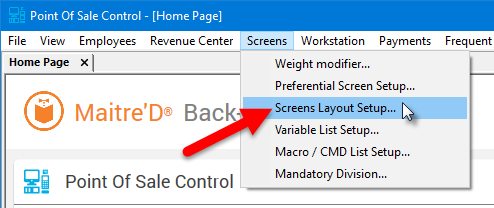
3. Click on the Screens menu and select Screens layout setup...
4. The list of available screen layouts is displayed.
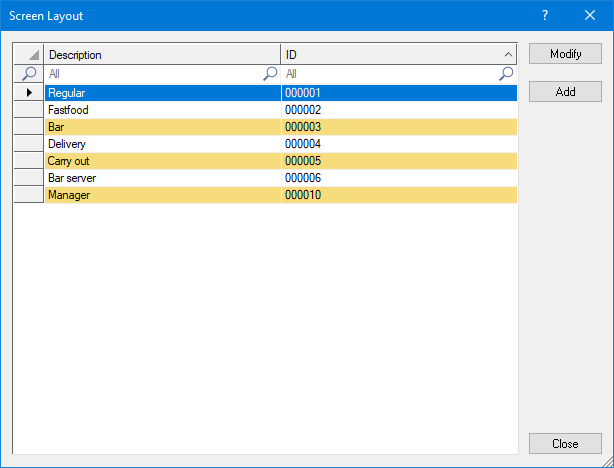

Select an existing screen layout and click the Modify button to edit its properties.
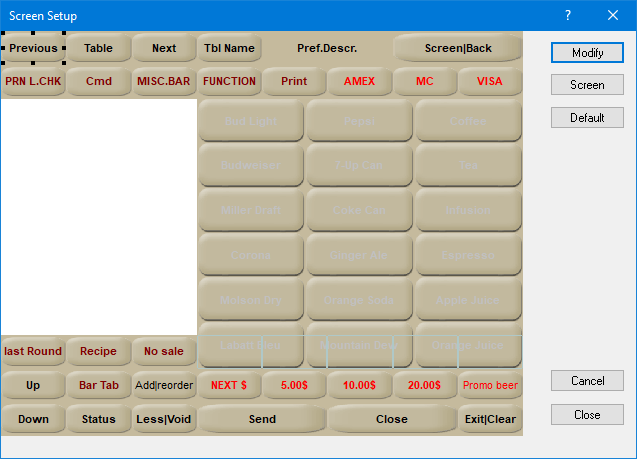
5. The Screen Layout Editor screen will appear.
***
### Locate problematic buttons
Unfortunately, there are no fancy tricks to detect problematic buttons on Screen Layouts. You need to double-click on each button that is located near an edge and look for grayed-out expand options:
Next, you will need to move the button (drag & drop) to an empty space that will allow it to expand properly. Then, you will be able to disable the Expand options and move the button back to where it was.
---
# Agent Instructions
This documentation is published with GitBook. GitBook is the documentation platform designed so that both humans and AI agents can read, navigate, and reason over technical content effectively. Learn more at gitbook.com.
## Querying This Documentation
If you need additional information that is not directly available in this page, you can query the documentation dynamically by asking a question.
Perform an HTTP GET request on the current page URL with the `ask` query parameter, and the optional `goal` query parameter:
```
GET https://docs.maitredpos.com/maitred/maitred-advanced-pos-user-interface-html-pos/troubleshooting/locate-and-repair-expanded-buttons.md?ask=&goal=
```
`ask` is the immediate question: it should be specific, self-contained, and written in natural language.
`goal` is optional and describes the broader end goal you are ultimately trying to accomplish on behalf of the user. GitBook uses it to tailor the answer towards what is most useful for that goal.
The response will contain a direct answer to the question and relevant excerpts and sources from the documentation.
Use this mechanism when the answer is not explicitly present in the current page, you need clarification or additional context, or you want to retrieve related documentation sections.