> For the complete documentation index, see [llms.txt](https://docs.maitredpos.com/llms.txt). Markdown versions of documentation pages are available by appending `.md` to page URLs; this page is available as [Markdown](https://docs.maitredpos.com/maitred/maitred-complete-online-documentation/chap-9-report-center/filters.md).
# Filters
### Activity Range
#### Select the invoice date range
**Invoice date**
**From**
Enable the date you wish the report to start.
**To**
Enable the date you wish the report to end.
NOTE: Enabling the All Values option in the Order Count filter disables the Activity Range filter
***
### Amount
The amount filter is used mainly with invoice reports and allows filtering on various amounts that can be found on invoices, such as Total, Sus-total, Total Tip, Promotion amount, Item Price, Media or Service Charge.
**OR / AND**
The OR / AND operators allows you to combine multiple search expressions.
**Field**
Select: sub-total, total, total; tip, promotion, item price, media, service charge.
**Operator**
Select: equal, not equal, less than, greater than, less or equal, greater or equal.
**Value**
Enter the price value, desired to begin your report.
***
### Categories
**Select Category/Categories desired for Report**

Enable this to check all Categories.

Enable this to uncheck all selected Categories.
***
### Comparison
The Comparison filter is used in various comparison reports, available in the Analysis section, such as:
* Division Comparison by modes
* Division Comparison by Revenue Center
* Division comparison Consolidated
* etc...
Choose from the drop-down menu the sales you wish to compare.
* Daily summary files
* Weekly Summary files
* Monthly summary files
* Period summary files
* Annual Summary files
* Custom Date
NOTE: The dates available for comparison will be determined by the dates selected as the Fiscal Date. If selecting a Weekly Summary file, under the Fiscal Date branch, then you can select a Weekly summary file under the Comparison branch.
***
### Customers
 Selects all customers
 Removes all customers
***
### Date Range
**Select the range of dates for which the report will be generated**
**NOTE: The range is limited to the past 366 days and to the number of days to keep Transaction history set in the Account Receivable setup screen.**
**From:**
Enter or select the first date to include in the report.
**To:**
Enter or select the last date to include in the report.
***
### Day
\>Select the day for which the report will be generated
**Today**
Enable this to generate the report for the current day.
**Previous day**
Enable from the drop down menu one of the last 7 days on for which you want to generate the report
***
### Delay
\>Delay
**Longer than**
Enter the time of delay you wish your report to generate.
\>Dates
**From**
Enter the date you wish your report to start generating.
**To**
Enter the date you wish your report to stop generating.
***
### Department
Removes all customers
***
### Date Range
**Select the range of dates for which the report will be generated**
**NOTE: The range is limited to the past 366 days and to the number of days to keep Transaction history set in the Account Receivable setup screen.**
**From:**
Enter or select the first date to include in the report.
**To:**
Enter or select the last date to include in the report.
***
### Day
\>Select the day for which the report will be generated
**Today**
Enable this to generate the report for the current day.
**Previous day**
Enable from the drop down menu one of the last 7 days on for which you want to generate the report
***
### Delay
\>Delay
**Longer than**
Enter the time of delay you wish your report to generate.
\>Dates
**From**
Enter the date you wish your report to start generating.
**To**
Enter the date you wish your report to stop generating.
***
### Department
 Enable this option to add all modes for the report to be generated.
 Enable this option to remove all of the selected modes.
***
### Divisions
**Select desired Division/Divisions for the report**
Enable this option to remove all of the selected modes.
***
### Divisions
**Select desired Division/Divisions for the report**
 Enable this to check all Divisions.
 Enable this to uncheck all selected Divisions.
***
### Drawer
**Select desired drawers for report**
Enable this to uncheck all selected Divisions.
***
### Drawer
**Select desired drawers for report**
 Enable this to check all Drawers.
 Enable this to uncheck all selected Drawers
***
### Drawer
**Select desired drawers for report**
Enable this to check all Drawers.
Enable this to uncheck all selected Drawers
***
### Fiscal Date
#### Choose From the Drop-down menus the sales you would like to analyze
Daily summary files
Weekly Summary files
Monthly summary files
Period summary files
Annual Summary Files
Custom Date \*
\*Custom Date allows to select the beginning and ending dates of the sales data being analyzed
Once selecting the dates for the report, you can select workstations, modes, Revenue Centers etc. to be included or excluded. Select the filter branches to customize the report. Take note that some filter branches will have selections with a number in brackets. The number in brackets corresponds to the primary key # in the BDF file generated by the report.
***
### Forecast
\>Parameters
**Number of days:**
Enter the number of previous days to be considered in the forecast.
**Variance %:**
Enter the variance of the true calculations you wish to see.
\>Exclusion
**Remove Minimum/Maximum:**
Enable these options to exclude the lowest or highest single day / week / month's totals into the equation.
***
### Formula
**Display Formula of Applied Filters**
This branch shows the filter applied on this report. This display will be empty if you do not apply any filters.
***
### Hourly Report Filter
#### Select the Hourly Report(s)
**Average Sales per Transactions by Server**
This filter shows the average price per transaction according to the Time Table.
NOTE: Transaction is a kitchen/bar order.
**Meter**
This filter shows the Meters that were affected according to the Time Table.
**Number of Invoices by Server**
This filter shows the number of checks for each employee according to the Time Table.
**Number of Items by Server**
This filter shows the number of items for each employee according to the Time Table.
**Number of Meals by Server**
This filter shows the number of meals each employee sold according to the Time Table.
**Sales by Division**
This filter show the sales amount per division according to the Time Table.
**Sales by Server**
This filter shows the total amount of sales for each employee according to the Time Table.
**Sales by Workstation**
This filter shows the hourly sales per workstation according to the Time Table
***
### Invoices
Invoices
\>Select the range for which the report will be generated
**From**
Enable the invoice number you wish the report starts generate
**To**
Enable the invoice number you wish the report stops generate
**Include normal invoices**
Enable this option to use invoices generated at the workstations.
**Include import sale invoices**
Enable this option to use invoices generated by an external web application.
***
### Items
Enable this to uncheck all selected Drawers
***
### Drawer
**Select desired drawers for report**
Enable this to check all Drawers.
Enable this to uncheck all selected Drawers
***
### Fiscal Date
#### Choose From the Drop-down menus the sales you would like to analyze
Daily summary files
Weekly Summary files
Monthly summary files
Period summary files
Annual Summary Files
Custom Date \*
\*Custom Date allows to select the beginning and ending dates of the sales data being analyzed
Once selecting the dates for the report, you can select workstations, modes, Revenue Centers etc. to be included or excluded. Select the filter branches to customize the report. Take note that some filter branches will have selections with a number in brackets. The number in brackets corresponds to the primary key # in the BDF file generated by the report.
***
### Forecast
\>Parameters
**Number of days:**
Enter the number of previous days to be considered in the forecast.
**Variance %:**
Enter the variance of the true calculations you wish to see.
\>Exclusion
**Remove Minimum/Maximum:**
Enable these options to exclude the lowest or highest single day / week / month's totals into the equation.
***
### Formula
**Display Formula of Applied Filters**
This branch shows the filter applied on this report. This display will be empty if you do not apply any filters.
***
### Hourly Report Filter
#### Select the Hourly Report(s)
**Average Sales per Transactions by Server**
This filter shows the average price per transaction according to the Time Table.
NOTE: Transaction is a kitchen/bar order.
**Meter**
This filter shows the Meters that were affected according to the Time Table.
**Number of Invoices by Server**
This filter shows the number of checks for each employee according to the Time Table.
**Number of Items by Server**
This filter shows the number of items for each employee according to the Time Table.
**Number of Meals by Server**
This filter shows the number of meals each employee sold according to the Time Table.
**Sales by Division**
This filter show the sales amount per division according to the Time Table.
**Sales by Server**
This filter shows the total amount of sales for each employee according to the Time Table.
**Sales by Workstation**
This filter shows the hourly sales per workstation according to the Time Table
***
### Invoices
Invoices
\>Select the range for which the report will be generated
**From**
Enable the invoice number you wish the report starts generate
**To**
Enable the invoice number you wish the report stops generate
**Include normal invoices**
Enable this option to use invoices generated at the workstations.
**Include import sale invoices**
Enable this option to use invoices generated by an external web application.
***
### Items
 Select this option to add all the items from the scroll down list in the report.
 Enable this option to remove all the options from the scroll down list.
***
### Item Classes
Enable this option to remove all the options from the scroll down list.
***
### Item Classes
 Enable this option to add all item classes for the report to be generated.
 Enable this option to remove all of the selected item classes.
***
### Medias
#### Select desired options
Enable this option to remove all of the selected item classes.
***
### Medias
#### Select desired options
 Enable this to selected all options
 Enable this to uncheck all selected options
***
### Modes
Enable this option to add all modes for the report to be generated.
Enable this option to remove all of the selected modes.
***
### Order Count
\>Select the range for which the report will be generated
**Order Count**
**From**
Enable the minimum number of orders to include.
**To**
Enable the maximum number of orders to include.
**All Values:**
Enable this option to include any customer who ordered at least once.
NOTE: Enabling this option disables the Activity Range filter.
***
### Order Date Range
\>Select the invoice date range
**Current day**
Enable this option for the current day.
**Invoice date**
**From**
Enable the date you wish the report to start.
**To**
Enable the date you wish the report to end.
\>Select the order time range
**Order time**
**From**
Enable the time you wish the report to start.
**To**
Enable the time you wish the report to end.
***
#### Pre-Order Date Range
**Select the range of dates or hours for which the pre-order report will be generated**
**NOTE: Pre-Orders are only taken for the next 366 days.**
**Range:**
* **Custom Date: Allows to enter or select a beginning and ending date in the two filters below.**
* **Now: Allows to enter the number of hours or days from the moment the report is printed in the filters at the bottom.**
**From:**
Enter or select the first date to include in the report.
**To:**
Enter or select the last date to include in the report.
**Plus:**
Enter the number of hours or days from the present to include in the report.
**Unit:**
Select Hours or Days
***
### Preferential Screens
**Select desired Preferential Screens**
Enable this to uncheck all selected options
***
### Modes
Enable this option to add all modes for the report to be generated.
Enable this option to remove all of the selected modes.
***
### Order Count
\>Select the range for which the report will be generated
**Order Count**
**From**
Enable the minimum number of orders to include.
**To**
Enable the maximum number of orders to include.
**All Values:**
Enable this option to include any customer who ordered at least once.
NOTE: Enabling this option disables the Activity Range filter.
***
### Order Date Range
\>Select the invoice date range
**Current day**
Enable this option for the current day.
**Invoice date**
**From**
Enable the date you wish the report to start.
**To**
Enable the date you wish the report to end.
\>Select the order time range
**Order time**
**From**
Enable the time you wish the report to start.
**To**
Enable the time you wish the report to end.
***
#### Pre-Order Date Range
**Select the range of dates or hours for which the pre-order report will be generated**
**NOTE: Pre-Orders are only taken for the next 366 days.**
**Range:**
* **Custom Date: Allows to enter or select a beginning and ending date in the two filters below.**
* **Now: Allows to enter the number of hours or days from the moment the report is printed in the filters at the bottom.**
**From:**
Enter or select the first date to include in the report.
**To:**
Enter or select the last date to include in the report.
**Plus:**
Enter the number of hours or days from the present to include in the report.
**Unit:**
Select Hours or Days
***
### Preferential Screens
**Select desired Preferential Screens**
 Enable this to check all Preferential Screens.
 Enable this to uncheck all selected Preferential Screens.
***
### Promotion
**Select the type of discount you wish to promote.**
Enable this to uncheck all selected Preferential Screens.
***
### Promotion
**Select the type of discount you wish to promote.**
 Enable this option, if wish to have all promotions in the report.
 Enable this option, to remove all selected promotions
***
### Revenue Centers
**Select desired Revenue Center(s)**
Enable this option, to remove all selected promotions
***
### Revenue Centers
**Select desired Revenue Center(s)**
 Enable this to check all Revenue Centers.
 Enable this to uncheck all selected Revenue Centers.
***
### Screen Layout
**Select desired Screen Layout**
Enable this to uncheck all selected Revenue Centers.
***
### Screen Layout
**Select desired Screen Layout**
 Enable this to check all Screen Layouts.
 Enable this to uncheck all selected Screen Layouts.
***
### Shift
#### Select Desired Shifts
Enable this to uncheck all selected Screen Layouts.
***
### Shift
#### Select Desired Shifts
 Enable this to check all Shifts.
 Enable this to uncheck all selected Shifts.
***
### Table.
Enable this to uncheck all selected Shifts.
***
### Table.
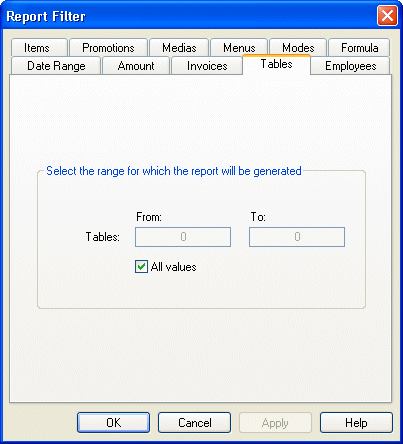 #### Select the range for which the report will be generated
#### Tables
**From**
Enter here the number of the table you wish the report start generating.
**To**
Enter here the number of the table you wish the report stops generating.
**All values**
Enable this option to generate the report on all tables.
***
### Task
#### Select the range for which the report will be generated
#### Tables
**From**
Enter here the number of the table you wish the report start generating.
**To**
Enter here the number of the table you wish the report stops generating.
**All values**
Enable this option to generate the report on all tables.
***
### Task
 Enable this option to add all Tasks for the report to be generated.
 Enable this option to remove all of the selected Tasks.
***
### Time
\>Select the range of time for which the report will be generated.
**From**
Specify the starting time of the report.
**To**
Specify the ending time of the report.
**Time slice**
Specify what is the time slice you want for this report.
***
### Time Table Filter
#### Select the Time Frame(s)
NOTE: Time Tables are created in Report Center / File / Time Table
***
### Training
**Normal Sales:**
**Enable this option to only print real sales.**
**Training Sales:**
**Enable this option to only print practice sales.**
***
### Transactions
\>Parameters
**Included inactive accounts**
Enable this option to include all inactive accounts in the report. An inactive account is an account that has no transactions
***
### Until Date
**Date:**
Enable the date for which you wish the report to generate.
***
### Week
**Current Week, Next Week:**
Enable the Current or Previous Week you wish the report to generate
**From**
The date you wish the report to start of the above-mentioned week.
**To**
The date you wish to end of the above-mentioned week.
***
### Workstation
#### Select Desired Workstation/Workstations
Enable this option to remove all of the selected Tasks.
***
### Time
\>Select the range of time for which the report will be generated.
**From**
Specify the starting time of the report.
**To**
Specify the ending time of the report.
**Time slice**
Specify what is the time slice you want for this report.
***
### Time Table Filter
#### Select the Time Frame(s)
NOTE: Time Tables are created in Report Center / File / Time Table
***
### Training
**Normal Sales:**
**Enable this option to only print real sales.**
**Training Sales:**
**Enable this option to only print practice sales.**
***
### Transactions
\>Parameters
**Included inactive accounts**
Enable this option to include all inactive accounts in the report. An inactive account is an account that has no transactions
***
### Until Date
**Date:**
Enable the date for which you wish the report to generate.
***
### Week
**Current Week, Next Week:**
Enable the Current or Previous Week you wish the report to generate
**From**
The date you wish the report to start of the above-mentioned week.
**To**
The date you wish to end of the above-mentioned week.
***
### Workstation
#### Select Desired Workstation/Workstations
 Enable this to check all Workstations.
 Enable this to uncheck all selected Workstations.
***
### ZIP code
**Add All**
Enable this option to add all zip codes for the report to be generated.
**Remove All**
Enable this option to remove all of the selected zip codes.
---
# Agent Instructions
This documentation is published with GitBook. GitBook is the documentation platform designed so that both humans and AI agents can read, navigate, and reason over technical content effectively. Learn more at gitbook.com.
## Querying This Documentation
If you need additional information that is not directly available in this page, you can query the documentation dynamically by asking a question.
Perform an HTTP GET request on the current page URL with the `ask` query parameter, and the optional `goal` query parameter:
```
GET https://docs.maitredpos.com/maitred/maitred-complete-online-documentation/chap-9-report-center/filters.md?ask=&goal=
```
`ask` is the immediate question: it should be specific, self-contained, and written in natural language.
`goal` is optional and describes the broader end goal you are ultimately trying to accomplish on behalf of the user. GitBook uses it to tailor the answer towards what is most useful for that goal.
The response will contain a direct answer to the question and relevant excerpts and sources from the documentation.
Use this mechanism when the answer is not explicitly present in the current page, you need clarification or additional context, or you want to retrieve related documentation sections.
Enable this to uncheck all selected Workstations.
***
### ZIP code
**Add All**
Enable this option to add all zip codes for the report to be generated.
**Remove All**
Enable this option to remove all of the selected zip codes.
---
# Agent Instructions
This documentation is published with GitBook. GitBook is the documentation platform designed so that both humans and AI agents can read, navigate, and reason over technical content effectively. Learn more at gitbook.com.
## Querying This Documentation
If you need additional information that is not directly available in this page, you can query the documentation dynamically by asking a question.
Perform an HTTP GET request on the current page URL with the `ask` query parameter, and the optional `goal` query parameter:
```
GET https://docs.maitredpos.com/maitred/maitred-complete-online-documentation/chap-9-report-center/filters.md?ask=&goal=
```
`ask` is the immediate question: it should be specific, self-contained, and written in natural language.
`goal` is optional and describes the broader end goal you are ultimately trying to accomplish on behalf of the user. GitBook uses it to tailor the answer towards what is most useful for that goal.
The response will contain a direct answer to the question and relevant excerpts and sources from the documentation.
Use this mechanism when the answer is not explicitly present in the current page, you need clarification or additional context, or you want to retrieve related documentation sections.